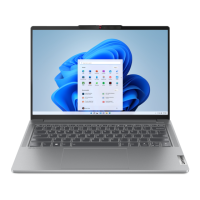
Do you have a question about the Lenovo IdeaPad Pro 5 and is the answer not in the manual?
Follow rules to ensure general safety, including safe lifting and avoiding hazardous actions.
Observe rules when working on electrical equipment, use approved tools, and disconnect power.
Guide to identify potentially unsafe conditions and assess hazards before servicing.
Protecting components from ESD damage by equalizing charge and using grounding systems.
Ensuring proper electrical grounding of the computer for safety and system function.
Provides safety notices in multiple languages for user awareness.
Information to include in the parts exchange or return form when returning an FRU.
Exploded illustrations help technicians identify FRUs or CRUs for replacement.
Lists tools required for servicing Lenovo computers, indicating applicability for product models.
Guidelines for safe and correct FRU removal/replacement, emphasizing training and procedure adherence.
Step-by-step instructions for removing the lower case of the computer.
Procedure for disconnecting and removing the battery pack.
Steps to disconnect and remove the SSD module, including bracket and mylar.
Procedure for disconnecting and removing the Wi-Fi card.
Steps to disconnect and remove the speaker assembly.
Procedure for disconnecting and removing the I/O board cable.
Steps to peel back keyboard FPC and remove touchpad board cable.
Procedure for disconnecting battery, peeling mylar, and removing the heat sink.
Steps to detach fan cables and remove the fan assembly.
Procedure to remove two screws and then open the hinge to access I/O board.
Steps to open hinge, disconnect cables, and remove the system board and I/O board FPC.
Using a Golden Key U1 tool to flash-write SN, MT, PN, and UUID to the new system board.
Procedure to detach antenna cables and EDP cable from the system board.
Lists all FRUs/CRUs to be removed before removing the upper case.
Explanation that the LCD module contains FRUs and requires detachment from the upper case.
Step to remove the hinge cover after detaching the LCD module.
Steps to remove the LCD bezel after removing the LCD module and hinge cover.
Procedure to remove six screws and then remove the hinges.
Steps to remove tape and then remove the LCD panel.
Procedure to peel off tape and remove the EDP cable from the LCD panel.
Steps to remove the main and auxiliary antenna.
Procedure to remove the microphone rubber.
Procedure to remove the ToF rubber.
Steps to remove the camera cable from the camera board and sensor board.
Procedure to remove the sensor board cable from the sensor board.
Steps to disconnect cables and remove the sensor board.
Procedure to disconnect the camera cable and remove the camera board.
Lists all FRUs/CRUs to be removed before removing the LCD cover.
Describes country/region specific labels attached to the base cover for replacement.
| RAM | Up to 32GB LPDDR5 |
|---|---|
| Display Size | 14 inches, 16 inches |
| Processor | AMD Ryzen 7 7735HS, Intel Core i7 |
| Graphics | Intel Iris Xe Graphics |
| Storage | Up to 1TB PCIe SSD |
| Operating System | Windows 11 Home |
| Weight | 1.46 kg (14 inches), 1.9 kg (16 inches) |
| Ports | HDMI, Headphone/mic combo |
| Display Refresh Rate | 120Hz |
| Battery | 75Wh (16 inches) |