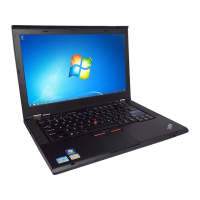
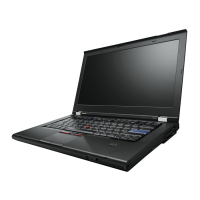
Do you have a question about the Lenovo T420 and is the answer not in the manual?
Essential guidelines for safe handling and maintenance procedures.
Rules and precautions for working with electrical components.
Checklist for identifying and mitigating potential safety hazards.
Procedures for protecting sensitive electronic components from static discharge.
Guidelines for proper electrical grounding for safety and system function.
Important safety warnings and precautions in multiple languages.
Information and warnings regarding laser safety compliance.
Guidelines for effective and economical replacement of Field Replaceable Units (FRUs).
Procedures and considerations for replacing the HDD or SSD.
Important precautions and handling guidelines for system board replacement.
How to interpret and use error codes for troubleshooting.
Methods for identifying FRUs for custom and standard product configurations.
Steps to take before performing detailed diagnostics or checks.
A systematic approach to identifying and correcting ThinkPad issues.
How to use the PC-Doctor diagnostic tool for system testing.
Utilizing ThinkVantage Toolbox for system diagnostics and problem resolution.
Specific diagnostic tests for individual Field Replaceable Units (FRUs).
Procedures for diagnosing and verifying power supply issues.
Steps for restoring the computer to its original factory configuration using recovery discs.
Information on Power-on, Hard-disk, and Supervisor passwords.
Explanation of screen blank, sleep, and hibernation power saving modes.
A guide linking symptoms and errors to specific FRUs for troubleshooting.
Status of speaker and microphone mute functions.
Indicates the status of wireless LAN, WAN, and Bluetooth features.
Shows activity on storage devices and system power status.
Status of the Serial Ultrabay device and Caps Lock key.
Displays battery charge level, charging status, and errors.
Indicates when the computer is in sleep or standby mode.
Fn key combinations for locking the system and managing power plans.
Fn key combinations for sleep, hibernation, and wireless feature control.
Fn keys for camera settings, display output, and UltraNav device.
Fn key combinations for media playback and other system functions.
Guidelines for correctly tightening screws during FRU replacement.
Procedures for restoring system unit serial numbers after board replacement.
How to read and write Engineering Change Announcement (ECA) information.
Key rules to follow before, during, and after FRU replacement.
Steps to remove the SIM card before servicing the computer.
Detailed instructions for removing and installing the battery pack.
Procedure for removing and installing the ExpressCard blank bezel.
Steps to remove and replace the Serial Ultrabay Enhanced device or travel bezel.
Instructions for removing and installing the hard disk or solid state drive.
Procedure for removing the DIMM slot cover.
Steps for removing and installing DIMM modules from the underside.
Instructions for replacing the PCI Express Mini Card for wireless WAN.
Detailed steps for removing and installing the keyboard.
Steps for removing and installing DIMM modules from under the keyboard.
Procedure for removing and installing the backup battery.
Instructions for replacing the PCI Express Mini Card for wireless LAN.
Steps to replace the keyboard bezel, FPC cable, and Bluetooth daughter card.
Procedure for removing and installing SmartCard readers.
Instructions for replacing the Modem daughter card.
Steps to remove and install the speaker assembly.
Detailed procedure for removing and replacing the LCD unit.
Instructions for removing and installing the CPU fan assembly.
Critical steps for handling and replacing the CPU.
Procedure for removing and replacing the base cover and DC-in cable.
Steps for removing and replacing the internal magnesium structure frame.
Critical procedures and precautions for system board replacement.
Instructions for removing and installing the LCD bezel assembly.
Procedure for removing and installing the LED board.
Steps for removing and installing the integrated camera module.
Detailed instructions for replacing the LCD panel and its cable.
Procedure for removing and installing the camera cable.
Steps for removing and installing wireless LAN/WAN antenna assemblies.
Procedure for removing and replacing hinges and the LCD rear cover.
Shows the location of ports and connectors on the rear of the ThinkPad.
Identifies hardware components on the bottom of the ThinkPad.
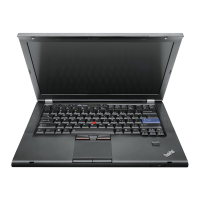
Identifies hardware components visible on the front of the ThinkPad.
Comprehensive listing of all FRUs with part numbers and CRU IDs.
Specific part numbers for different LCD panel types.
List of available keyboard FRUs by language layout.
Includes screws, seals, and other small components.
Details on compatible AC power adapters.
Lists power cords available for different countries and regions.
Details on operating system and driver recovery DVDs.
List of tools required for servicing the ThinkPad.
| Processor | Intel Core i5 or i7 (2nd Gen) |
|---|---|
| RAM | Up to 16GB DDR3 |
| Graphics | Intel HD Graphics 3000 or NVIDIA NVS 4200M |
| Display | 14-inch, 1366x768 or 1600x900 |
| Operating System | Windows 7 Professional |
| Battery Life | Up to 9 hours |
| Battery | 6-cell Li-ion |
| Ports | USB 2.0, USB 3.0, VGA, DisplayPort, Ethernet |
| Wireless | Wi-Fi 802.11 a/b/g/n |
| Storage | HDD or SSD |
| Weight | 2.2 kg (4.85 lbs) |


