Do you have a question about the Leviton 9866-B0W and is the answer not in the manual?
Rotate the mounting bracket counter-clockwise before proceeding with installation.
Remove the surface cover from the light fixture prior to wiring.
Connect the device wiring according to the diagram provided in the instructions.
Secure the bracket flush against the ceiling surface, avoiding overtightening.
Align and push the light body upwards to engage with the mounting bracket.
Remove the surface cover when installing without a bracket.
Wire the device according to the diagram for flush-mount installation.
Install the light body using two screws for a flush mount.
Install the surface cover to the light body, ensuring lock marks align.
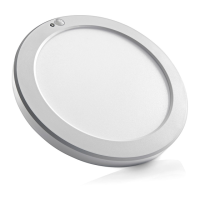
The Leviton 8" LED Downlight with Motion Sensor, Cat. No. 9866-BOW, is a versatile lighting solution designed for indoor applications, offering both illumination and integrated motion sensing capabilities. This device is engineered to provide efficient lighting while enhancing convenience and energy savings through its intelligent features.
At its core, this device serves as an LED downlight, providing illumination for various indoor spaces. The light output is delivered by an integrated LED system, ensuring energy efficiency and a long operational lifespan. A key differentiating feature is the integrated motion sensor, which allows the light to automatically turn on or off based on detected movement and ambient light conditions. This automation contributes to energy conservation by ensuring the light is only active when needed.
The downlight offers color temperature adjustability, allowing users to select between three distinct light appearances: 3000K (Soft white, yellowish), 4000K (Cool white), and 5000K (Daylight, bright white). This CCT (Correlated Color Temperature) changeable feature provides flexibility to match the lighting to the desired ambiance or task requirements of a room.
The Leviton 8" LED Downlight is designed for flush-mount installation, making it suitable for a clean and integrated look on ceilings. The installation process involves securing a mounting bracket to an outlet box, wiring the device, and then attaching the light body to the bracket. It is crucial to ensure the bracket is tightened flush against the ceiling surface without overtightening to prevent bending and facilitate proper lamp installation. The main wire should be run through the middle of the bracket, and the ground wire connected to the green screw on the mounting bracket. Once the light body is in place, it is secured with screws, and the surface cover is installed, ensuring the lock marks are aligned.
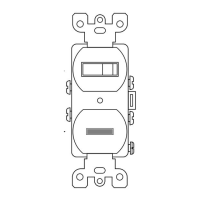
The device incorporates a set of three switches that control its advanced features, allowing for significant customization of its operation:
Switch 1: Auto Time-Off Options This switch allows users to set the duration for which the light remains on after motion is detected and no further motion is sensed. The available options are 30 seconds or 180 seconds (3 minutes). This feature helps in conserving energy by automatically turning off the light after a set period of inactivity.
Switch 2: Sensor Modes This switch enables selection between two distinct sensor operating modes, optimizing the light's behavior based on ambient light conditions:
Switch 3: Sensor ON/OFF This simple yet effective switch allows the user to completely disable the motion sensor functionality. When the sensor is turned off, the lamp can be operated like a standard single-pole switch, providing continuous illumination until manually turned off. This feature is useful in situations where automatic activation is not desired, or for troubleshooting purposes.
The sensor coverage is directly proportional to the installation height. The provided diagrams illustrate the top view and side view of the sensor's detection range, indicating that at a height of 2.4 meters (8 ft), the sensor can detect motion within a radius of approximately 3.9 meters (13 ft) from the center. When installing, it is recommended to align the sensor towards the door or entry point to maximize its effectiveness in detecting occupants entering or exiting the space.
The Leviton 8" LED Downlight is designed for low maintenance, typical of LED lighting solutions. The LED components have a long lifespan, reducing the need for frequent bulb replacements. The surface cover can be removed for access to the internal components if necessary, though this is generally not required for routine operation.
For cleaning, the exterior surface of the downlight can be gently wiped with a soft, dry cloth. Avoid using abrasive cleaners or solvents, as these could damage the finish or electronic components.
In the event of any issues or for technical assistance, Leviton provides customer support. For residents in the U.S., technical assistance can be reached at 1-800-824-3005, and for Canada, at 1-800-405-5320. The product is backed by a limited 5-year warranty, covering defects in materials and workmanship under normal and proper use from the purchase date. This warranty emphasizes the product's reliability and the manufacturer's commitment to quality. However, it's important to note that the warranty is void if the product is installed improperly, misused, opened, abused, or altered, highlighting the importance of following the installation instructions and using the device as intended.
| Voltage | 120 VAC |
|---|---|
| Color | White |
| Termination | Screw Terminals |
| Dimmable | Yes |
| Material | Thermoplastic |
| Type | Incandescent/LED Dimmer |
| Load Type | Incandescent, LED |
| Wattage | 600W Incandescent |
| Bulb Type | Incandescent/LED/CFL |