4.7 V1-6 Above deck fitting
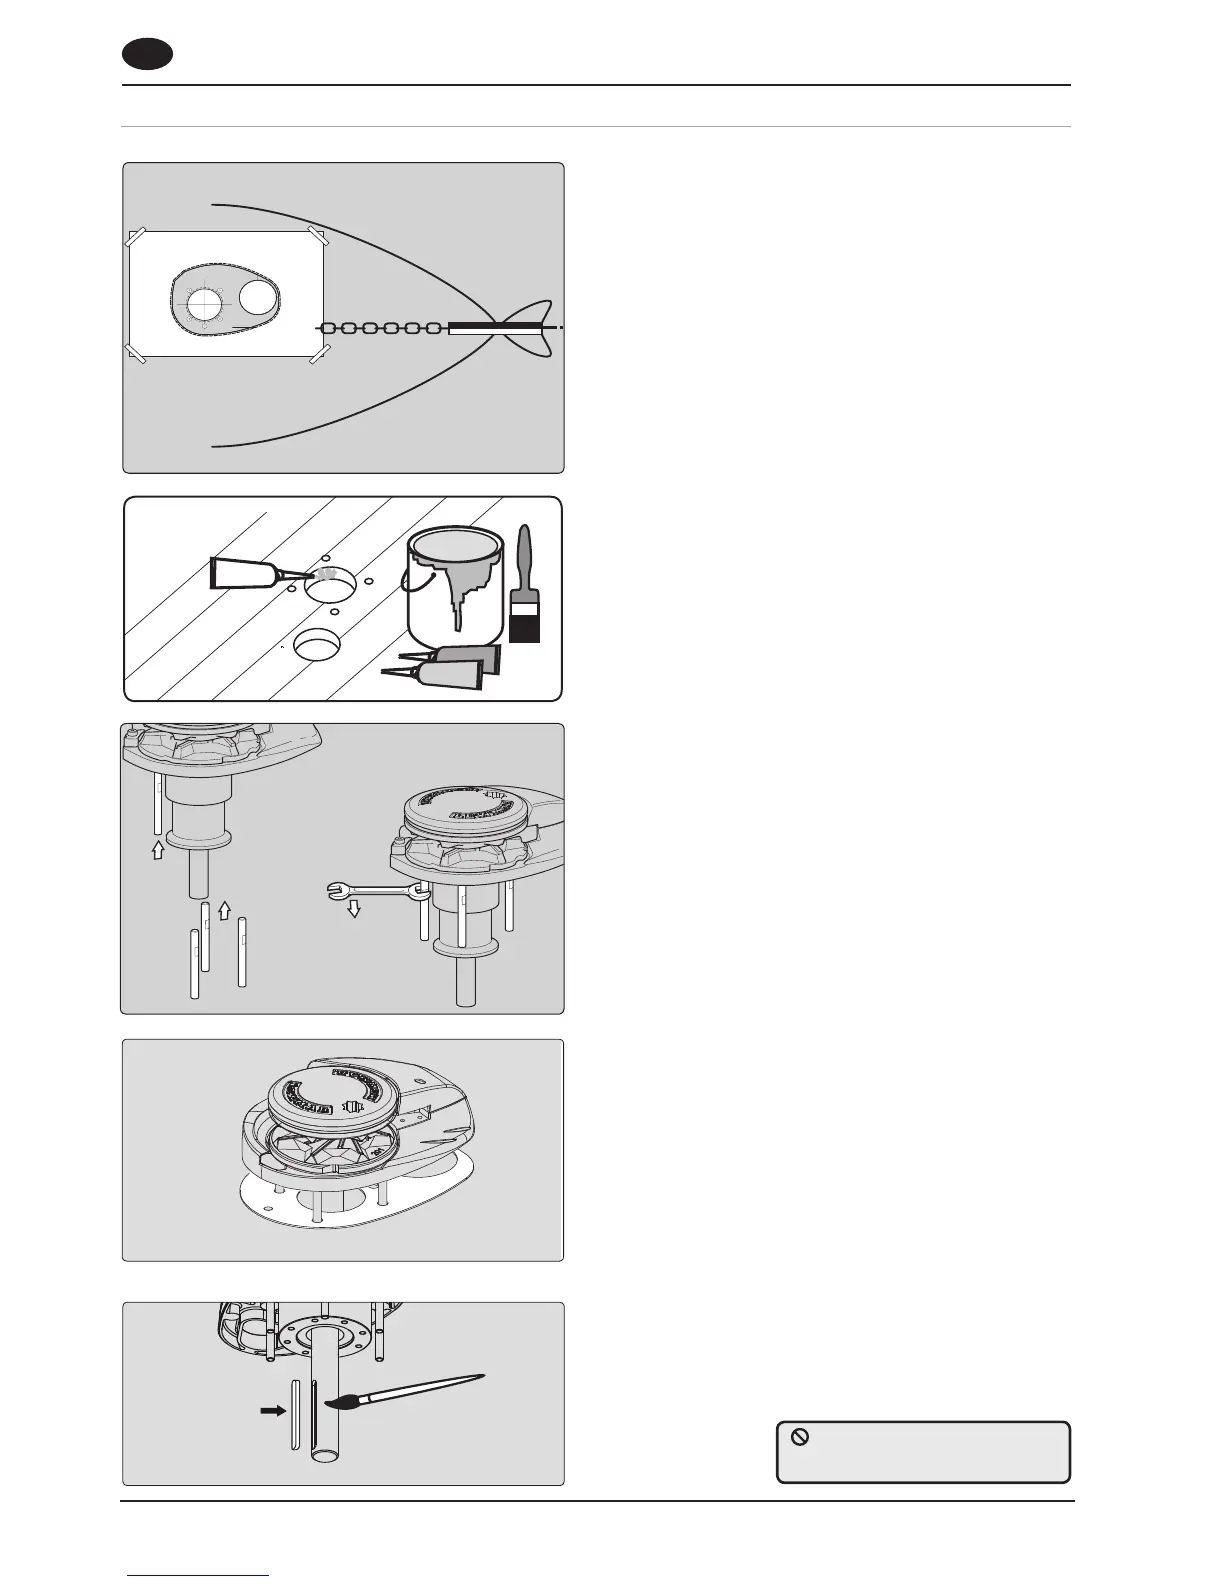
1. Using your template and aer you have checked all
the above and below deck requirements cut the fol-
lowing holes.
Model V1-3
Using a 10 mm (⅜”) diameter drill, make the five
holes for the mounting studs and sensor. With a 75
mm (3”) diameter hole saw, make two holes for the
rode and down tube to pass through.
Models V4-6
Using a 12 mm (7/16”) diameter drill, make the five
holes for the mounting studs and sensor. With a 115
mm (4½”) diameter hole saw, make two holes for the
rode and down tube to pass through.
2. When all the holes have been made, remove the tem-
plate. To help avoid water absorption by the deck,
apply an appropriate marine sealant to the freshly
cut hole edges.
3. Assemble and tighten studs into base until they
bottom out in their holes. Some studs have a flat.
Position the flats of the studs nearest the base of the
windlass.
4. Models V1-5
Place the base mat in position on the deck.
Optionally, apply a suitable sealant to the base of
the windlass, any mounting pad or around the studs.
Model V6
This model is not supplied with a base mat.
Use sealant
NOTE: If using silicone or other rubbery type sealant,
it is advisable to allow curing of the sealant before
final tightening of the mounting nuts.
5. Lightly coat the sha with grease and ensure the
drive key is in place before assembly to motor/
gearbox.
DO NOT use a permanent
adhesive/sealant eg.5200