Lexicon
4-1
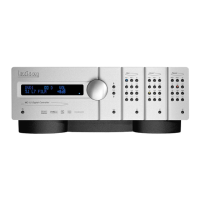
Chapter 4 Performance Verification
This section describes procedures to verify the operation of the MPX 110 and the integrity of its analog and
digital audio signal paths.
Functional Tests
INITIAL INSPECTION
Inspect the unit for any obvious signs of physical damage. Verify that the front panel controls operate
smoothly and correctly. (Refer to the MPX 110 Owner’s Manual for detailed explanations of functionality.)
Verify that all screws and rear panel jacks are secure, and inspect the AC power supply for any signs of
physical damage.
POWER SUPPLY
1. Remove cover as described in disassembly/reassembly section.
2. Plug the adapter into the MPX 110 and apply power.
3. Set the DMM to measure VD and check the regulated voltages for proper levels.
Supplies Location Range
+5 VD Marked test (4.85-5.25)
points to the
Right of C6
+5 VA Marked test (4.75-5.25)
points to the
Left of J6
-5 VA Marked test (-4.75-5.25)
points to the
Left of J6
POWER UP
1. Connect the 9VAC adapter (provided with the MPX 110) between the isolated variable output of the
Variac and the MPX 110 rear panel Power connector.
2. Verify that AC current draw is <0.1 Amps
On normal power up the MPX 110 will run the following Diagnostic Tests. This Diagnostic Test sequence is
displayed on the front panel LEDs for trouble-shooting purposes. If any of the red Clip LEDs remain lit, a
diagnostic failure has occurred and the MPX 110 should be repaired before proceeding.
Test No. Test Edit Bypass Store Tap
1 ROM Checksum l l l O
2 SRAM l l l O l
3 Lexichip 3 WCS l l O O l l
4 Lexichip 3 Interrupt Timer l l O l l
5 Lexichip 3 Audio Data File l l O l l O
8 EEPROM Checksum l O l l l
l =OFF
O =ON
SETUP
1. Connect a 5-pin MIDI cable between the MPX 110 rear panel MIDI IN and OUT/THRU connectors.
2. Connect a dual style 1/4" Footswitch to the MPX 110 rear panel Footswitch jack.
3. Turn the MPX 110 front panel VARIATION knob to 12.
4. Press and hold the MPX 110 front panel Bypass button while powering on the MPX 110.
5. When the green Level LEDs light, release Bypass.
6. Verify that the MPX 110 front panel Edit and Bypass LEDs are lit.

 Loading...