x
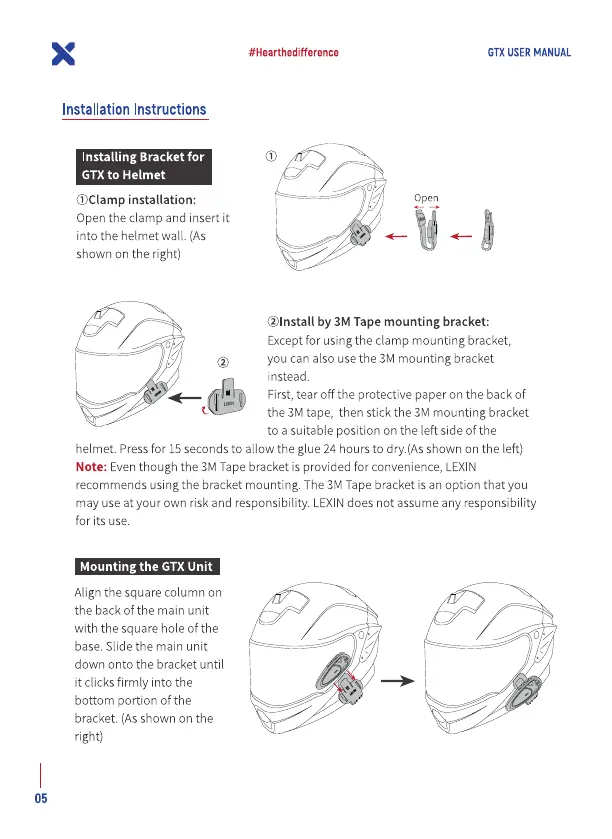
Installation Instructions
Installing Bracket for
GTX to Helmet
installation:
Open the clamp and insert it
into the helmet wall. (As
shown on the right)
#Hearthedifference
GTX USER MANUAL
Open
@lnstall by 3M Tape mounting bracket:
Exceptfor using the clamp mounting bracket,
you can also usethe 3M mounting bracket
instead.
First, tear off the protective paper on the back of
the 3M tape, then stick the 3M mounting bracket
to a suitable position on the left side of the
helmet. Pressfor 15 seconds to allow the glue 24 hours to dry.(Asshown on the left)
Note: Eventhough the 3M Tapebracket is provided for convenience, LEXIN
recommends using the bracket mounting. The3M Tapebracket is an option that you
may use at your own risk and responsibility. LEXINdoes not assume any responsibility
for its use.
Mounting the GTX Unit
Align the square column on
the back of the main unit
with the square hole of the
base. Slide the main unit
down onto the bracket until
it clicks firmly into the
bottom portion of the
bracket. (As shown on the
right)
05
 Loading...