EasyManuals Logo

Lexmark E260dn Series Maintenance Guide

Lexmark E260dn Series
11 pages
To Next Page IconTo Next Page
To Previous Page IconTo Previous Page
Page #7 background imageLoading...
Page #7 background image
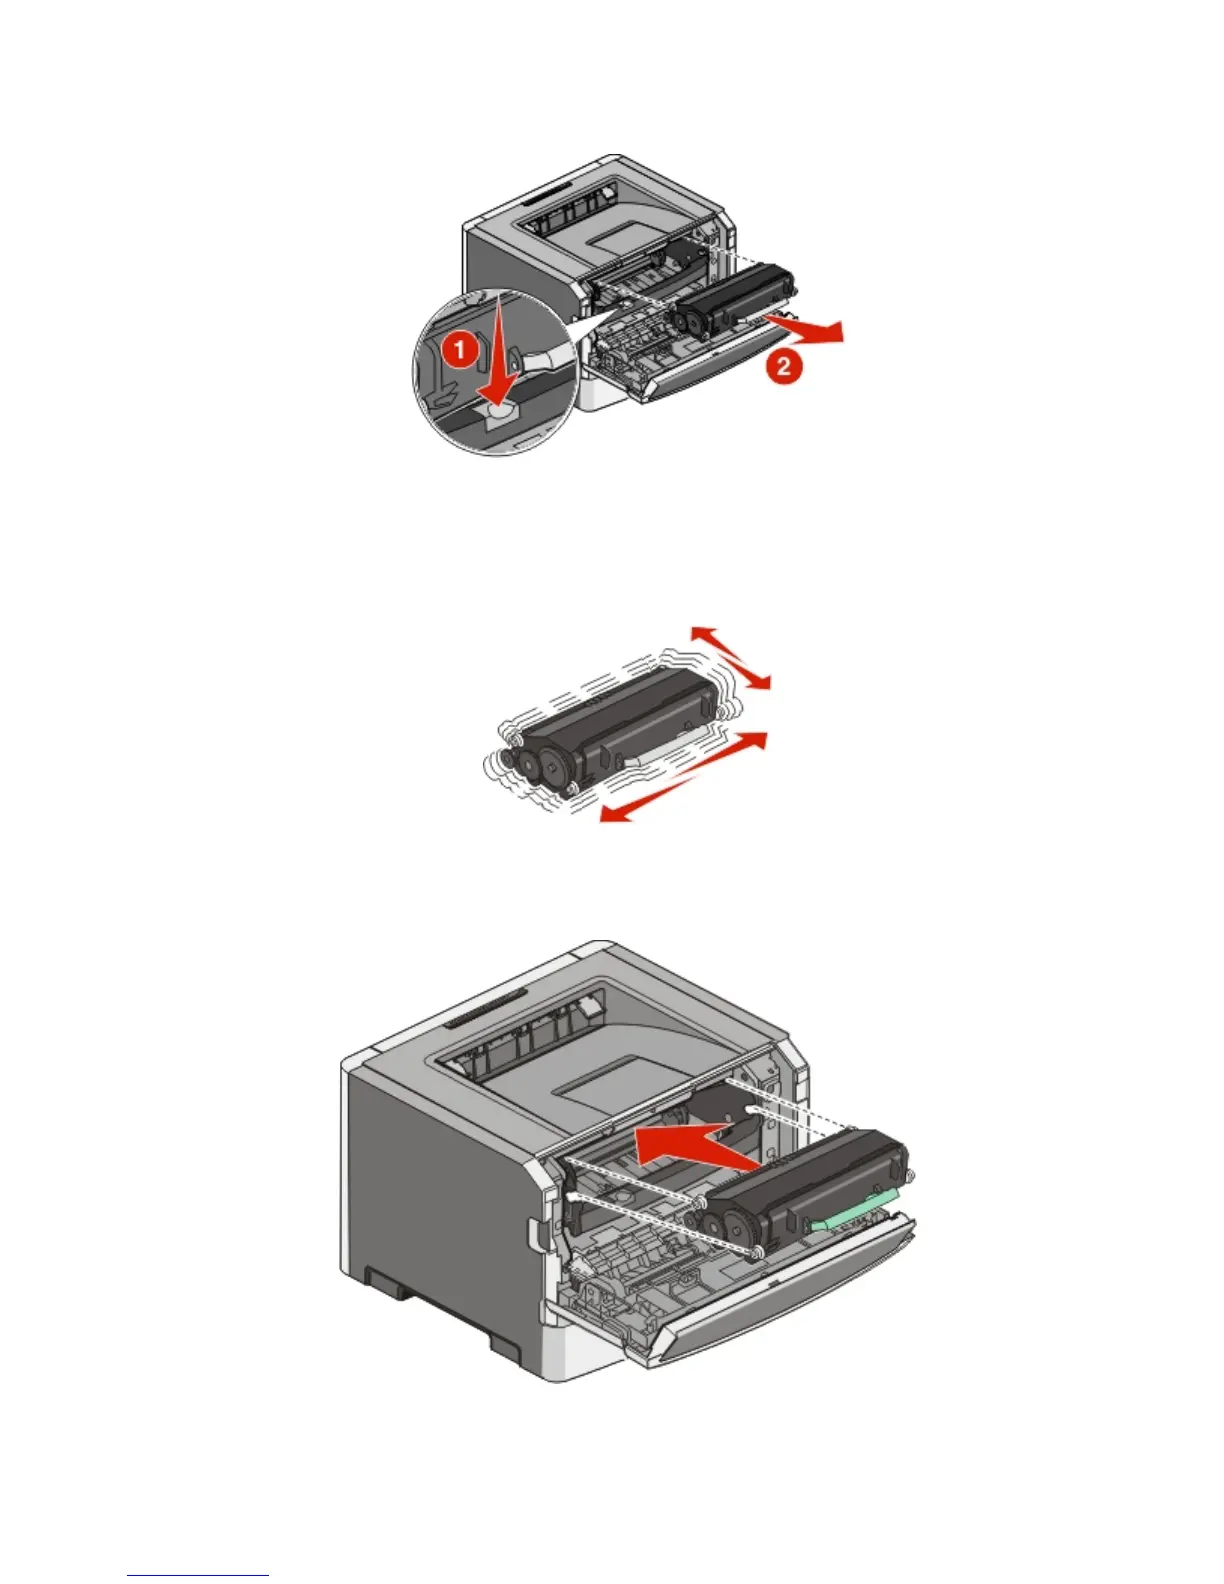
2 Press the button on the base of the photoconductor kit, and then pull the toner cartridge out using the handle.
3 Unpack the new toner cartridge.
Warning—Potential Damage:
When replacing a toner cartridge, do not leave the new cartridge exposed to
direct light for an extended period of time. Extended light exposure can cause print quality problems.
4 Rotate the cartridge in all directions to distribute the toner.
5
Install the new toner cartridge by aligning the rollers on the toner cartridge with the arrows on the tracks of the
photoconductor kit. Push the toner cartridge in as far as it will go. The cartridge clicks into place when correctly
installed.
6 Close the front door.
Maintaining the printer
7

Other manuals for Lexmark E260dn Series

Questions and Answers:

Question and Answer IconNeed help?

Do you have a question about the Lexmark E260dn Series and is the answer not in the manual?

Lexmark E260dn Series Specifications

General IconGeneral
Print TechnologyMonochrome Laser
Duplex PrintingStandard
Paper Input Capacity250 sheets
Paper Output Capacity150 sheets
Resolution1200 x 1200 dpi
Memory32 MB
ConnectivityUSB 2.0, Ethernet
Media Sizes SupportedA4, A5, A6, Executive, Letter, Legal, Statement, Universal
Media Types SupportedPlain Paper, Card Stock, Transparencies, Envelopes, Paper Labels
Operating System CompatibilityMicrosoft Windows, Apple Mac OS, Linux
Dimensions378 x 391 x 259 mm
Weight14.0 kg
Recommended Monthly Page Volume250 - 2, 500 pages

Related product manuals