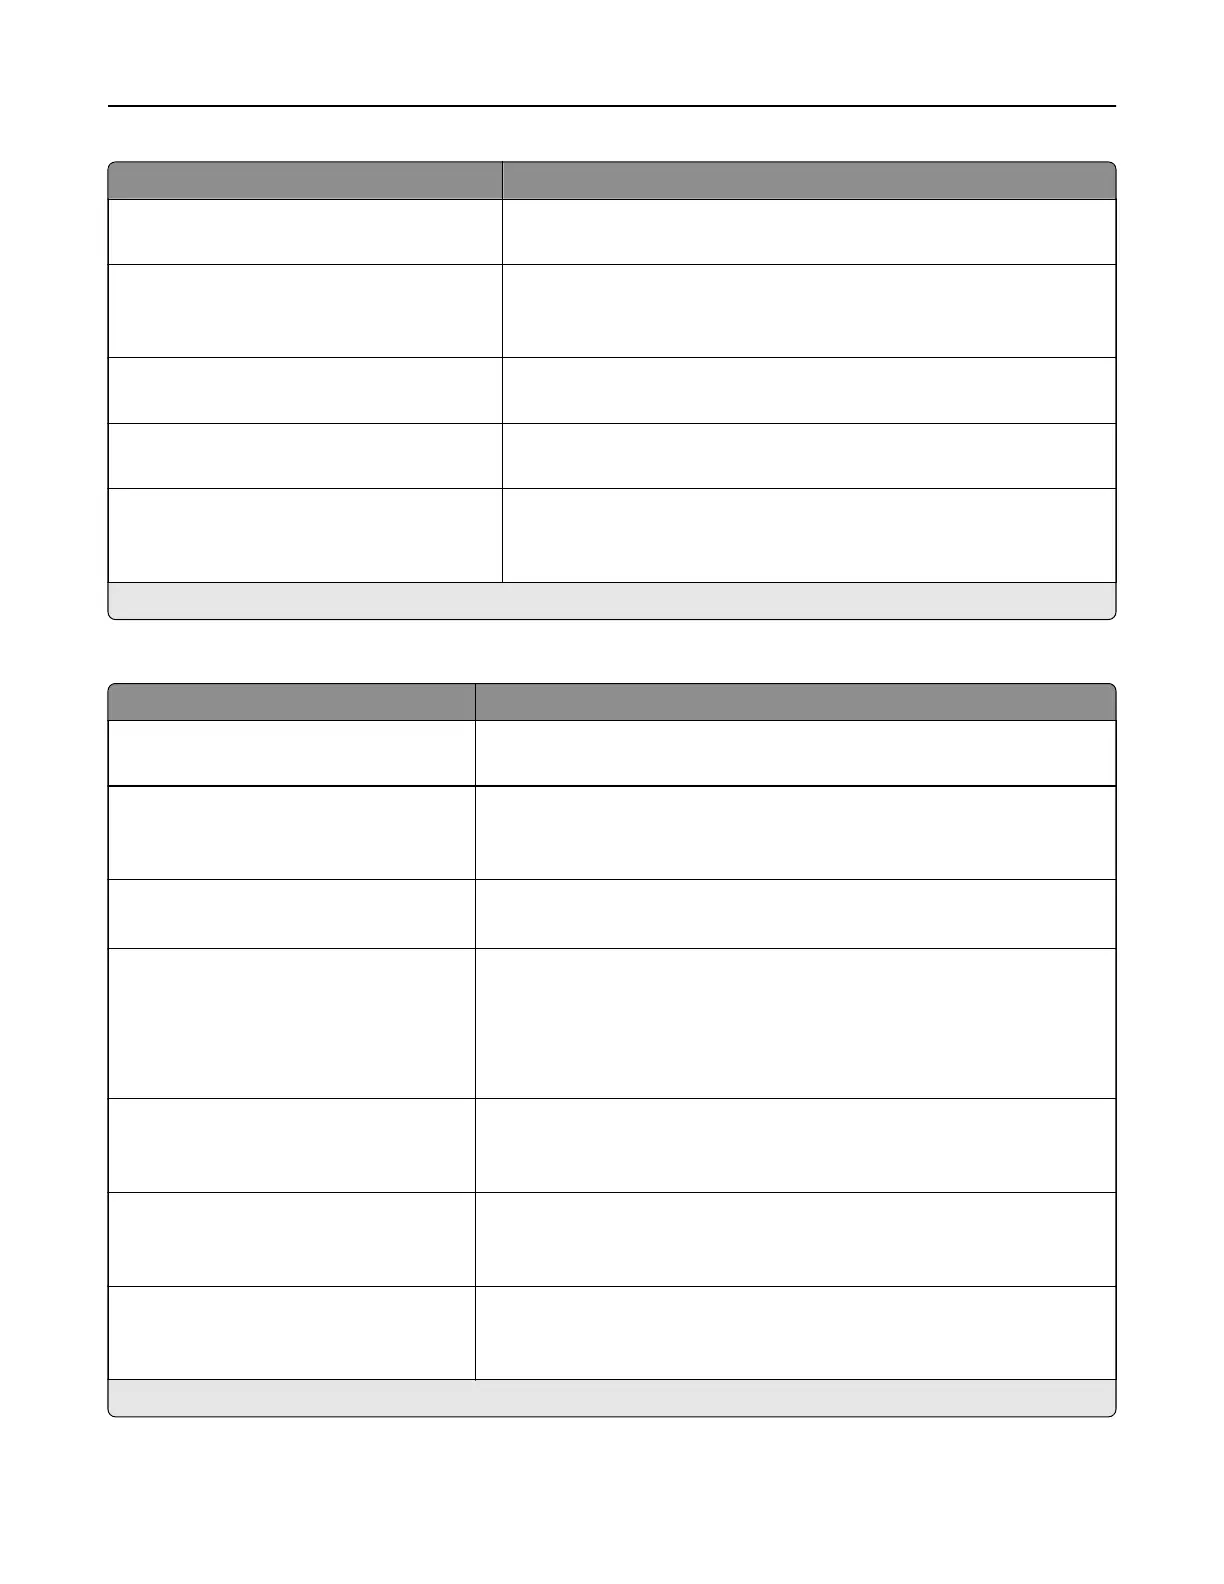
Menu item Description
Shadow Detail
‑4 to 4 (0*)
Adjust the shadow detail in the scanned image.
Scan Edge to Edge
O*
On
Scan the original document from edge to edge.
Sharpness
1–5 (3*)
Adjust the sharpness in the scanned image.
Temp era ture
‑4 to 4 (0*)
Generate a bluer or redder output of the original document.
Blank Pages
Blank Page Removal (Do Not Remove*)
Blank Page Sensitivity (5*)
Set the sensitivity of scans in relation to blank pages in the original
document.
Note: An asterisk (*) next to a value indicates the factory default setting.
Admin Controls
Menu item Description
Max E‑mail Size
0–65535 (0*)
Set the allowable file size for each e‑mail.
Size Error Message Specify an error message that the printer sends when an e‑mail exceeds
its allowable file size.
Note: You can type up to 1024 characters.
Limit Destinations Limit sending of e‑mail only to the specified list of domain name.
Note: Use a comma to separate each domain.
Send Me a Copy
Never appears*
On by Default
O by Default
Always On
Send a copy of the e‑mail to yourself.
Allow self e‑mails only
O*
On
Set the printer to send e‑mails to yourself only.
Use cc:/bcc:
O*
On
Enable carbon copy and blind carbon copy in e‑mail.
Use Multi‑Page TIFF
O
On*
Enable scanning of multiple TIFF images in one TIFF file.
Note: An asterisk (*) next to a value indicates the factory default setting.
Understanding the printer menus 122



 To Next Page