REPAIR MANUAL SUPPLEMENT: SMART KEY REGISTRATION – EL003-04 Revised June 24, 2004
Page 2 of 9
1. Make sure that the key is NEW (has never been registered to another vehicle) and
verify that it is a Master Key (has a trunk button). Sub–keys will NOT have a trunk
button and have NO Smart function.
2. Place the vehicle in an area that is free from radio frequency interference (i.e., away
from any power lines, laser wheel alignment machines, etc.).
3. Turn off or remove from the vehicle interior any wireless communication devices
(i.e., cell phones, text pagers, etc.) and all other non–factory electrical accessories.
4. Insert a registered
Smart Key into the ignition.
5. Turn the ignition to the ON position, but do not start the engine.
6. Connect Diagnostic Tester to DLC3.
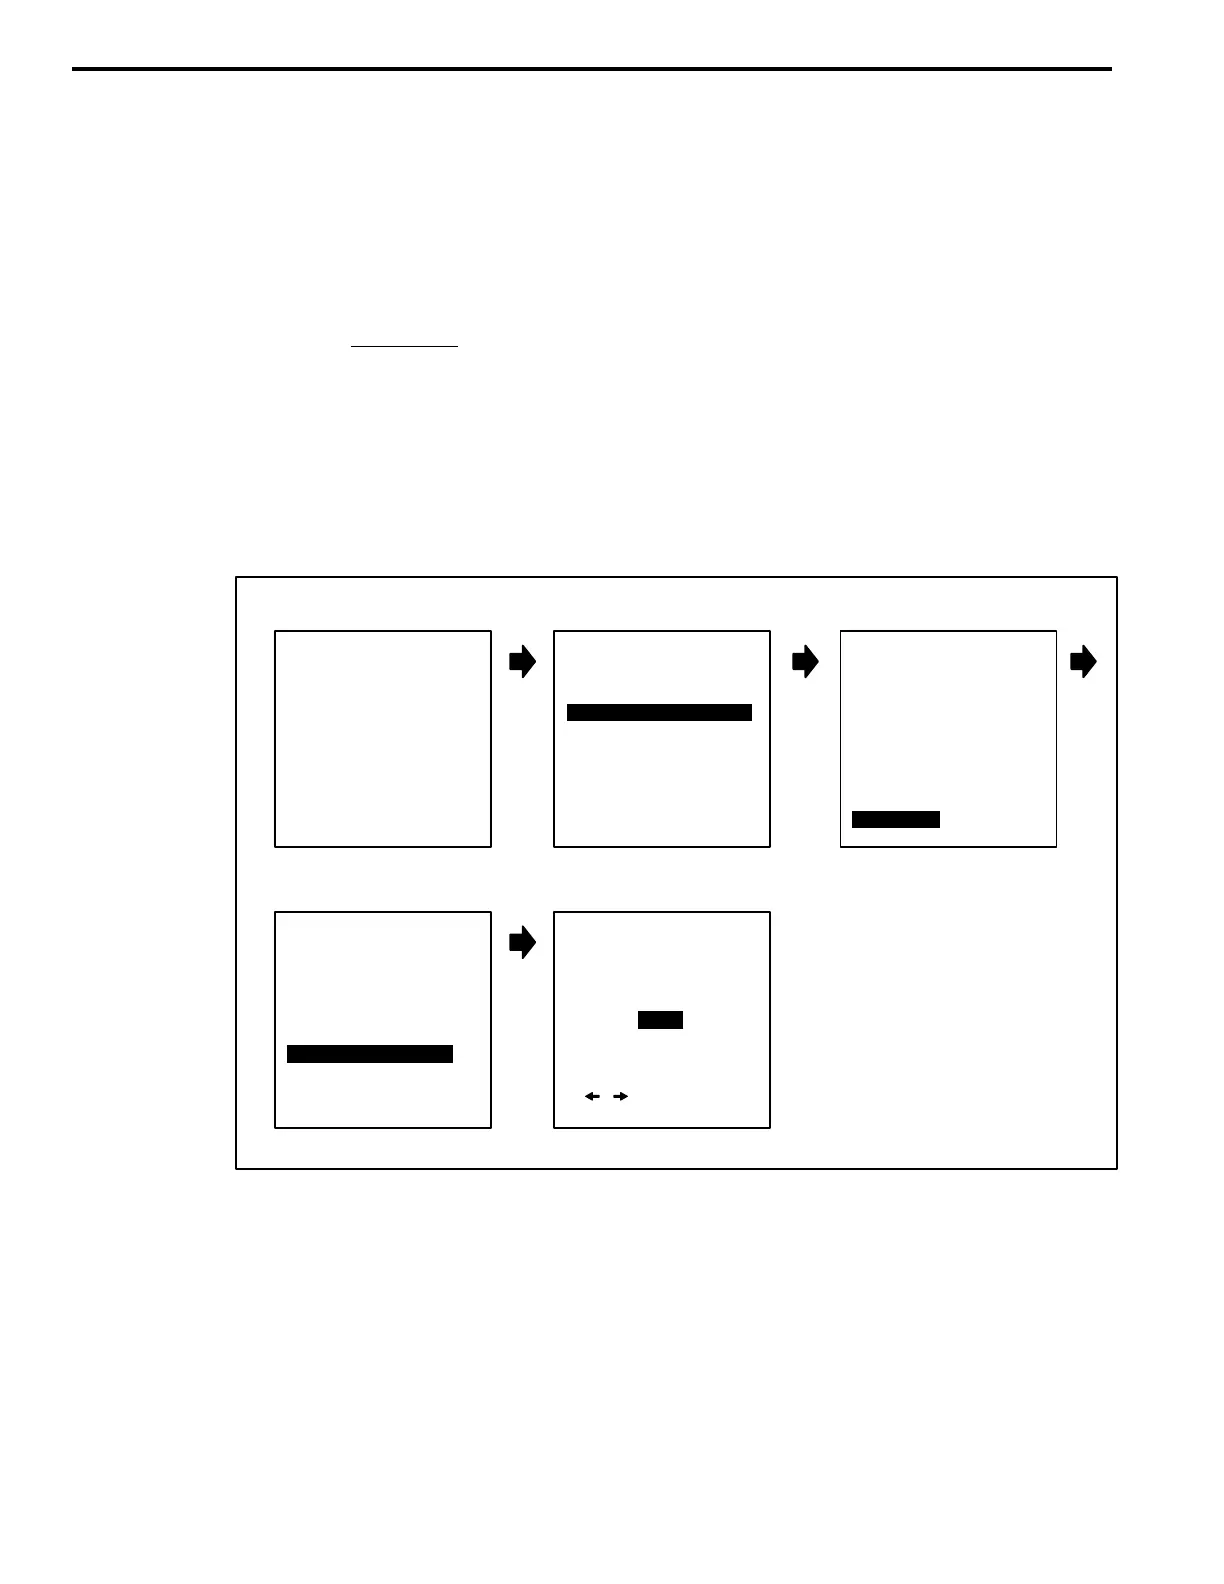
7. If the Diagnostic Tester backlighting is ON, use the screen flow below to turn it “OFF”
to prevent possible signal interference. If backlighting is already OFF, proceed to
step 8.
A. Turn the Diagnostic Tester power ON and follow the screen flow below.
B
TOYOTA
DIAGNOSTIC TOOLSET
PROGRAM CARD
Version 13.2a
A C
BACKLIGHT SET
The backlight
will be
ED
[ / ] TO CHANGE
[ENTER] TO SELECT
2: CUSTOMIZE
3: ECU REPROGRAM
FUNCTION SELECT
FOR NORTH AMERICA
*APPLICATION SELECT*
1: DIAGNOSIS
1: OBD/MOBD
2 ENHANCED OBD II
3: CARB OBD II
4: BREAK–OUT BOX
5: NVH
6: AUTOPROBE
7: 02 RPM CHECK
8: SNAPSHOT REVIEW
9: SETUP
0: GAS ANALYSIS
9: SETUP
11/08/05
Press <ENTER>
SETUP MENU
1: CLOCK/CALENDAR
2: PRINTER BAUD
3: PRINTER SELECT
4: UNIT CONVERSION
5: BRAND SELECT
6: DATA BASE SELECT
7: BACKLIGHT SET
8: ENH OBDII HELP
9: SELF TEST
7: BACKLIGHT SET
OFF
at Power–Up.
B. Turn the Diagnostic Tester power OFF and back ON.
Registration
Procedure