Maintenance
3.5 Disassembly and
Reassembly of the
Electric Motor
Before starting any disassembly work,
always disconnect the motor from the
mains.
Reliably prevent the pump from running up.
Required tools:
Screwdriver 1.0 x 5.5 mm (for junction box), open-jaw
wrenches size 7 and size 19 (for junction box), Allan keys
size 3 and size 6.
Possibly a puller for the coupling.
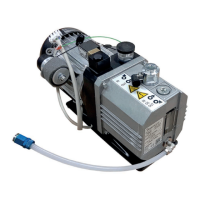
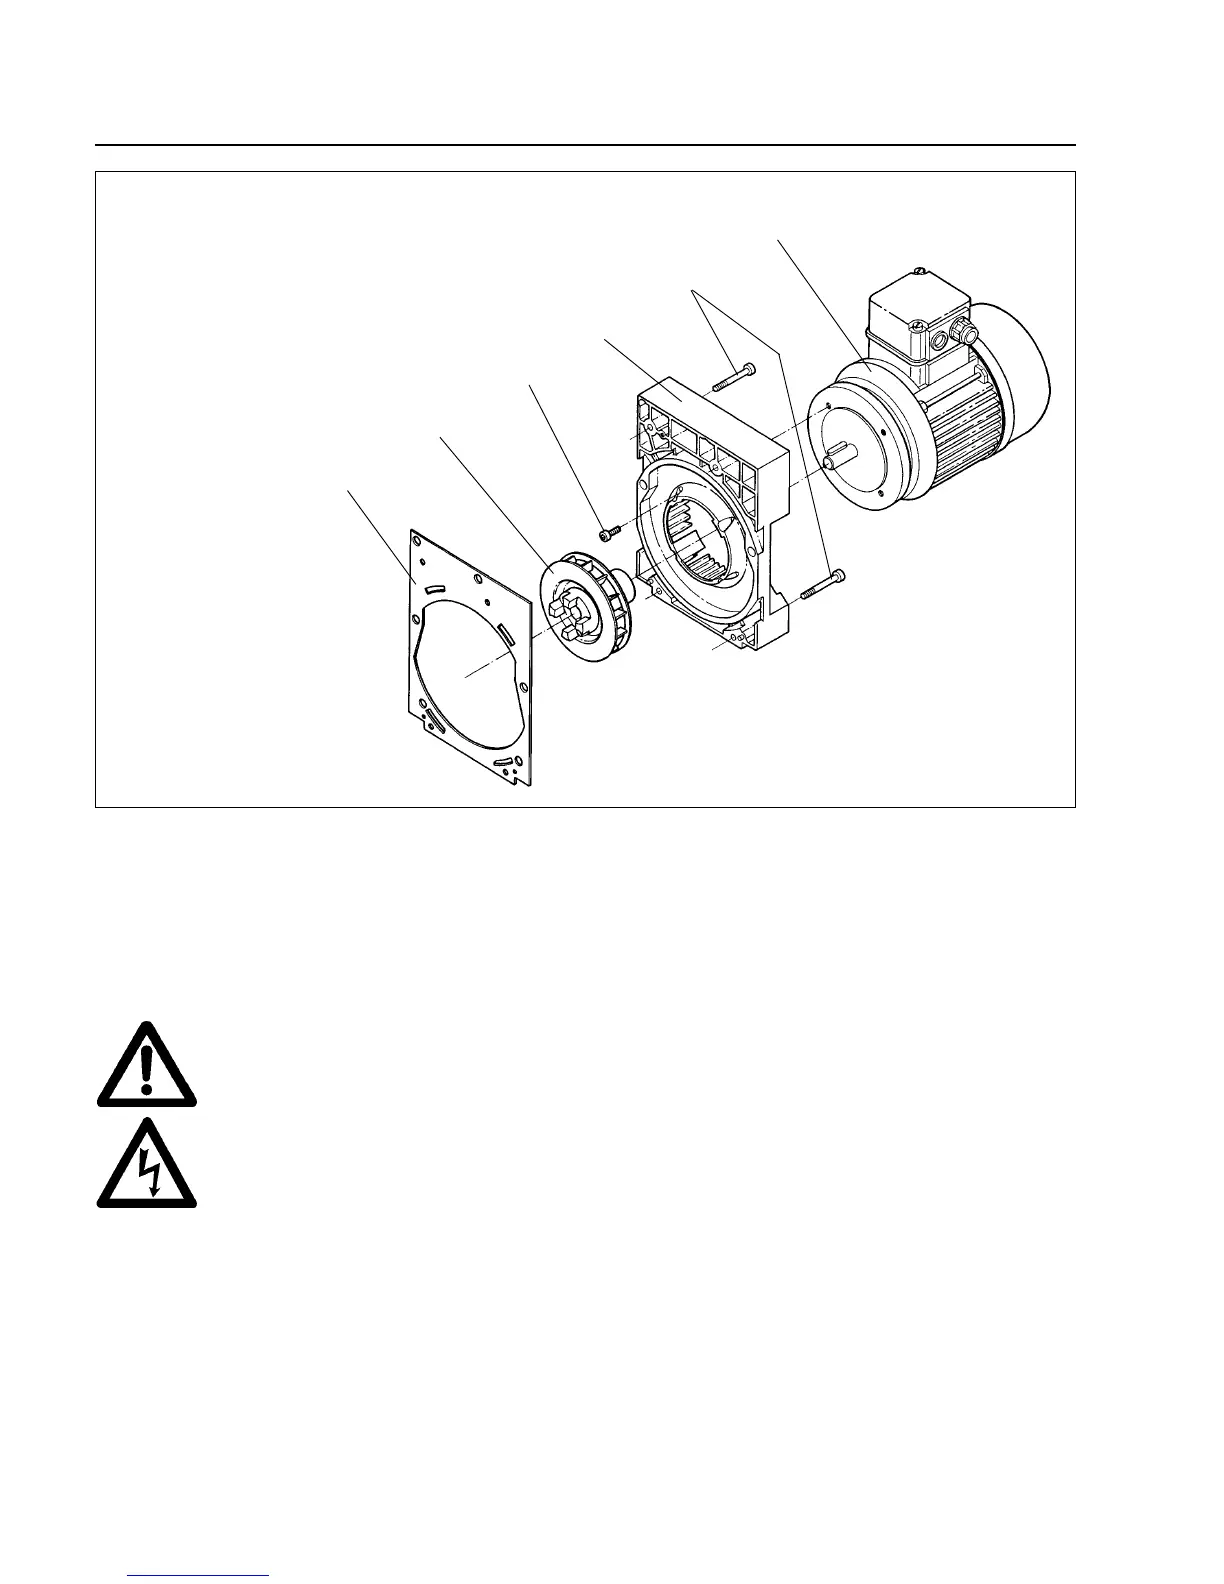
Disconnect the mains connection.
Support the motor.
Unscrew the four non-recessed hex. socket screws
(11/5).
Remove the intermediate flange (11/4) together with the
electric motor.
Remove the gasket (11/1).
Loosen the threaded pin and pull the coupling with the
blade wheel (11/2) off the motor shaft.
Unscrew the hex. socket screws (11/3).
Remove the electric motor (11/6).
Clean all parts and check that they are in perfect
condition; if not, replace them with new parts.
Reassemble in the reverse order.
In the case of 60 Hz motors (USA versions)
the coupling must not be pushed on to the
shaft right up to the stop. On the other hand
if it is not pushed on far enough the pump
module may be damaged during operation.
Push the coupling on in such a way that the
distance between the front end of the
coupling and the gasket (11/1) on the
intermediate flange amounts to 43.7 mm.
18
Fig. 11 Disassembly and reassembly of the electric motor
Key to Fig. 11
1 Gasket
2 Coupling with fan blades
3 Hex. socket screws
4 Intermediate flange
5 Hex. socket screws
6 Electric motor
Caution
Warning
1
2
3
4
5
6
 Loading...