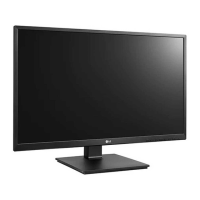
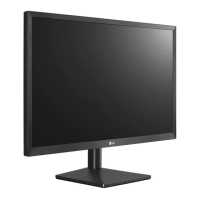
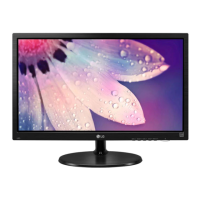
This document is an owner's manual for LG LED LCD Monitors, specifically covering the 22MK4, 24MK4, 27MK4, 22BK4, 24BK4, and 27BK4 series. The manual provides comprehensive instructions for assembling, preparing, using, customizing, and troubleshooting the monitor.
Function Description
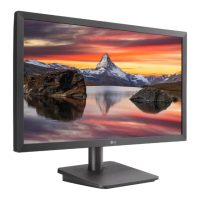
The LG LED LCD Monitor functions as a display device for personal computers (PCs) and AV devices. It utilizes LED backlighting for its LCD screen, offering a clear and vibrant visual experience. The monitor supports various input signals, including D-SUB (analog) and HDMI (digital), allowing for versatile connectivity with different devices. It is designed to provide a comfortable viewing experience with adjustable screen angles and customizable display settings.
Usage Features
Assembly and Preparation:
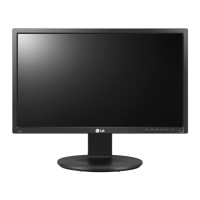
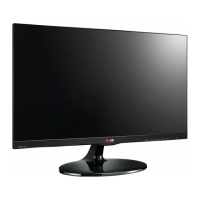
The manual details the steps for assembling the monitor, including attaching the stand base and body. It emphasizes checking for all components upon unboxing and provides illustrations for clarity. Users are cautioned to handle the monitor carefully during assembly and movement to prevent damage, particularly to the screen and joystick button. Proper ventilation is also highlighted, recommending a minimum 100 mm (3.94 inches) space from the wall when mounting on a table.
Mounting Options:
The monitor can be mounted on a table using its stand or on a wall using a VESA-compatible wall mount bracket (optional). Specific instructions and warnings are provided for both mounting methods, including screw torque recommendations and safety precautions against electric shock and injury.
Connectivity:
- Connecting to a PC: The monitor supports both D-SUB and HDMI connections for PCs. D-SUB transmits analog video, while HDMI transmits digital video and audio signals. Users are advised to use certified HDMI cables to avoid compatibility issues and connection errors.
- Connecting to AV Devices: HDMI connection is also used for AV devices, transmitting digital video and audio signals to the monitor.
- Connecting Peripherals: The monitor includes a headphones port, allowing users to connect headphones for audio output. It is recommended to use straight headphones to avoid interference with other external devices.
The monitor features a joystick button located at the bottom for easy control of its functions.
- Power On/Off: Pressing the joystick button once turns the monitor on, while pressing and holding it turns the monitor off.
- Volume Control: Moving the joystick button left or right adjusts the volume (for HDMI only).
- Main Menu Navigation: The joystick button is used to activate the main menu and navigate through its options (up/down, left/right) to set various display parameters.
The On-Screen Display (OSD) menu offers extensive customization options, accessible via the joystick button.
- Quick Settings:
- Brightness/Contrast: Adjusts the overall brightness and contrast of the screen.
- Volume: Controls the audio output level (for HDMI only), with a mute/unmute function.
- Input Settings:
- Input List: Allows selection of the desired input mode (D-SUB, HDMI).
- Aspect Ratio: Adjusts the screen's aspect ratio, offering "Full Wide" (displays video in wide-screen) and "Original" (displays video according to the video signal input).
- Picture Settings:
- Picture Mode: Provides various preset modes optimized for different content types:
- Custom: Allows user-defined adjustments.
- Reader: Optimizes the screen for viewing documents, with adjustable brightness.
- Photo: Optimizes for viewing photos.
- Cinema: Enhances visual effects for video content.
- Color Weakness: A subsidiary mode for users with red-green color blindness, helping them distinguish between these colors more easily. Users are advised to turn this off if uncomfortable.
- Game: Optimizes for gameplay.
- Picture Adjust:
- Brightness/Contrast: Further fine-tunes brightness and contrast.
- Sharpness: Adjusts the sharpness of the screen.
- SUPER RESOLUTION+: Enhances picture quality for crystal clear images, with settings for High, Middle, and Low, suitable for various video and image types (high-quality video/game, UCC/SD video, slow-moving pictures/still images). It can also be turned off.
- Black Level: Sets the offset level for HDMI input, defining the darkest color the monitor can display (High for current contrast ratio, Low for lower black levels and higher white levels).
- DFC (Dynamic Frequency Control): Automatically adjusts brightness based on screen content; can be turned On or Off.
- Game Adjust:
- Response Time: Sets the response time for displayed pictures, with options like Faster, Fast, Normal, and Off. Faster settings are recommended for fast-moving content to reduce image sticking.
- FreeSync: Provides seamless and natural images by synchronizing the vertical frequency of the input signal with the output signal. This feature requires a compatible AMD graphic card and HDMI interface.
- Black Stabilizer: Allows users to control black contrast for better visibility in dark scenes, useful for games. Increasing the value brightens low gray areas, while reducing it darkens them.
- Cross Hair: Displays a crosshair on the center of the screen for First Person Shooter (FPS) games, with four different crosshair options.
- Color Adjust:
- Gamma: Adjusts the gamma value, affecting image darkness (higher gamma = darker image). Options include Mode 1, Mode 2, Mode 3, and Mode 4 (default).
- Color Temp: Selects factory default picture colors (Warm, Medium, Cool) or allows custom adjustment of Red, Green, and Blue colors.
- Configuration Adjust (D-SUB only):
- Horizontal/Vertical: Moves the image left/right or up/down.
- Clock: Minimizes vertical bars or stripes and changes horizontal screen size.
- Phase: Adjusts display focus, removes horizontal noise, and sharpens characters.
- Resolution (D-SUB only): Allows users to set the desired resolution, enabled only when the PC output matches specific resolutions (e.g., 1920x1080).
- Picture Reset: Resets all picture settings to default.
- General Settings:
- Language: Selects the OSD menu language.
- SMART ENERGY SAVING: Saves energy with High or Low efficiency settings, or can be disabled. Note that this may affect monitor luminance.
- Automatic Standby: Automatically switches the monitor to standby mode after a certain period.
- OSD Lock: Prevents incorrect key input, disabling all OSD functions except brightness, contrast, input, information, and volume.
- Information: Displays monitor details like Model, Serial Number, Total Power On Time, and Resolution.
- Reset: Resets all monitor settings to default.
Maintenance Features
Safety Precautions:
The manual includes several warnings and cautions to ensure safe operation and longevity of the monitor.
- Genuine Components: Always use genuine LG components to ensure safety and performance, as counterfeit parts may cause damage or injury and void the warranty.
- Cable Usage: Use supplied components and certified cables to prevent display issues or image noise.
- Handling: Avoid touching the monitor screen directly, especially during movement or adjustment, as it can cause damage to pixels. Hold the top and bottom frame firmly when moving, and never carry it by the stand base alone.
- Upright Position: Keep the monitor upright when moving; do not turn it on its side or tilt it sideways.
- Screw Tightening: Do not apply excessive force when tightening screws during assembly, as this can damage the monitor. Avoid foreign substances on screw parts.
- Power Cord: Unplug the power cord before moving or installing the monitor to prevent electric shock.
Troubleshooting:
A dedicated section helps users diagnose and resolve common issues:
- No Image: Check power cord connection and PC status. If "Out of Range" or "NO SIGNAL" messages appear, verify signal cable connection and ensure PC resolution/frequency are within the monitor's supported range.
- OSD Control Issues: If OSD functions are locked, unlock them via the OSD lock menu.
- Incorrect Display Image: If colors are mono or abnormal, check signal cable connection, video card insertion, and color settings (ensure 24 bits true color). If the screen blinks, check for interlace mode and change to recommended resolution.
- "Unrecognized monitor, Plug&Play (VESA DDC) monitor found" Message: Install the display driver from the CD or LG website and ensure the video card supports Plug&Play.
- Screen Flickering: If using HDMI 1080i 60/50 Hz, change the resolution to the recommended 1080P.
Kensington Security System:
The monitor is equipped with a Kensington security system connector, allowing users to secure the monitor to a table using a Kensington security cable (optional).
Environmental Considerations:
The manual provides operating and storage temperature/humidity ranges to ensure optimal performance and longevity of the device.