EasyManua.ls Logo

LG GCD4115NS - User Manual

LG GCD4115NS
30 pages
Print Icon
To Next Page IconTo Next Page
Loading...
Introduction
Installation
Operation
Suggestion On
Food storage
Care and
Maintenance
Registration
Installation
Starting
Temperature Control
Defrosting
Storing Food
General Information
t n emecalpeR pmaL
Cleaning
Trouble Shooting
Precaution
4
4
16
17
17
18
Display Panel
18
How to adjust the temperature in the
refrigerator and freezer compartment
19
Vacation
Lock
On/Off
Ice Making
Super Freezer
20
Function
20
20
20
21
21
21
Water Dispenser(Applicable to some models only)
22
24
25
25
26
28
30
How to Reverse the Door
30
Memory Feature
21
Door Alarm
21
Self Test
21
3
Fresh Drawer(Option)
19
Table of Contents
Trouble Shooting
To Reverse the Doors
Important Safety Instruction
Identification of Parts
Question and Answer IconNeed help?

Do you have a question about the LG GCD4115NS and is the answer not in the manual?

Overview

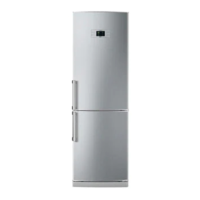
This document outlines the features, usage, and maintenance of a fridge-freezer, including instructions for door reversal.

Function Description:

The fridge-freezer is equipped with two independent temperature controls for the refrigerator and freezer compartments. Users can adjust these temperatures to their desired settings. The refrigerator compartment temperature can be set from 0°C to 6°C, while the freezer compartment ranges from -15°C to -23°C.

Key functions include:

  • Super Freezer: This feature allows for rapid freezing of food. Activating "SUPER FRZ." initiates a quick freeze operation for approximately 3 hours, after which it automatically reverts to the previous temperature setting. It can be manually stopped by pressing the button again.
  • Vacation Mode: Designed for energy saving during extended absences, this mode reduces energy consumption. It is activated and deactivated by pressing the "VACATION" button.
  • Lock Function: This button stops the operation of other control buttons, preventing accidental changes. It can be locked or unlocked by pressing the "CHILD LOCK" button for 3 seconds. When locked, other buttons are inactive.
  • On/Off Control: The "ON/OFF" button toggles the refrigerator's power. Pressing it for 3 seconds switches the unit on or off.
  • Memory Feature: This function saves the set temperature, vacation status, and On/Off status. In the event of a power failure, these settings are restored when power returns.
  • Door Alarm: A warning sounds three times for 30 seconds if the refrigerator door remains open or not completely closed for more than a minute. If the alarm persists after closing the door, contact a service center.
  • Self Test: The appliance automatically detects failures during operation. If a failure occurs and buttons are unresponsive, do not turn off the power; contact the service center immediately.
  • Ice Making: To make ice, fill the ice tray to the water level and place it in the freezer. For faster ice production, use the "SUPER FRZ." button. To remove ice cubes, twist the tray gently or run water over it.
  • Defrosting: The unit features automatic defrosting. Defrost water flows into an evaporating tray and is automatically evaporated.
  • Water Dispenser (Applicable to some models only): This feature provides chilled water. The water tank can hold up to 4.5 liters of potable water. To fill, turn the handle tank backward, open the small cap tank, and pour water while observing the sight glass. To dispense, press the dispenser pad with a cup.

Important Technical Specifications:

  • Refrigerant: The fridge-freezer uses isobutane refrigerant (R600a), a natural gas with high environmental compatibility. The amount of refrigerant (80-90g) is combustible.
  • Lamp: Uses a DC12V 0.75W LED lamp. If damaged, it should be replaced by a service center.
  • Room Size for Refrigerant Leak: To prevent a flammable gas-air mixture in case of a leak, the room where the appliance is sited must be at least 1m² for every 8g of R600a refrigerant. The specific amount of refrigerant is indicated on the appliance's identification plate.

Usage Features:

  • Installation:
    • Choose a suitable location away from heat sources, direct sunlight, or moisture.
    • Ensure proper air circulation around the unit (at least 2 inches/5 cm from the rear wall).
    • Level the unit using the leveling screws to prevent vibration. The front should be slightly higher than the rear to aid door closing.
    • Clean the fridge-freezer thoroughly before first use.
    • Install accessories like ice cube boxes in their designated places.
    • Connect the power supply cord to a dedicated outlet; avoid using it with other appliances on the same outlet.
    • After installation, allow 2-3 hours for the unit to stabilize at normal operating temperature before filling it with food. If the power plug is disconnected, wait 5 minutes before restarting.
  • Food Storage:
    • Avoid storing perishable foods like bananas and melons at low temperatures.
    • Allow hot food to cool before storing to prevent spoilage and higher energy consumption.
    • Use lidded containers to prevent moisture evaporation and preserve food taste and nutrients.
    • Do not block air vents to ensure even cold air circulation.
    • Minimize door openings to prevent warm air entry and temperature rise.
    • Avoid storing too many items in door racks, which can hinder door closure.
    • Do not store bottles in the freezer compartment as they may break when frozen.
    • Do not refreeze thawed food to prevent loss of taste and nutrition.
    • The Fresh Drawer is designed to be 2°C lower than the refrigerator compartment for extended freshness.
  • Water Dispenser (if applicable):
    • Only use potable spring water. Do not use other beverages (milk, juice, carbonated drinks, or grain-containing beverages) as this may cause failure.
    • Ensure the water level does not exceed the MAX line to prevent leakage. Refill when the water level is below the MIN line for optimal pouring.

Maintenance Features:

  • Cleaning:
    • Always unplug the power before cleaning.
    • Exterior: Clean with a soft cloth soaked in hot water and liquid detergent. For stainless steel exteriors, use a mild detergent in warm water. Dry thoroughly with a soft cloth. Avoid abrasive or harsh cleaners, appliance wax, bleach, or chlorine-containing products on stainless steel.
    • Interior: Clean as described for the exterior.
    • After Cleaning: Check that the power cord is undamaged, the plug is not overheated, and it is tightly inserted into the outlet.
    • Warning: Do not spray water directly inside or outside the fridge-freezer. Do not use abrasive materials, petroleum, benzene, thinner, hydrochloric acid, boiling water, or rough brushes, as these can damage parts.
  • Water Dispenser Cleaning (if applicable):
    • Drip Tray: Pull out the drip tray, discharge water, clean, and rinse thoroughly. Wipe moisture around the door and drip tray with a clean cloth.
    • Exterior Dispenser: Wipe with a clean cloth.
    • Water Tank: Lift the tank by pressing the fixing lever, remove it, then remove the large cap tank. Clean and rinse the inside/outside of the water tank with a neutral cleansing agent.
    • Cap Tank (Big & Small): Clean and rinse with a neutral cleansing agent. Use a small brush for grooves.
    • Valve Assembly: Clean and rinse with a small brush, operating the bottom part of the valve assembly. Ensure the sealing rubber is correctly fixed after cleaning to prevent water leakage.
  • Anti-Condensation Pipe: This pipe is installed around the front and between compartments to prevent dewing. It is normal for this area to feel warm, especially after installation or in high ambient temperatures.
  • Power Failure: During a 1-2 hour power failure, food stores are generally safe. Avoid frequent door openings.
  • Moving the Appliance: Remove all food and secure loose items with tape. Turn the leveling screws until they stop to prevent floor scratches and allow for easier movement.
  • Door Reversal: The doors are reversible to suit kitchen layouts.
    • Precaution: Remove all food and accessories. Use a torque wrench or spanner for bolts. Do not lay the fridge-freezer down. Be careful not to drop doors during disassembly/assembly.
    • Procedure: Involves separating door handles, unscrewing hinge covers and bolts, carefully removing doors, swapping hinge components, and reattaching doors and handles. This process is complex and requires careful attention to detail. Reversing the doors is not covered by the warranty.

LG GCD4115NS Specifications

General IconGeneral
BrandLG
ModelGCD4115NS
CategoryFreezer
LanguageEnglish

Related product manuals