Copyright © 2009 LG Electronics. Inc. All right reserved.
Only for training and service purposes
- 7 -
LGE Internal Use Only
5. Caution for DMD
(Digital Micro-mirror Device)
5-1. Caution for DMD ESD
(1) Connector the grounding to prevent a damage of ESD
(Electrostatic Discharge) when handing the DMD.
(2) Wear a wrist strap to connect the ESD grounding in flesh
necessarily.
(3) Connect the ESD ground to workstation and an electric
conductor.
(4) Save the DMD after getting rid of a static electricity. Keep
it at an exclusive case when moving it When grounding,
open the case.
(5) Put on gloves for preventing static electricity.
(6) All work is done at static free location. Attach the tape or
remove a dust on the DMD front or DMD back pin
5-2. Caution for DMD Clean
(1) Follow the procedure and caution to prevent the screen
from being scratched.
(2) When DMD glass stains with dust, polish the front and
back DMD glass with soft cloth. Then, do it again after
rotating 180 degree the DMD. If necessary, keep under
observation.
(3) Don’t clean the DMD with the high pressure. The static
electricity and pressure will damage the DMD.
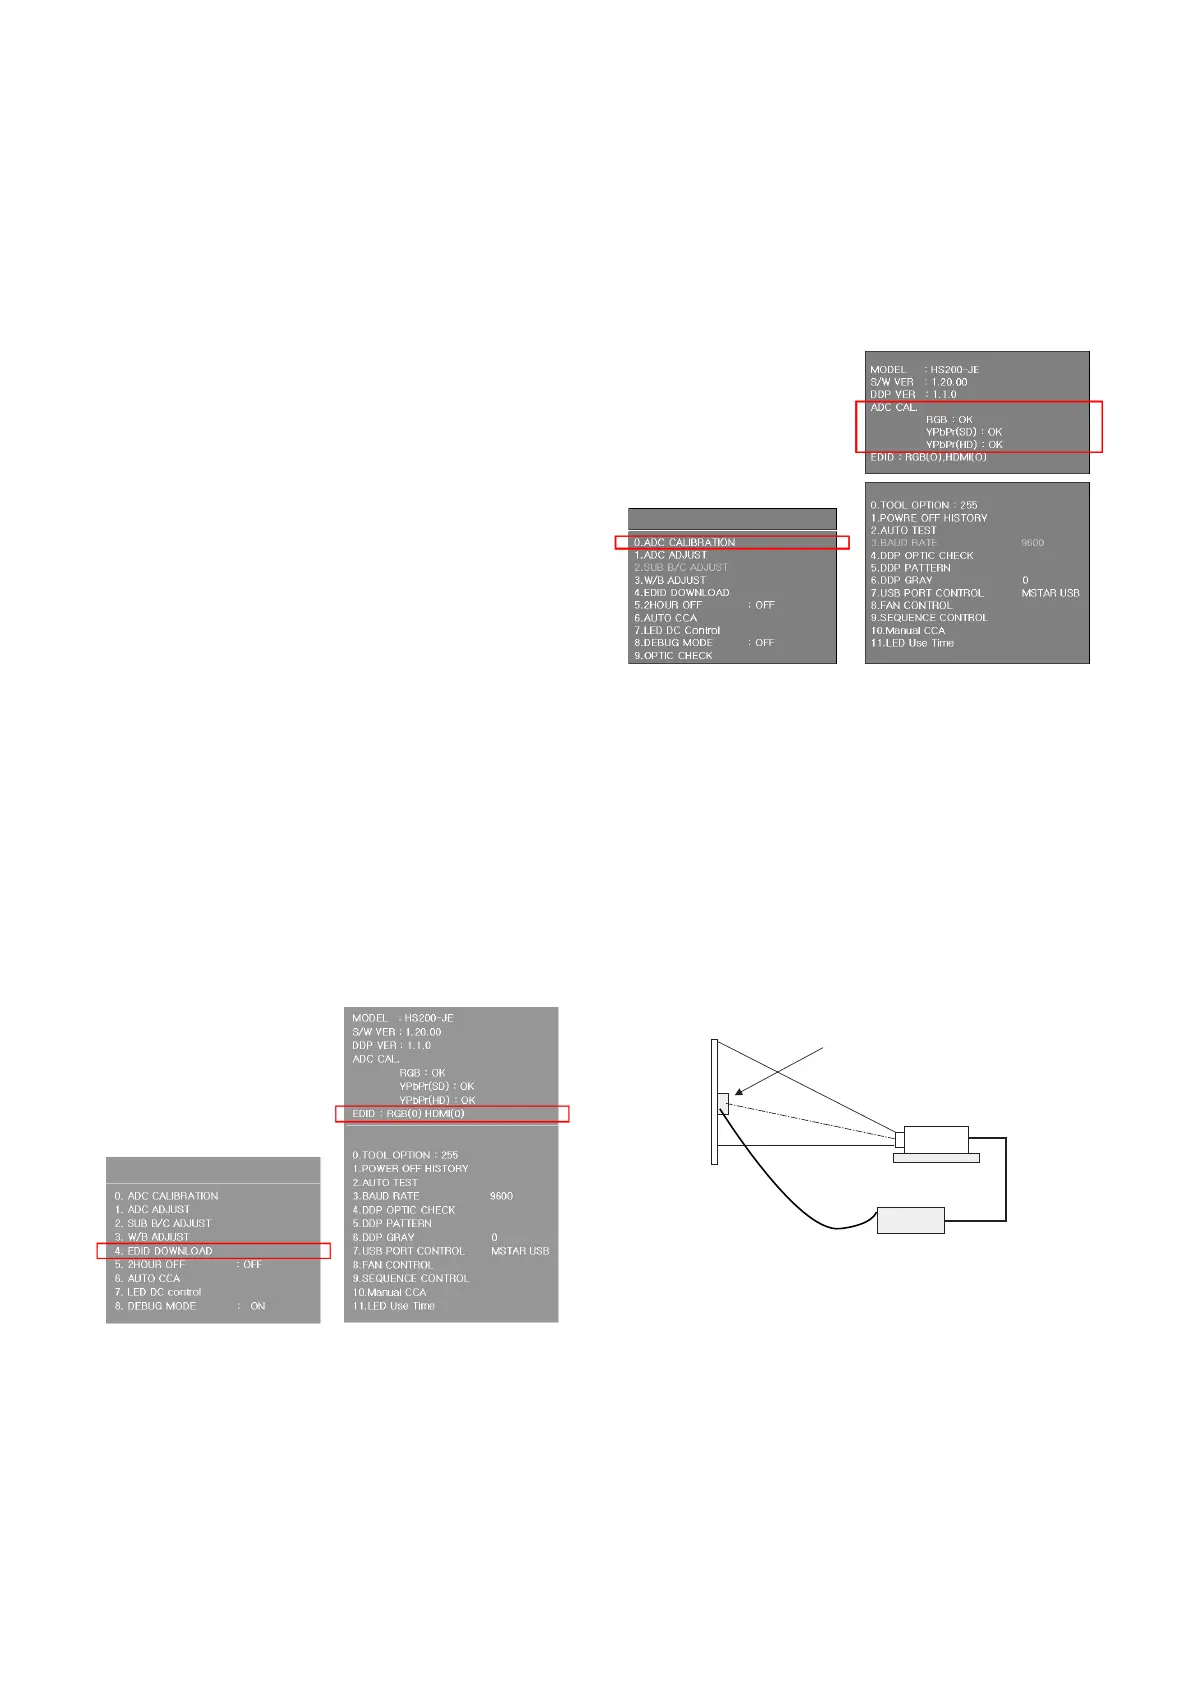
6. EDID Data Download
(1) Enter to Adjustment mode by pressing “ADJ” key on
Adjustment Remote control.(Without RGB/HDMI jack)
(2) Press right key at “4. EDID DOWNLOAD”. And then EDID
Download is operated.(Fig.6-1)
(3) Check the EDID Download of RGB/ HDMI by pressing
“INSTART” key.(Fig.6-2) If failed, perform (1) ~ (2) again
(0 : Success, X : Failure)
7. ADC Adjustment
(1) Enter to Adjustment mode by pressing “ADJ” key on
Adjustment Remote control.
(2) Press right key at “0. ADC CALIBRATION”. And then ADC
adjustment is operated.(Fig.7-1)
(3) Check the status of RGB/YPbPr by pressing “INSTART”
key.(Fig.7-2) If failed, perform (1) ~ (2) again
(0 : Success, X : Failure)
8. White Balance Adjustment
8-1. Required Test Equipment
(1) Illuminometer (Model : CL-200) 1EA : Chromaticity
measurement from projection screen center
(2) Remote control 1EA
(3) CL200 and SET connection Interface Board 1EA
(4) CL200 Uart Communication Cable 1EA
8-2. Equipment Composition
<Fig. 6-1> <Fig. 6-2>
<Fig. 7-1> <Fig. 7-2>
 Loading...