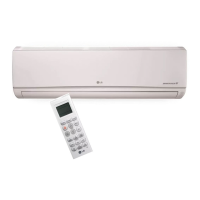
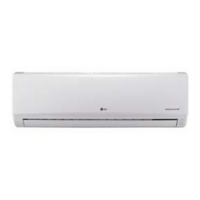
This document is an owner's manual for a multi-type air conditioner, covering Standard, Standard Libero, Artcool Mirror, and Ceiling Cassette models. It provides comprehensive instructions for safe operation, maintenance, and troubleshooting.
Function Description
The air conditioner is designed to provide cooling, heating, dehumidification, and air circulation functions. It features a PLASMA purification system (optional) to improve air quality by removing microscopic contaminants. The unit can be operated via a wireless remote controller or an optional wired remote controller.
Operation Modes:
- Cooling Mode: Provides cooling with adjustable temperature settings (18°C-30°C / 64°F-86°F).
- Heating Mode: Provides heating with adjustable temperature settings (16°C-30°C / 60°F-86°F).
- Healthy Dehumidification Mode: Automatically adjusts room temperature and airflow to optimal conditions for dehumidification, without displaying or allowing manual temperature control.
- Air Circulation Mode: Circulates air without cooling or heating, with adjustable fan speeds.
- Auto Operation Mode: The system automatically operates based on electronic controls, allowing users to set a desired temperature range (64°F-86°F).
- Jet Cool/Heat Operation: Provides rapid cooling or heating. In Jet Cool, the unit runs at super high fan speed and 18°C (64°F) for 30 minutes. In Jet Heat (available on some models), it runs at super high fan speed and 30°C (86°F) for 30 minutes.
- Energy-Saving Cooling Mode (Optional): Operates efficiently by adjusting body-adaptation time according to temperature changes, helping to save energy.
- Sleep Mode Operation (Optional): Allows setting a timer for automatic shutdown (1-7 hours). The indoor fan operates at super low speed in cooling mode and low speed in heating mode for comfortable sleep.
- Auto Clean (Optional): Removes moisture from indoor units after cooling or dehumidification operations to prevent mold and odors. When activated, the indoor fan continues to run for about 30 minutes after the unit is turned off, and the louver closes.
- Forced Operation: Allows the unit to operate even if the remote controller is not available. Pressing the ON/OFF button starts the operation, and pressing it again stops it. During test operation, the unit cools at high fan speed for 18 minutes.
- Auto Restart Function: In case of a power failure, this feature restores the previous operating conditions once power is regained. This function is enabled by factory default but can be disabled or re-enabled by holding the ON/OFF button for 6 seconds.
Airflow Control:
- Horizontal Vane Control (Up/Down Airflow Direction Control): The horizontal vane can be adjusted using the remote controller. Pressing the UP/DOWN AIRFLOW button initiates a swing, and pressing it again sets the louver at the desired vertical airflow direction.
- Vertical Louver Control (Left/Right Airflow Direction Control) (Optional): The vertical louvers can be adjusted using the remote controller. Pressing the LEFT/RIGHT AIRFLOW button initiates a swing, and pressing it again sets the louver at the desired horizontal airflow direction.
Usage Features
Remote Controller:
- Wireless Remote Controller: Used to select operation modes, set temperature, adjust fan speed, control airflow direction, activate plasma purification, set timers, and check room temperature. It requires two AAA batteries.
- Wired Remote Controller (Optional): Provides similar control functions as the wireless remote, including operation indication, temperature setting, fan speed, ON/OFF, operation mode selection, airflow, subfunction, ventilation, reservation, and setting/cancel buttons.
Setting and Adjustments:
- Battery Installation: Insert two AAA batteries into the wireless remote controller, ensuring correct polarity.
- Current Time Setting: Set the current time using the TIMER and SET/CLEAR buttons.
- Timer Setting: Program the unit to turn on or off at specific times using the TIMER and SET/CLEAR buttons. Timers can be canceled individually or all at once.
- Display Luminosity (Optional): Adjust the brightness of the LCD/LED display on the remote controller.
- °C/°F Switch: Toggle temperature readings between Celsius and Fahrenheit.
- Fan Speed Selection: Choose from low, medium, high, or "chaos" fan speeds. The "chaos" or "natural wind" mode simulates a natural breeze by automatically changing fan speed.
Safety Precautions:
- Always use a grounded power plug and socket.
- Do not use defective circuit breakers or multi-consents.
- Ensure proper grounding of the product.
- Do not modify or extend the power cable.
- Contact authorized service technicians for installation, removal, or repair.
- Do not operate the unit with wet hands.
- Keep flammable gases or combustibles away from the unit.
- Do not open the front grille during operation.
- Ventilate the room regularly, especially when operating in a tightly closed space or with other heating elements.
- Dispose of packing materials safely to prevent injury to children.
- Do not step on or place objects on the outdoor unit.
- Install the unit on a stable base and ensure the installation area does not deteriorate.
- Use the provided installation kit.
- Ensure proper drainage of condensed water.
- Check for refrigerant leakage after installation or repair.
- Do not block the air inlet or outlet.
- Do not expose skin, children, or plants to direct cool or hot air drafts.
Maintenance Features
General Maintenance:
- Turn off the main power, disconnect the circuit breaker, and unplug the power cord before any maintenance.
- Clean the unit with a soft, dry cloth. Avoid bleach or abrasive cleaners.
- Do not use water hotter than 40°C (104°F) or volatile substances, as they can cause deformation, discoloration, or damage to the unit's surface.
Filter Maintenance:
- Air Filters: Located behind the front panel/grille. Check and clean every two weeks or more often if necessary.
- Removal: Pull the filter tab slightly forward.
- Cleaning: Use a vacuum cleaner or warm soapy water. For stubborn dirt, use a detergent solution in lukewarm water.
- Drying: Dry thoroughly in the shade.
- Reinstallation: Insert the filters back into their original position.
- Caution: Do not touch metal parts of the indoor unit when removing the air filter to avoid injury.
- Plasma Filters (Optional): Located behind the air filter. Check and clean every three months or more often if necessary.
- Removal: Gently pull forward after removing the air filter.
- Cleaning: Use a vacuum cleaner or water.
- Drying: Dry thoroughly in the shade.
- Reinstallation: Insert back into original position.
- Caution: Do not touch the plasma filter within 10 seconds of opening the inlet grille to avoid electric shock.
- Deodorizer Filters or Allergy Free Filter + Triple Filter: Located behind the air filter.
- Maintenance: Expose them to direct sunlight for 2 hours.
- Reinstallation: Insert back into original position.
Remote Controller Maintenance:
- Choose a safe and easily accessible location for the remote controller holder.
- Fix the holder securely with supplied screws.
- Slide the remote controller into the holder.
- Avoid direct sunlight exposure for the remote controller.
- Keep the signal transmitter and receiver clean for proper communication.
- If other appliances are operated by the remote control, change their position or consult a serviceman.
Operation Tips for Efficiency:
- Do not overcool the room: This wastes electricity and is not good for health.
- Keep blinds or curtains closed: Prevent direct sunlight from entering the room during operation.
- Keep the room temperature uniform: Adjust vertical and horizontal airflow to ensure even temperature distribution.
- Ensure doors and windows are shut tight: Minimize opening to retain cool air.
- Clean the air filter regularly: Blockages reduce airflow and efficiency. Clean at least every two weeks.
- Ventilate the room occasionally: Since windows are often kept closed, occasional ventilation is recommended.
- Use high fan speed for effective and fast cooling: The unit achieves its rated cooling capacity at high fan speeds.