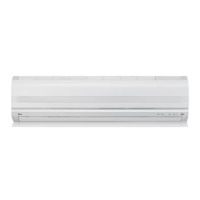
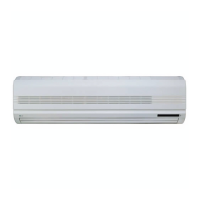
This document serves as an Owner's Manual for an LG Room Air Conditioner, providing comprehensive instructions for its operation, maintenance, and troubleshooting. It emphasizes safety precautions, electrical safety, and detailed guidance on using the various functions of the air conditioning unit.
The primary function of this device is to provide air conditioning for a room, offering both cooling and, in some models, heating capabilities. It is designed to create a comfortable indoor environment by controlling temperature, humidity, and airflow. The manual outlines different operational modes to suit various user preferences and environmental conditions.
Usage Features:
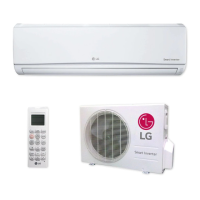
The air conditioner can be controlled via a wireless remote controller, which is equipped with numerous buttons for various functions.
- Start/Stop Button: Used to turn the unit on or off.
- Operation Mode Selection Button: Allows selection between different modes such as Cooling, Auto Operation (Cooling Only Model), Auto Changeover (Heat Pump Model), Healthy Dehumidification, and Heating.
- Room Temperature Setting Buttons: Used to adjust the desired room temperature within specified ranges (e.g., 18°C~30°C for cooling, 16°C~30°C for heating).
- Indoor Fan Speed Selector Button: Offers four fan speed settings: low, medium, high, and CHAOS. The CHAOS mode simulates a natural breeze by automatically varying the fan speed, aiming for a fresher feeling and optimizing power consumption by preventing overcooling.
- Jet Cool/Heat Button: Activates a rapid cooling or heating function. In Jet Cool mode, the unit operates at super high fan speed and 18°C for 30 minutes for fast cooling. Similarly, Jet Heat (available in some models) operates at super high fan speed and 30°C for 60 minutes to quickly warm the room. This function cannot be activated during heating or auto changeover operations, except for Inverter, Art Cool, and Art Cool Wide (non-Deluxe) models where Jet Heat is available for heating.
- CHAOS Swing Button: Controls the vertical movement of the louvers, allowing users to set the desired up/down airflow direction or enable automatic swinging for even air distribution.
- Horizontal Airflow Direction Control Button (Optional): Allows setting the desired horizontal airflow direction.
- ON/OFF Timer Buttons: Used to set specific times for the unit to start or stop operation.
- Time Setting Buttons: For adjusting the current time displayed on the remote controller.
- Timer Set/Cancel Button: To confirm or cancel timer operations.
- Sleep Mode Auto Button: Sets the unit to operate in sleep mode, which automatically adjusts the temperature and fan speed for comfortable sleep. In cooling or healthy dehumidification mode, the setting temperature will gradually rise by 2°C over one hour.
- Air Circulation Button: Circulates room air without cooling or heating. Fan speed can be adjusted in this mode. For inverter type models without this button, air circulation can be operated by pressing the PLASMA button.
- Energy-Saving Cooling Mode Button (Optional): This mode saves energy during cooling and healthy dehumidification by adjusting the desired temperature and operation based on body-adaptation time and temperature changes.
- Room Temperature Checking Button: Displays the current room temperature.
- PLASMA Button (Optional): Activates the NEO PLASMA Purification function, which uses plasma technology to remove microscopic contaminants from the air, providing clean and hygienic air. This function can be used in any operation mode and with any fan speed.
- Auto Clean Button (Optional): Initiates a self-cleaning function to remove moisture left in the indoor unit after cooling or healthy dehumidification. When activated, the indoor fan continues to run for about 30 minutes after the unit is turned off, drying the internal components and closing the louver.
- 2nd F Button: Used to access secondary functions printed in blue on the remote controller buttons. Pressing it activates the blue function; it automatically cancels if idle for 10 seconds.
- LCD Luminosity Button (Optional): Adjusts the brightness of the LCD display on the remote controller.
The manual also describes a "Forced Operation" mode, which can be used when the remote control is unavailable. This mode starts the unit in cooling at high fan speed, resetting after 18 minutes. It can be activated by pressing and holding the ON/OFF button on the unit for 3-5 seconds.
Maintenance Features:
Regular maintenance is crucial for the efficient and prolonged operation of the air conditioner.
- Indoor Unit Cleaning: The indoor unit should be cleaned with a soft, dry cloth. Harsh detergents, solvents, or hot water (above 40°C) should be avoided as they can cause deformation, discoloration, or damage to plastic parts.
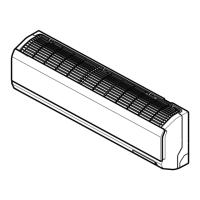
- Air Filter Cleaning: Air filters, located behind the front panel/grille, should be checked and cleaned every two weeks or more often if necessary. They can be cleaned with a vacuum cleaner or warm soapy water. If heavily soiled, a detergent solution can be used. After washing, filters should be dried in the shade before reinstallation. The manual provides diagrams for removing filters for different model types (Art Cool Type, Art Cool Type Wide, Deluxe Type 1 & 2, Standard Split Type).
- Plasma Filter Cleaning (Optional): Plasma filters should be checked and cleaned every three months or more often. They can be cleaned with a vacuum cleaner or water and dried in the shade before reinstallation. A caution is given not to touch the plasma filter within 10 seconds of opening the inlet grille due to electric shock risk.
- Deodorizer Filter Cleaning (Optional): Deodorizer filters should be removed from behind the air filter and exposed to direct sunlight for two hours, then reinserted.
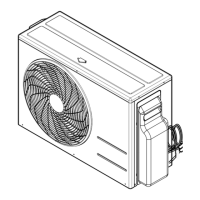
- Outdoor Unit Cleaning: The heat exchanger coils and panel vents of the outdoor unit should be checked regularly. If clogged with dirt or soot, professional steam cleaning is recommended. Dirty or clogged coils can reduce operating efficiency and increase costs.
Safety Precautions:
The manual includes a dedicated section on safety precautions, categorized as WARNING (possibility of death or serious injury) and CAUTION (possibility of injury or damage).
- Electrical Safety: Emphasizes proper grounding, using correctly rated circuit breakers and fuses, avoiding multi-sockets, and ensuring the power plug and socket are clean and secure. It warns against using damaged power cords, adapters, or extension cords. Electrical work should only be performed by qualified electricians or authorized service centers.
- Installation Safety: Instructions include using the provided installation kit, ensuring a stable installation stand, and avoiding installation in areas exposed to sea wind or where noise/hot air could disturb neighbors.
- Operation Safety: Warnings against opening the front grille during operation, touching metal parts when removing filters, inserting hands or objects into air inlets/outlets, and operating the unit in a tightly closed space for extended periods without ventilation. It also advises against touching leaking refrigerant gas.
- Maintenance Safety: Stresses turning off main power and unplugging the unit before maintenance, discharging capacitors in the outdoor unit before repair, and using only genuine replacement parts.
- Battery Safety: Advises against mixing old and new batteries or different types, recharging or disassembling batteries, and disposing of them in fire. It also provides instructions for handling leaked battery fluid.
Troubleshooting Tips:
A troubleshooting section helps users diagnose common issues before calling for service. It addresses problems like the air conditioner not starting (unplugged, blown fuse, power failure, high voltage) and not cooling effectively (restricted airflow, dirty air filter, hot room, cold air escaping, incorrect temperature settings, heating sources in the room). It advises checking connections, circuit breakers, filters, and room conditions.
The manual also specifies situations requiring immediate service, such as burning smell, loud noise, hot or damaged power cord, error codes from self-diagnosis, water leakage from the indoor unit, or faulty switches/breakers.
Overall, this manual provides a comprehensive guide for safely and effectively using and maintaining the LG Room Air Conditioner, ensuring optimal performance and user comfort.