- 17 -
5.3 HDCP (High-Bandwidth Digital Contents Protection) SETTING
• Connect D-sub Signal Cable to D-Sub Jack
• Input HDCP key with HDCP-key- in-program
• HDCP Key value is stored on EEPROM(AT24C64) which is
From “0x80” addresses of 0xA0 page
• AC off/ on and on HDCP button of MSPG925 and confirm
whether picture is displayed or not of using MSPG925
• HDCP Key value is different among the sets.,
6. Serial Number Writing of the Product
Use RS-232C cable and write serial Number of the Product
7. Adjustment of White Balance
7.1. Purpose and Principle for Adjustment of the Color
Temperature
• Purpose: Adjust the color temperature to reduce the
deviation of the module color temperature.
• Principle : To adjust the white balance without the
saturation, Fix the one of R/G/B gain to C0 and decrease
the others.
7.2. Adjustment Mode
: Two modes of Cool and Warm for only RGB input
(Medium data is automatically calibrated by the Normal data)
- Required Equipment
• Remote controller for adjustment
• Color Analyzer: CA-110 or CA-210 or same product
- LCD MNT(ch : 9)
- Input Signal Information
• Input the RGB (1920*1080@60, 216 Gray Pattern)
(MSPG-1025 Model : 126, Pattern:78)
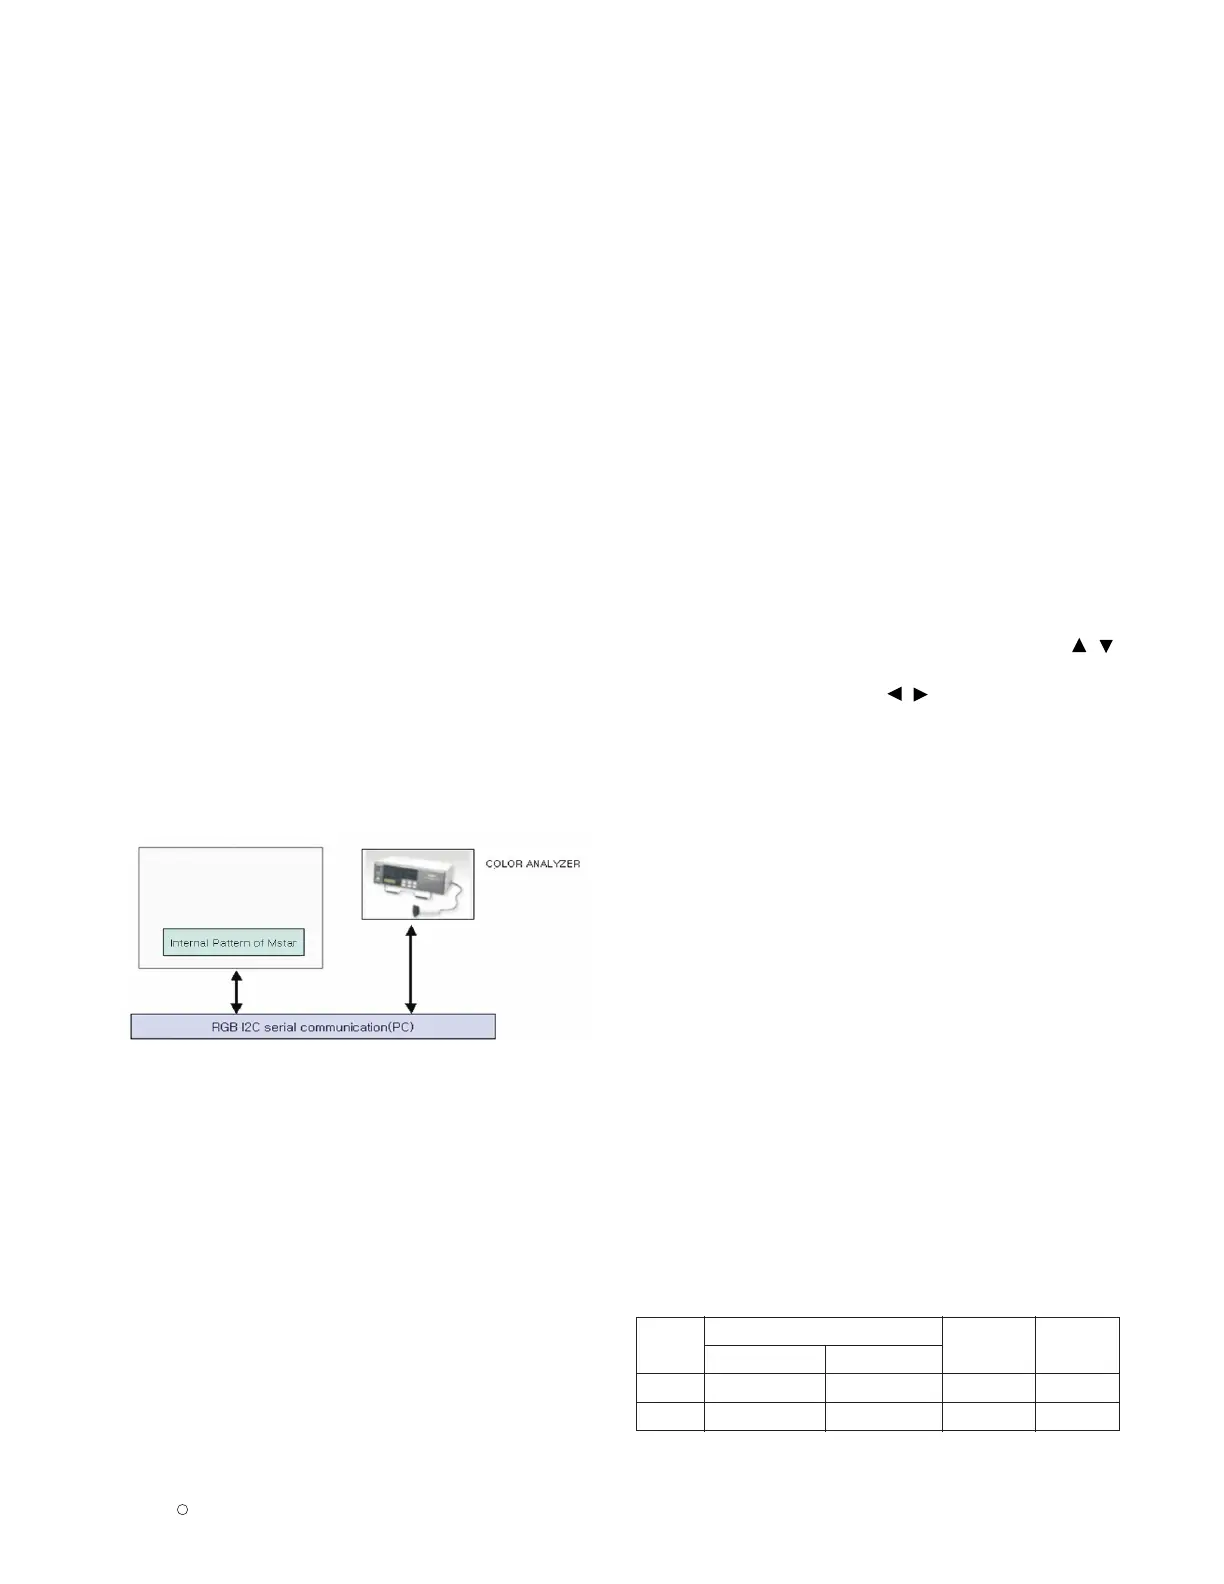
7.3. Connecting Diagram of Equipment for Measuring
(For Automatic Adjustment)
(1) Enter the adjustment mode of DDC
- Set command delay time : 50ms
- Enter the DDC adjustment mode at the same time heat-
run mode when pushing the power on by power only
key
- Maintain the DDC adjustment mode with same condition
of Heat-run
-> Maintain after AC off/on in status of Heat-run pattern
display)
(2) Release the DDC adjustment mode
- Release the adjust mode after AC off/on or std-by off/on
in status of finishing the Hear-run mode)
- Release the Adjust mode when receiving the aging off
command(F3 00 00) from adjustment equipment)
- Need to transmit the aging off command to TV set after
finishing the adjustment.)
- Check DDC adjust mode release by exit key and release
DDC adjust mode)
(3) Enter the adjust mode of white balance
Enter the white balance adjustment mode with aging
command(F3, 00, FF)
* Luminance min value is 200cd/m
2
in the cool mode( For LCD)
7.4. Adjustment of White Balance for Manual Adjustment
• Adjustment mode : Two modes (Cool & Warm)
(Medium data is automatically calibrated by the Cool data)
• Color analyzer(CA110, CA210) should be used in the
calibrated ch by CS-1000(.(LCD : CH9, PDP : CH10)
• Operate the zero-calibration of the CA-110 or CA-210, then
stick sensor to the module when adjusting.
• For manual adjustment, it is also possible by the following
sequence.
1) Select white pattern of heat-run by pressing “POWER
ON” key on remote control for adjustment then operate
heat run longer than 15 minutes.
(If not executed this step, the condition for W/B will be
differ )
2) Push “Exit” key.
3) Change to the AV mode by remote control.(Push front-
AV)
4) Input external pattern(85% white pattern)
5) Stick sensor to center of the screen and select each
items (Red/Green/Blue Gain and Offset) using /
(CH + / -) key on R/C..
6) Adjust R/ G/B Gain using
/
(
VOL + / -) key on R/C.
(Fix the one of R/G/B and change the others).
7) Adjust two modes (Cool and Warm)..
8) When Adjustment is completed, Exit adjustment mode
using EXIT key on R/C
[CASE]
First adjust the coordinate much away from the target
value(x, y).
1. x, y > target
a) Decrease the R, G.
2. x, y < target
a) First decrease the B gain,
b) Decrease the one of the others.
- In case of decreasing the x, decreasing the R: fix G
- In case of decreasing the y , decreasing the G: fix R
3. x > target , y < target
a) First decrease B, so make y a little more than the
target.
b) Adjust x value by decreasing the R
4. x < target , y > target
a) First decrease B, so make x a little more than the
target.
b) Adjust x value by decreasing the G
9) When adjustment is completed, Exit adjustment mode
using EXIT key on R/C.
• Standard color coordinate and temperature when using the
CA-110 or CA210 equipment
Mode
Color coordinate
Temp ∆uv
XY
Cool 0.276±0.002 0.283±0.002 11,000K 0.000
Warm 0.313±0.002 0.329±0.002 6,500K 0.003
 Loading...