5
ENGLISH
When installing the sensor kit, make sure that the insulating material is not torn or fall off while de-
taching or attaching the motor cover. (If the finish of the insulating material is defective, air may
leak out.)
Caution
!
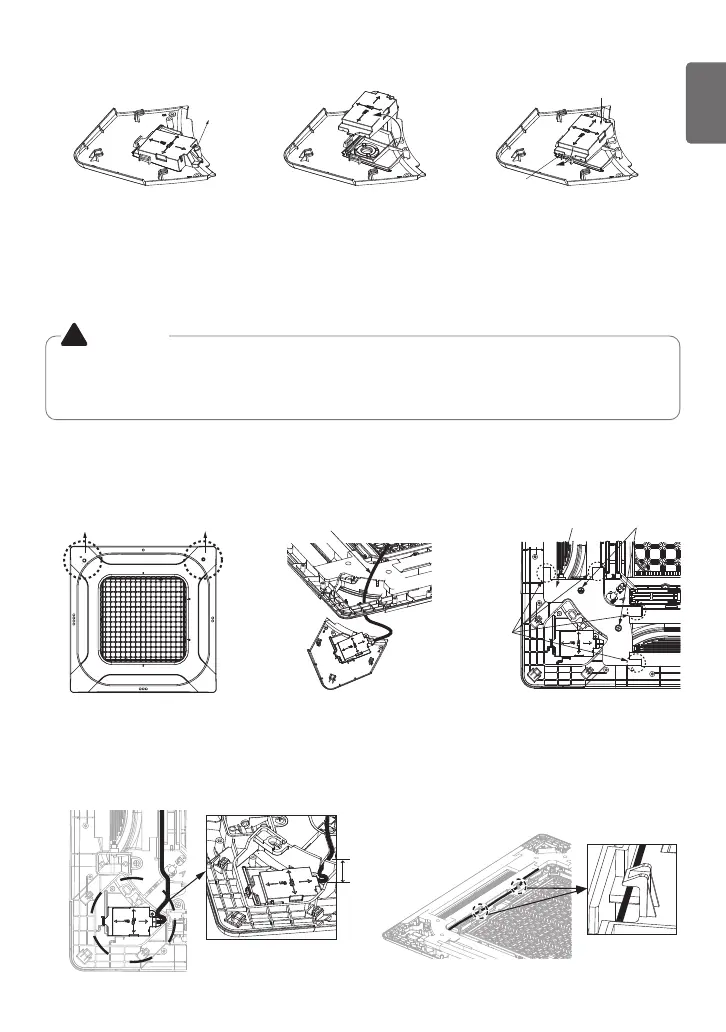
1-3. After installing the Human Detection Sensor kit, set the installation direction of the kit
(general, 90-degree rotated). Refer to the remote control manual for details on how to set
the installation direction.
2. Attach the kit to the panel.
2-1. Detach the corner cover at the installation location of the kit.
2-2. To mount the kit, insert the connecting wire into the space that appears when the
corner cover is detached.
2-3. Detach the motor cover by loosening two screws.
2-4. Organize the connecting wire as shown in the figure, and attach the motor cover.
(Secure a margin of approximately 6 - 10 cm for the connecting wire to make it
easy to detach the Human Detection Sensor kit.)
2-5. Align the connecting wire to the wire guide and fix it with the hooks.
Figure. 2-1 Figure. 2-3Figure. 2-2
Figure. 2-4
Remove ScrewsMotor CoverDetach Corner Cover
Display PCB Connecting Wire
Insulating
Material
Attachment
Parts
Figure. 2-5
Figure. 90-degree Rotated Installation
Remove Screws
Rotate PCB
Assembly
Tighten Screws
Fix with Hooks
Fix with Hooks
1-2. The default factory setting is for general installation, and you can rotate the PCB 90 de-
grees depending on the site conditions.