The provided manual describes the "RESU HV forced charging manual For RESU 10H Only," a guide for the forced charging of the LG Chem RESU 10H battery. This document, dated 2018.03.23, is classified under a "General" security level, indicating it's suitable for broad distribution. The manual outlines the necessary tools, disassembly procedures, battery voltage checks, fuse inspection, and the use of a portable charger for the RESU 10H battery.
Function Description:
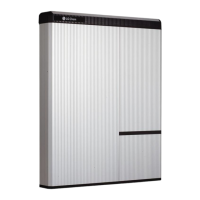
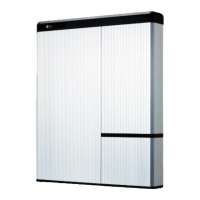
The RESU 10H is a high-voltage (HV) battery energy storage unit manufactured by LG Chem. This manual specifically addresses a "forced charging" procedure, which implies a method to charge the battery when standard charging methods might not be feasible or when the battery's state requires a specific charging intervention. This could be necessary in scenarios where the battery has deeply discharged or requires a controlled initial charge. The manual is exclusively for the RESU 10H model, indicating specific procedures tailored to its design and specifications. The overall function of the RESU 10H, as part of LG Chem's Energy Solution Company, is to store electrical energy for various applications, likely including residential or commercial energy storage systems, to provide backup power, or to optimize energy consumption.
Important Technical Specifications (Implied/Derived):
While explicit technical specifications for the RESU 10H are not fully detailed in the provided pages, several key parameters can be inferred from the charging and inspection procedures:
- Voltage Range: The portable charger is pre-set to 151-153 volts, and the target voltage for charging is 151 volts. This indicates that the RESU 10H operates at a nominal voltage around this range. The voltmeter check also measures DC voltage, confirming the battery's direct current nature.
- Current: During charging, the "current knob" on the portable charger is adjusted to approximately 5 amps. This suggests a recommended charging current for the forced charging procedure.
- Fuse Resistance: The resistance of the fuses (+) and (-) should be 0.2 ± 0.1 Ω. This is a critical specification for verifying fuse integrity and ensuring proper electrical flow within the battery system.
- Bolt Torque: When reassembling the inside top cover, a torque of 6 Nm is specified for the 10mm bolts. This is crucial for maintaining the structural integrity and sealing of the battery enclosure.
- Charger Model: The recommended power supply model for forced charging is the VOLTEQ HY20010EX. This provides a specific reference for the type of equipment required.
Usage Features:
The manual details a step-by-step process for performing forced charging, emphasizing safety and precision.
- Tool Requirements:
- Tools must have insulated grips to prevent electrical shock.
- Tools should have minimal exposed metal, and any exposed metal should be covered with insulation tape. This highlights a strong emphasis on electrical safety during maintenance.
- Specific tools mentioned include a socket wrench and a 10mm nut. Insulation shoes and insulation gloves are also required, further reinforcing safety protocols for handling high-voltage equipment.
- Disassembly Procedure:
- The process begins with opening the wiring box cover (2-10 degrees) and pulling it to remove.
- A critical safety step is to ensure the internal battery breaker (and AUX power switch for RESU10H-SEG models) is in the OFF position. If the battery is connected to an inverter, the inverter switch must also be off. This prevents accidental power surges or electrical hazards during disassembly.
- The top cover is removed by prying up at the back corners.
- The inside top cover is removed using a socket wrench and a 10mm bolt, with 6 hexagonal bolts needing to be loosened (marked with red circles in the diagram).
- The plug-in connector must be disassembled (also marked with red circles).
- Checking Battery Voltage:
- A voltmeter is set to DC voltage.
- Voltage is measured across the positive and negative terminals of the fuses.
- Checking for Blown Fuse:
- The battery cable must be disconnected from the DC/DC converter.
- The resistance of the fuses (+) and (-) is verified, with an expected value of 0.2 ± 0.1 Ω.
- Using the Portable Charger:
- The power cable for the power supply is plugged in, and the breaker switch is turned on.
- The power button on the charger is pushed to the "on" position.
- The voltage is verified to be pre-set to 151-153 volts.
- Limited voltage can be adjusted using two knobs on the right, though this should generally not be necessary if the charger hasn't been tampered with.
- The power button is then pushed "off."
- Crucially, the power cable is connected directly to the battery, not to the DC/DC converter.
- The green power button is pressed to initiate charging.
- The charger displays the current voltage, which should increase rapidly at first, then slowly until 151 volts is reached. If voltage doesn't increase, the current knob (far left) is slowly turned to five amps.
- Charging is expected to take 30 minutes to one hour.
Maintenance Features:
The manual implicitly provides maintenance features through its troubleshooting section and detailed inspection steps.
- Troubleshooting Guide: A dedicated troubleshooting section is provided for instances where difficulties arise during charging. This guide offers a systematic approach to resolve common issues:
- Turn unit off (green switch out).
- Turn "O.V. Set" knob (second from left) all the way to the right.
- Turn "current" knob (far left knob) all the way left.
- Turn unit on (green switch in).
- Turn far-left "current" knob approximately ¼ turn right.
- Using far right "voltage" knob, set charger to 151 volts.
- Turn charger off (green switch out).
- Plug unit in to RESU battery.
- Turn unit on (green switch in).
- Turn "current" knob right to approximately 5 amps.
- Battery should now be charging, with amperage tapering down as it reaches 151 volts.
- Fuse Inspection: The procedure for checking for blown fuses (disconnecting cables and measuring resistance) is a key maintenance step to diagnose and potentially resolve power delivery issues.
- Voltage Verification: Regularly checking battery voltage is a fundamental maintenance practice to monitor the battery's state of charge and overall health.
- Proper Reassembly: The specified torque for bolts (6 Nm) during reassembly ensures that the battery enclosure is properly sealed and secured, which is vital for the longevity and safety of the unit.
- Safety Protocols: The emphasis on insulated tools, gloves, and shoes, along with ensuring breakers and inverter switches are off, are critical safety maintenance protocols that prevent injury and damage to the device during any service or charging operation.
In summary, this manual provides a comprehensive guide for a specific, potentially critical, maintenance operation (forced charging) for the LG Chem RESU 10H battery, with a strong focus on safety, precision, and troubleshooting.