EasyManua.ls Logo

LG WT1501CW - User Manual

LG WT1501CW
6 pages
Print Icon
To Next Page IconTo Next Page
Loading...
4"
_tjsxzwjxzkŅhnjsyhqjfwfshjktw|fyjwqnsjxfsifnwņt|0fqqt|rnsnrzrhqjfwfshjxtkfy
qjfxyCns/"D/Ghr-fyymjxnijxfsiFns/"CBhr-gjmnsiymjzsny/Mjxzwjytfqqt|ktw|fqq0
ittw0twņttwrtqinslxymfyrf~nshwjfxjymjwjvznwjihqjfwfshjx/
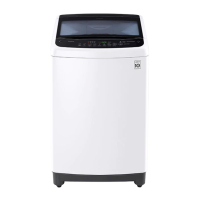
DIMENSIONS / CLEARANCES
1" 1"
E
A
B
EC&D:
4"
D
C
CONNECTING THE WATER LINES
Rubber Seal
Water Hose
(to tap)
Water Hose
(to water inlet
on washer)
Rubber Seal
Water Faucet
Cold water inlet
Hot water inlet
LG recommends the use of LG hoses. Any leaking, property damage, or
damage to the washing machine caused by an improper installation or by
the use of non-LG hoses is not covered under the terms of the LG warranty
and is the sole responsibility of the customer and/or an installer.
bfyjwxzuuq~uwjxxzwjrzxygjgjy|jjsDBuxnfsiCDBuxn"CEKKDJp[f-/Tk
ymj|fyjwxzuuq~uwjxxzwjnxrtwjymfsCDBuxn0fuwjxxzwjwjizhnsl{fq{jrzxy
gjnsxyfqqji/
CONNECTING THE DRAIN HOSE
Tie Stra p
EI<
(99 cm )
EI<
(99 cm )
Tie Stra p
K<"DBhr)
Tie Stra p
_mjiwfnsmtxjxmtzqifq|f~xgj
uwtujwq~xjhzwji/Qfnqzwjytuwtujwq~
xjhzwjymjiwfnsmtxjhfswjxzqyns
ņttinslfsiuwtujwy~ifrflj/
_mjiwfnsrzxygjnsxyfqqjins
fhhtwifshj|nymfs~fuuqnhfgqjqthfq
htijxfsiwjlzqfyntsx/
Xfpjxzwjymfyymjiwfnsmtxjnxsty
xywjyhmji0unshmji0hwzxmji0twpnspji/
Ytwrfqmjnlmytkymjjsitkymjmtxj
xmtzqigjfuuwt}nrfyjq~EG<FJ<
"B/IC/Dr-kwtrymjņttw/
TsxujhyymjymwjfijiŅyynsltsjfhmmtxjfsi
make sure there is a rubber seal in place in
gtymjsixtkjfhmmtxj/
Ntssjhyymj|fyjwxzuuq~mtxjxytymjSZ_
fsiNZWO|fyjwkfzhjyxynlmyq~g~mfsifsi
ymjsynlmyjsfstymjwD&Eyzws|nymuqnjwx/
Always run a gallon or two of water through
jfhmnsqjymtxjytņzxminwy0xhfqjfsitymjw
ijgwnxtzytkymj|fyjwqnsjx/Otnslxt|nqq
mjquuwj{jsykzyzwjuwtgqjrx|nymhqtllji
Ņqyjwxhwjjsx0fsi|nqqfqxtfqqt|~tzyt{jwnk~
|mnhm|fyjwqnsjnxmtyfsi|mnhmnxhtqi/
Attach the hot water line to the hot water
inlet on the back of the washer. Attach the
htqi|fyjwqnsjytymjhtqi|fyjwnsqjyts
ymjgfhptkymj|fxmjw/_nlmyjsymjŅyynslx
xjhzwjq~/_zwsZYgtymkfzhjyxfqqymj|f~fsi
hmjhpktwqjfpxfygtymjsixtkymjmtxjx/
Drain Hose
STANDPIPE Option
LAUNDRY TUB Option
Otstynsxjwyymjjsitk
ymjiwfnsmtxjnsytymj
xyfsiunujrtwjymfsK
nshmjx"DBhr-/Doing so can
cause siphoning, odors, or
improper draining.
Otstyzxjymnxiwfnsmtxj
|nymfņttwiwfns/_mjjsi
tkymjiwfnsmtxjrzxygjfy
qjfxyDInshmjxfgt{jymjņttw
ktwuwtujwiwfnsnslytthhzw/
Otstynsxyfqqymjjsitkymjiwfnsmtxjqt|jwymfs
DIns/"JE/Jhr-twmnlmjwymfsIHns/"DFE/Khr-fgt{j
ymjgtyytrtkymj|fxmjwtwrtwjymfsHBns/
(152.4 cm) away from the washer.
Yj{jwhwjfyjfsfnwynlmyxjfqgjy|jjsymjmtxjfsiymj
iwfns|nymyfujtwtymjwrjfsx/Tkstfnwlfunxuwjxjsy0
|fyjwhfsgjxnumtsjitzytkymjyzgwjxzqynslnsuttw
|fxm&wnsxjujwktwrfshjtwhqtymnslifrflj/
_mj|fxmjwxmtzqigjuqzlljinsytfCDBaLN0HBS
lwtzsijiEuwtsltzyqjy/[qzlnsymj|fxmjw/Truwtujw
htssjhyntstkymjjvznurjsylwtzsinslhtsizhytwhfswjxzqy
nswnxptkjqjhywnhxmthp/Nmjhp|nymfvzfqnŅjijqjhywnhnfs
twxjw{nhjyjhmsnhnfsnk~tzfwjnsitzgyfxyt|mjymjwymj
fuuqnfshjnxuwtujwq~lwtzsiji/Otstyrtink~ymjuqzl
uwt{niji|nymymjfuuqnfshj/TknyitjxstyŅyymjtzyqjy0mf{j
fuwtujwtzyqjynsxyfqqjig~fvzfqnŅjijqjhywnhnfs/Qfnqzwjyt
ktqqt|ymjxj|fwsnslxhfshfzxjxjwntzxnsozw~0Ņwj0jqjhywnhfq
xmthp0twijfym/
_mjut|jwtzyqjyrzxygj|nymnsHBnshmjx"C/Gr-tkjnymjw
xnijtkymj|fxmjw/
_mjfuuqnfshjfsitzyqjyrzxygjutxnyntsjixtymfyymjuqzl
is easily accessible.
Otstyt{jwqtfiymjtzyqjy|nymrtwjymfstsjfuuqnfshj/
_mjtzyqjyrzxygjlwtzsijinsfhhtwifshj|nymhzwwjsy
|nwnslhtijxfsiwjlzqfyntsx/
_nrjijqf~kzxjtwhnwhznygwjfpjwnxwjhtrrjsiji/
Tynxymjujwxtsfqwjxutsxngnqny~fsitgqnlfyntstkymjuwtizhy
t|sjwytmf{jfuwtujwtzyqjynsxyfqqjig~fvzfqnŅji
electrician.
CONNECT TO THE POWER SUPPLY
WT1501CW
QUICK INSTALL &
CLEARANCES
Qtwkzqqnsxyfqqfyntsinwjhyntsx&hqjfwfshjx
uqjfxjwjkjwytymjhtwwjxutsinsl
`xjwXfszfqfsiTsxyfqqfyntsRznij/
DIMENSIONS
L bniym DJ:
M Sjnlmy FBE&K:
N Ojuym DKE&K:
O Sjnlmy|nymqnitujs GGE&K:
P Xnsnrzr{jwynhfqxufhj GH:
Nfwyts"b}S}O- DIC&D:}FEJ&CB:}ECC&F:
bjnlmy"[wtizhy&Nfwyts- CEJ/Eqgx&CGD/Jqgx
POWER SOURCE
]fynslx N^LWnxyji
Pqjhywnhfq]jvznwjrjsyx CDBa0GLrux
Type Electric
LG Brand_Top Load Washers Fin_1.indd 2 8/22/17 11:55 AM
Question and Answer IconNeed help?

Do you have a question about the LG WT1501CW and is the answer not in the manual?

Summary

WT1501 CW QUICK INSTALL & CLEARANCES

WT1901 C* QUICK INSTALL & CLEARANCES

WT7200 CW QUICK INSTALL & CLEARANCES

WT7500 CW QUICK INSTALL & CLEARANCES

WT7600 H*A QUICK INSTALL & CLEARANCES

WT7700 H*A QUICK INSTALL & CLEARANCES

CONNECT TO THE POWER SUPPLY

Safety and installation instructions for the electrical power connection.

Overview

This document outlines the quick installation and clearances for several LG Top Load Washers, including models WT1501CW, WT1901C*, WT7200CW, WT7500CW, WT7600HA, and WT7700HA. It provides essential information for setting up the appliance, focusing on power supply, water line connections, and drain hose setup to ensure safe and efficient operation. For comprehensive instructions, users are directed to consult the full User Manual and Installation Guide.

Function Description

These LG Top Load Washers are designed to efficiently clean laundry using a combination of water, detergent, and mechanical action. They are equipped to handle various fabric types and soil levels, offering a range of wash cycles and options to suit different needs. The washers require a stable power supply, proper water connections for both hot and cold water, and an effective drainage system to function correctly. The design emphasizes ease of use while ensuring thorough cleaning performance.

Usage Features

The installation guide highlights several key usage features related to the setup and operation of the washing machine:

  • Power Supply: The washer must be connected to a 120-VAC, 60-Hz grounded 3-prong outlet. This ensures electrical safety and proper functioning. The power outlet should be easily accessible and located within 60 inches (1.5 m) of either side of the washer. It is crucial not to overload the outlet with multiple appliances. The outlet must be grounded according to current wiring codes and regulations, and a time-delay fuse or circuit breaker is recommended for protection. Users are advised to consult a qualified electrician if there are any doubts about proper grounding or outlet installation.
  • Water Supply: The washing machine requires both hot and cold water connections. LG strongly recommends using LG hoses for these connections to prevent leaks and property damage, which are not covered under the LG warranty if non-LG hoses are used or if installation is improper. The water supply pressure should be between 20 psi and 120 psi (138~827 kPa). If the pressure exceeds 120 psi, a pressure reducing valve must be installed. Before connecting, users should inspect the threaded fittings on each hose to ensure a rubber seal is in place at both ends. The hoses should be connected to the HOT and COLD water faucets tightly by hand, followed by an additional 2/3 turn with pliers. It is recommended to flush a gallon or two of water through each inlet hose to clear out dirt, scale, and debris from the water lines. This also helps verify which line is hot and which is cold. The hot water line should be attached to the hot water inlet on the back of the washer, and the cold water line to the cold water inlet. After securing the fittings, both faucets should be turned ON completely, and both ends of the hoses should be checked for leaks.
  • Drainage System: Proper drain hose installation is critical to prevent flooding and property damage. The drain hose must always be securely fastened and installed in accordance with applicable local codes and regulations. It is important to ensure the drain hose is not stretched, pinched, crushed, or kinked, as this can impede drainage. The normal height for the end of the drain hose should be approximately 35"–47" (0.9–1.2 m) from the floor. For a standpipe option, the end of the drain hose should not be inserted more than 8 inches (20 cm) into the standpipe to avoid siphoning, odors, or improper draining. For a laundry tub option, the drain hose should not be used with a floor drain, and its end must be at least 29 inches above the floor for proper drainage. The drain hose should not be installed lower than 29 inches (73.7 cm) or higher than 96 inches (243.8 cm) above the bottom of the washer, or more than 60 inches (152.4 cm) away from the washer. Crucially, an airtight seal between the hose and the drain should never be created using tape or other means. An air gap is necessary to prevent water from siphoning out of the tub, which can lead to poor wash/rinse performance or damage to clothing.
  • Clearances: To ensure adequate airflow and space for water lines, a minimum clearance of at least 1 inch (2.5 cm) at the sides and 4 inches (10 cm) behind the unit is required. Users must also account for wall, door, or floor moldings that might increase these clearance requirements.

Maintenance Features

While the document primarily focuses on installation, some aspects touch upon maintenance through proper setup:

  • Preventative Measures for Water Supply: Flushing a gallon or two of water through each inlet hose before connection helps clear dirt, scale, and debris from the water lines. This proactive step prevents future problems with clogged filter screens, which could otherwise impact water flow and machine performance.
  • Ensuring Proper Drainage: The detailed instructions for drain hose installation, including height requirements and the necessity of an air gap, are crucial for maintaining efficient drainage. Incorrect installation can lead to siphoning, which not only affects wash performance but can also cause damage to the machine or clothing. By following these guidelines, users can prevent common drainage issues that might require future maintenance or repairs.
  • Electrical Safety: The emphasis on proper grounding, using recommended fuses or circuit breakers, and avoiding outlet overload contributes to the long-term electrical safety and reliability of the appliance, reducing the risk of electrical issues that could necessitate repairs.
  • Use of LG Hoses: The recommendation to use LG hoses for water connections is a maintenance-related feature, as it aims to prevent leaks and property damage. Using approved components minimizes the risk of failures that could lead to costly repairs or water damage.

LG WT1501CW Specifications

General IconGeneral
Door hingeUp
Motor typeBeltless
Control typeTouch
Display typeLED
Loading typeTop-load
Product colorWhite
Built-in displayYes
Appliance placementFreestanding
Dispenser tray type3-way
Drum capacity- kg
Delay start (max)19 h
Spin-drying class-
Maximum spin speed1100 RPM
Noise level (wash)- dB
Load balancing systemNo
Number of washing programs8
Current5 A
AC input voltage120 V
Energy consumption washing per cycle- kWh
Package depth795.9 mm
Package width749.3 mm
Package height1110 mm
Package weight69535.7 g
Weight and Dimensions IconWeight and Dimensions
Depth720.7 mm
Width685.8 mm
Height1025.5 mm
Weight61552.5 g
Depth with door open1381.1 mm

Related product manuals