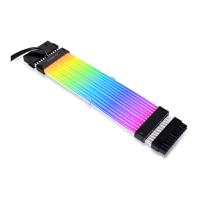
Strimer Plus V2
8 PIN Extension 300 mm
x 1 pc
更換接頭⽅向3步驟:
注 意!⾸ 先 檢 ⽰8p i n線 材 的 接 頭 ⽅ 向 是 否 符 合 所 安 裝 的 顯 ⽰ 卡 , 若 不 符 合 要 先 更 換 接 頭 ⽅ 向 。
Attention! Check orientation of the GPU 8 pin connector before installation. If in the other
way, follow below instructions to change the direction.
3 Steps to change the direction of the connector:
3.將卡扣推回扣件組。
3. Assemble all the buckles and cable combs.
完成更換 接頭⽅向。8 PIN
Direction of the 8 PIN connector is
reversed.
180°
2. Flip the cable.
2.翻轉排線。
!
翻轉 度。 180
Rotate 180 degrees.
1.先將各扣件組解開。
1. Release all the buckles and cable combs.
inward
包 內 容 物
Package contents /
安
Installation /
1
1
1
2
outward
2
1
1
1
outward
卡扣分別外推及內推,即可拿出排線與燈條。
Out pull the latch at both end of the buckle
and push inward of the smaller buckle to
release the cable from the lighting diffuser.
卡扣分 別 外推 及 下扣, 即 可將 排 線與
燈條安 裝 回去 。
線 連 接 南
Cable connection guide /
Controller not included.
Reminder! Please purchase Stimer Plus V2 24 Pin,
or Strimer L-Connect 3 Controller.
white buckle x 2 pcs white buckle x 2 pcs
or /
或
5 V
12 V
警告:請不要連接錯誤類型的
L E D接頭 , 如 果 連 接 到1 2 V接⼝,
將造成永久損壞。
Warning: Do not connect the
wrong type of LED connector. If it
is connected to the 12 V connector,
permanent damage will occur.
!
連接⾄主機板 。5 V ARGB 3 pin 接頭
Connect to Motherboard 5 V ARGB
3 pin header.
!
x 1 pc
Strimer Plus V2
8 PIN Extension 300 mm
不含 控 制 器 。
提醒!請 購 買 ,或St i m e r P l us V 2 2 4 P i n
控制 器 。St r i m e r L -C o n n e c t 3
!
注 意!可 以 更 換 ⽩ ⾊ 卡 扣 。
Able to swap to the white
buckles.
!
PW8-PV2
G50.PW8 - PV2.00
100P板 A4面彩印 摺2摺(摺再摺)
Out pull the both end of cable comb
and push the buckle downward to
install the cable and lighting diffuser.