Do you have a question about the Life Fitness FIT SERIES and is the answer not in the manual?
| Brand | Life Fitness |
|---|---|
| Model | FIT SERIES |
| Category | Home Gym |
| Language | English |
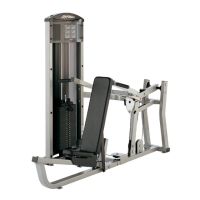
Detailed list of all components and their identifiers for the LAT/ROW machine.
Specifies the necessary tools for correctly assembling the LAT/ROW equipment.
Loosely assemble the LAT/LOW BASE to the TOWER using specified hardware.
Assemble the LAT/LOW FRAME to the base and the FOOT PLATE to the frame.
Insert guide rods, cushions, weight plates, head plate assembly, and shaft collars.
Loosely assemble the LAT/LOW BOOM to the TOWER and LAT/LOW FRAME.
Securely tighten all previous frame connections and install RH CAPS.
Insert pivot shafts and securely assemble LAT/LOW PLATES to the frame and seat.
Securely assemble the LAT SEAT PAD to the LAT/LOW SEAT.
Assemble the SWIVEL PULLEY to the LAT/LOW FRAME using specified hardware.
Securely assemble the LAT/LOW ADJUST PLATE and TAPPED SHAFT to the frame.
Route the LAT CABLE and assemble pulleys to the LAT/LOW BOOM.
Securely assemble a pulley to the LAT/LOW BOOM using specified hardware.
Route the LAT CABLE around a pulley and install the WEIGHT STACK PIN.
Route ROW CABLE around pulleys and assemble them to the SWIVEL PULLEY and LAT/LOW FRAME.
Route the ROW CABLE around a pulley and connect it to the TAPPED SHAFT.
Assemble the KNEE HOLD DOWN and ROLLER PADS to the LAT/LOW FRAME.
Assemble the LOW ROW BAR and LAT BAR to the respective cables using snap links.
Make cable tension adjustments and apply weight stack labels for optimal performance.
Securely assemble the TOP, FRONT, and REAR SHROUDS to the TOWER.
Essential safety rules and warnings for using the exercise equipment.
Details the warranty periods for different parts of the equipment.
Guidelines for cleaning, inspection, and lubrication to maintain the equipment.