EasyManua.ls Logo

Lifebreath 95MAX series User Manual

Lifebreath 95MAX series
36 pages
To Next Page IconTo Next Page
Page #1 background imageLoading...
Page #1 background image
69-MaxSeries
1011
Residential Heat Recovery Ventilators (HRV)
Operation and Installation Manual
Max Series
155MAX
155ECM*
155MAXRX
200MAX*
200MAXRX*
195DCS*
195ECM*
300DCS*
95MAX*
5 Speed Electronics
Lifestyle MAX Digital Control included
This product earned the EERGY STAR by
meeting strict energy efficiency guidelines set by
atural Resources Canada and the US EPA. It
meets EERGY STAR requirements only when
used in Canada.
*
Question and Answer IconNeed help?

Do you have a question about the Lifebreath 95MAX series and is the answer not in the manual?

Lifebreath 95MAX series Specifications

General IconGeneral
BrandLifebreath
Model95MAX series
CategoryFan
LanguageEnglish

Summary

Safety and Important Installation Notices

Critical Installation Advisory

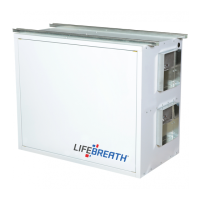
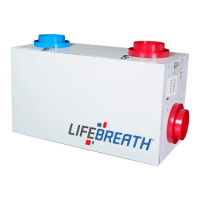
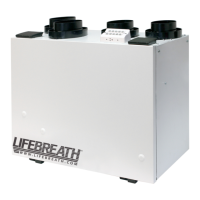
Manual must be read before unit installation.

Electrical Safety Precautions

Disconnect power, confirm polarity, use voltmeter, ensure grounding.

HRV Maintenance Routine

Inspect Exterior Hoods

Check for blockages like leaves, snow, or frost.

Clean Air Filters

Instructions for removing and cleaning the washable air filters.

Clean HRV Core

Steps for removing, cleaning, and reinstalling the heat recovery core.

Clean Drain Line and Duct Work

Clean condensate drain line, P-trap, and internal ductwork.

Electrical Hazard Warning

Turn off power before any service or maintenance.

HRV Installation Methods

Simplified Installation Method

Connects HRV to furnace return for ventilation.

Partially Dedicated Installation Method

Draws stale air from specific rooms and supplies fresh air.

Fully Dedicated Installation Method

Stand-alone system drawing stale and supplying fresh air.

Simplified Installation Diagrams

Simplified Installation (Return/Return Method)

Key points and diagram for the simplified installation.

Partially Dedicated Installation Diagrams

Partially Dedicated System Overview

Draws stale air from specific rooms and supplies fresh air.

Backdraft Damper Requirement Warning

Warning about the necessity of a backdraft damper for stale air ducts.

Fully Dedicated Installation Diagrams

Fully Dedicated System Overview

Stand-alone system drawing stale and supplying fresh air.

General Installation Procedures

Unit Location Recommendations

Guidance on choosing an appropriate installation space.

Suspending the Unit with Hanging Straps

Instructions for hanging the unit using adjustable straps.

Unit Leveling and Adjustment

Steps to level the unit for proper condensate drainage.

Installation and Service Safety Warning

Emphasizes that installation and service must be done by qualified personnel.

Drain Connections and Grille Installation

Main Control Installation

Mounting Options for Main Control

Installing the control on a switch box or surface mount.

Separating Face Plate and Back Plate

How to separate the control's face and back plates.

Marking and Drilling for Control Installation

Marking locations and drilling holes for control mounting.

Wiring and Securing the Main Control

Connecting wires and attaching the control's back plate.

Attaching the Face Plate to the Back Plate

Aligning and attaching the face plate to the back plate.

Connecting Control Wire to Ventilator

Connecting the control wire to the ventilator's terminal block.

HRV Interlocking and Advanced Controls

Interlocking HRV with Forced Air System

Ensures HRV operates when the furnace blower is active.

Air Flow Balancing Procedures

Importance of Air Flow Balancing

Ensures balanced air introduction and exhaustion for efficiency.

Balancing Preparation Steps

Steps to take before starting the air balancing procedure.

Balancing Air Flows with a Pitot Tube

Step 1: Drill Duct Holes for Pitot Tube

Drilling holes for pitot tube insertion in air streams.

Step 2: Measure Stale Air Flow

Inserting pitot tube and averaging reading for stale air.

Step 3: Measure Fresh Air Flow

Repeating measurement for fresh air stream.

Step 4: Seal Holes and Adjust Dampers

Sealing holes and adjusting dampers for balanced airflow.

Determining CFM from Airflow Readings

Calculating airflow in CFM using velocity pressure and duct area.

Air Flow Balancing using Door Ports

Prepare Air Flow Measuring Device

Connecting hoses to magnehelic gauge or manometer.

Insert Hoses into HRV Door Ports

Inserting rubber fittings into the HRV door ports.

Remove Door Port Covers

Removing covers to access the door ports.

Operate HRV and Forced Air System

Running the HRV and furnace blower at high speed.

Measure Airflows via Door Ports

Connecting gauge to ports and recording readings for both air streams.

Refer to Airflow Reference Chart

Using charts to determine airflow rates based on readings.

Balance Airflows by Adjusting Dampers

Adjusting dampers to equalize fresh and stale airflows.

Reinstall Door Port Covers

Removing fittings and reinstalling port covers.

Balancing Collar Instructions and Kits

Troubleshooting your HRV System

Troubleshooting Poor Air Flows

Identifies causes and solutions for low or unbalanced airflow.

Troubleshooting Cold Supply Air

Addresses issues with cold supply air temperature.

Troubleshooting Dehumidistat Operation

Solutions for dehumidistat not operating or set incorrectly.

Troubleshooting High Humidity and Condensation

Addresses causes of high humidity and window condensation.

Troubleshooting Low Humidity Levels

Solutions for low humidity and HRV speed settings.

Troubleshooting HRV/Ducts Frosting Up

Identifies causes and solutions for frost formation.

Troubleshooting Ductwork Condensation/Ice

Addresses issues with condensation or ice in insulated ductwork.

Troubleshooting Water in HRV Bottom

Solutions for water accumulation in the HRV unit.

Residential Wiring Diagrams

Wiring Diagrams for 155ECM and 195ECM

Related product manuals