Do you have a question about the Lifestyle Solutions RELAX A LOUNGER and is the answer not in the manual?
| Product Name | Lifestyle Solutions RELAX A LOUNGER |
|---|---|
| Category | Indoor Furnishing |
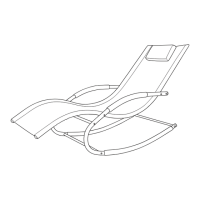
| Type | Lounger |
| Style | Modern |
| Assembly Required | Yes |
Product designed for one adult; prohibits jumping to prevent injury and damage.
Product is for home use only and not for commercial applications.
Recommended two people for handling, with an extra hand being beneficial.
Contains vital safety information; read and retain for future reference.
Detailed list of all parts required for assembly, including quantities.
List of all hardware components, including bolts, washers, and hex key, with quantities.
Initial connection of parts for the footrest and headrest sections.
Securing the fabric seat to the frame components.
Slotting the headrest and footrest sections together.
Using hex key and bolts (C) to loosely secure the frame.
Using hex key, bolts (B), and washers (E) to attach seat supports.
Using hex key and bolts (D) to attach armrest components.
Tightening all previously installed bolts securely.
Attaching the headrest cushion (Part 7) to the lounger.