EasyManua.ls Logo

Lifetime 0040 User Manual

Lifetime 0040
20 pages
To Next Page IconTo Next Page
Page #1 background imageLoading...
Page #1 background image
Icon Legend...............................4
Warnings & Notices.....................5
Assembly..................................6
Registration............................14
Warranty.................................17
TOOLS REQUIRED TABLE OF CONTENTS
Requires 655 lb (297 kg) of concrete mix. See the Assembly
Instructions to complete the assembly of your Lifetime
®
Basketball System.
Requires 3+ days for concrete to cure, plus 2-3 hours to
complete assembly steps for the in-ground basketball
system (not included).
2+ people recommended for setup.
ASSEMBLY INSTRUCTIONS
IN-GROUND BASKETBALL POLE
GROUND SLEEVE
MODEL 0040
Save this instruction in the event that the manufacturer has
to be contacted for replacement parts.
BEFORE ASSEMBLY:
(1) (1)
9/16"
(1) (1)
(1)(1)
30"
655 lb (297 kg)
CONTACT LIFETIME
®
CUSTOMER SERVICE:
Call: 1-800-225-3865
7:00 am–5:00 pm (Monday–Friday) MST
and 9:00 am–1:00 pm Saturday MST
QUESTIONS?
Model Number: 0040
Product ID:
For Customer Service in Mainland
Europe and the United Kingdom,
E-mail: cs@lifetimeproducts.eu
Live Chat:
www.lifetime.com/customerservice
Pour le français, voir la page 2. Para el español, ver la página 3.
(6-8)
COPY
Question and Answer IconNeed help?

Do you have a question about the Lifetime 0040 and is the answer not in the manual?

Lifetime 0040 Specifications

General IconGeneral
Product NameLifetime 0040
CategorySports & Outdoors
SportBasketball
FoldableNo
PortableYes
Adjustment Increments6 inches
Adjustment Range7.5 ft. to 10 ft. (2, 2 m to 3 m)
ColorBlack
Warranty5 years

Summary

Icon Legend

Safety Warnings and Notices

Assembly

Hardware Required

Lists the necessary hardware components for the assembly process.

Parts Required

Lists the required parts for the assembly process.

Tools Required

Lists the tools needed to perform the assembly steps.

Install Ground Sleeve and Pole

Guides on sliding the cap and inserting the pole into the ground sleeve.

Apply Wedge Stickers

Instructs on applying stickers to the wedge and inserting it into the sleeve.

Dig Hole and Position Sleeve

Details on digging the hole, stacking bricks, and positioning the ground sleeve.

Fill Hole and Set Concrete

Guides on finishing concrete fill, shaping the surface, and checking alignment.

One-Piece Pole Concrete Setup

Specific concrete and rebar placement instructions for one-piece poles.

Three-Piece Pole Concrete Setup

Specific concrete and rebar placement instructions for three-piece poles.

Final Pole Insertion and Wedge

Details on marking, inserting the pole, and securing the wedge.
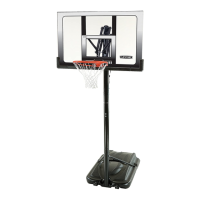
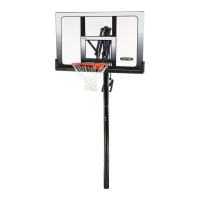
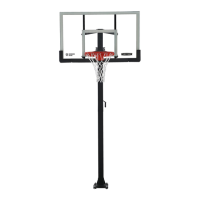
Product Registration

5-Year Limited Factory Warranty

Related product manuals