15
TOOLS AND HARDWARE REQUIRED / OUTILS ET QUINCAILLERIE REQUIS / INSTRUMENTAL Y HERRAJE REQUERIDOS
X SECTION 1 (CONTINUED) / SECTION 1 (SUITE) / SECCIÓN 1 (CONTINUACIÓN)
6
1.2
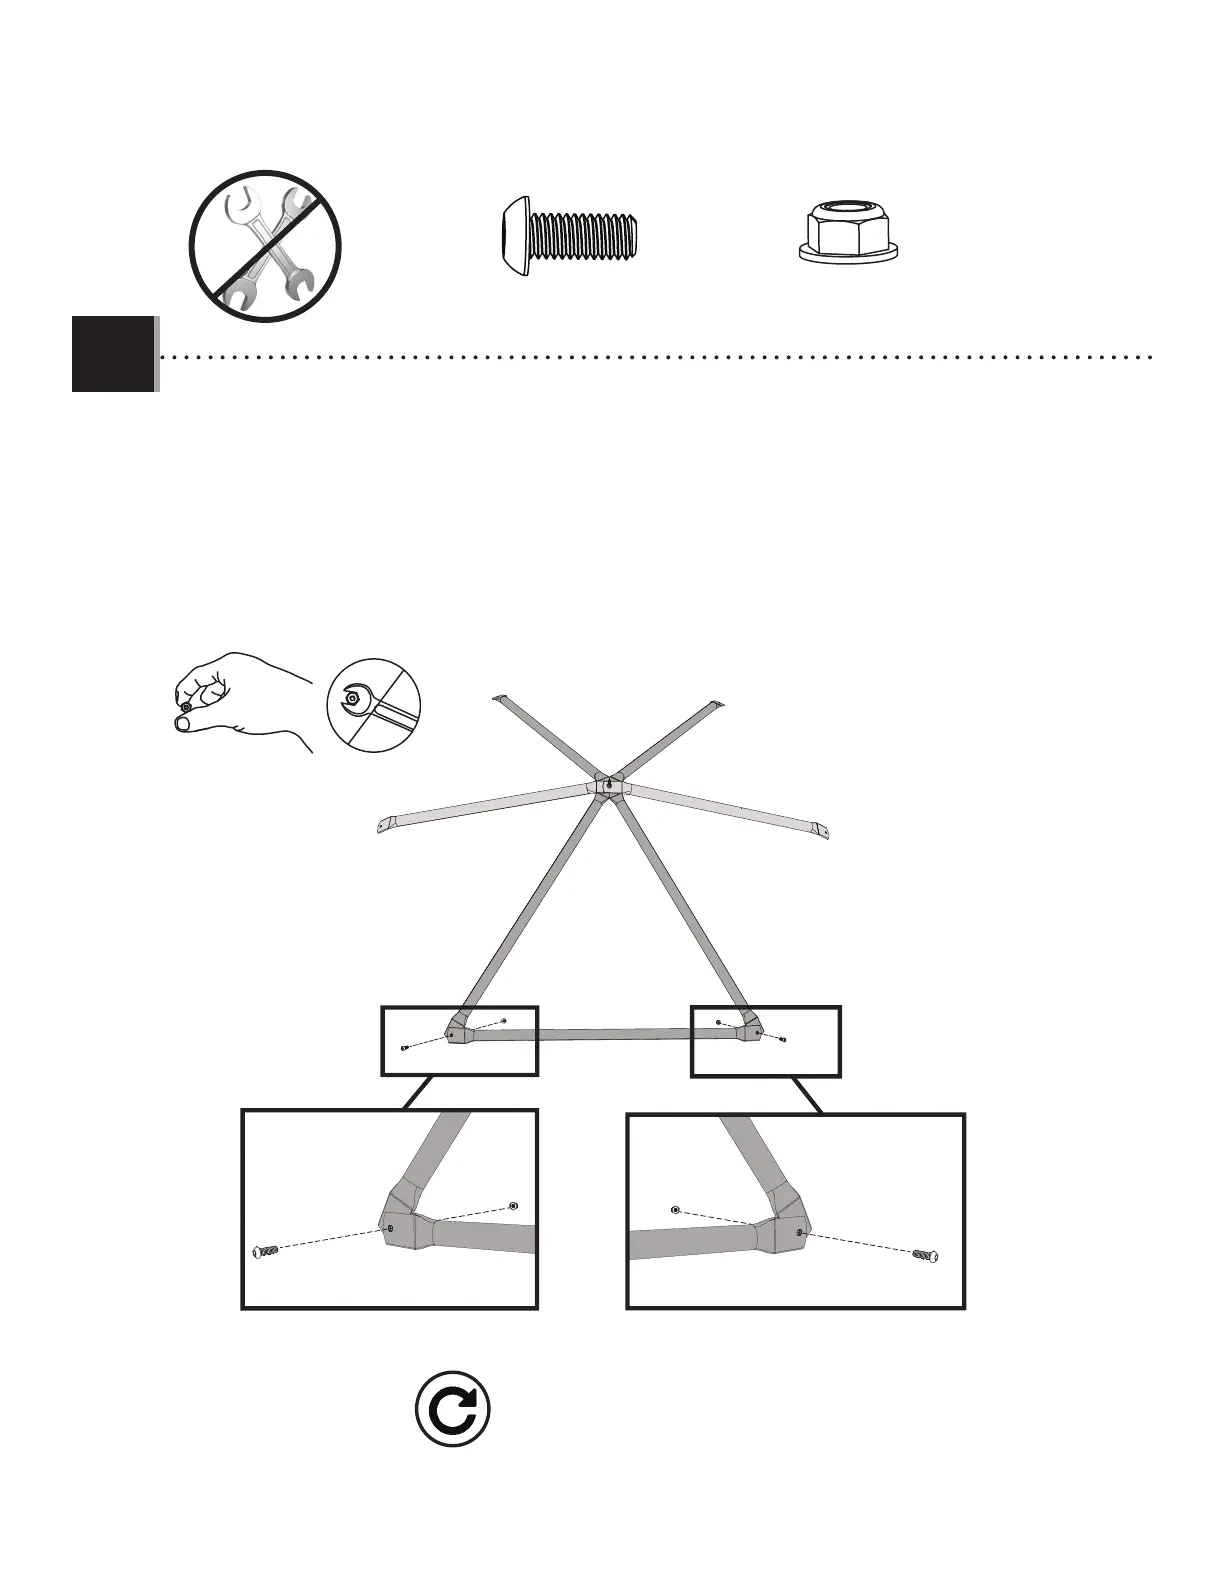
• Attach a Blue Tube (CPD) to the bottom of the assembly completed in the previous step (Joint A) with the
hardware indicated. Finger-tighten the Nylock Nut for removal later. Follow the same assembly for Joint B.
• Fixez un tube bleus (CPD) au bas de l'assemblage terminé à l'étape précédente (assemblage A) avec la
quincaillerie indiquée. Serrez à la main l'écrou Nylock pour le retirer plus tard. Suivez le même montage pour
l’assemblage B.
• Adhiera un tubo azules (CPD) a la parte inferior del ensamblado terminado en el paso anterior (Unión A) con
los elementos indicados. Apriete con los dedos la tuerca Nylock para retirarla posteriormente. Siga el mismo
ensamblado para la Unión B.
Joint A / Junta A
Joint B / Junta B
CPD
• Repeat this step on all fi ve assemblies.
• Répétez cette étape sur les cinq assemblages
• Repita este paso en los cinco ensambles.
GAV (x10)
GAX (x10)
GAV
GAV
GAXGAX