16
TOOLS AND HARDWARE REQUIRED / OUTILS ET QUINCAILLERIE REQUIS / INSTRUMENTAL Y HERRAJE REQUERIDOS
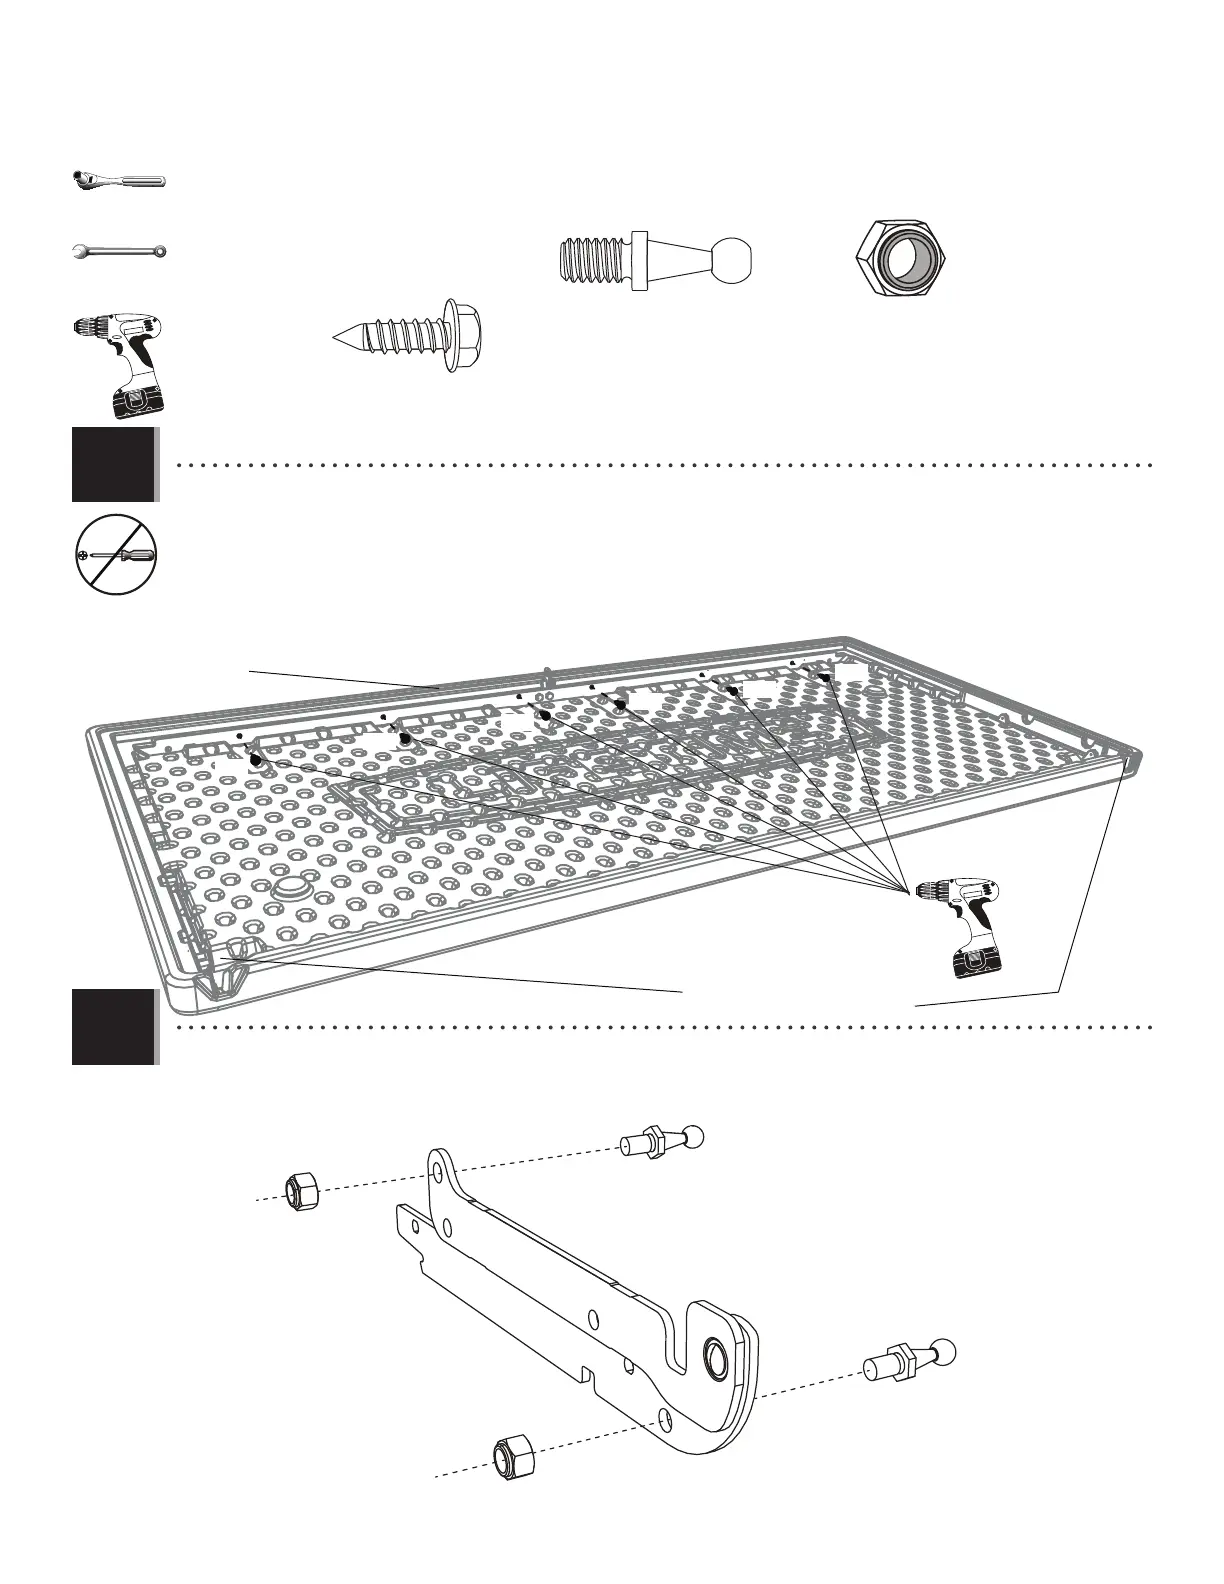
u SECTION 2 (CONTINUED) / SECTION 2 (SUITE) / SECCIÓN 2 (CONTINUACIÓN)
• The holes in the Support are smaller than the Screws (BCK); therefore, use a drill, not a wrench, to attach the
Support to the Lid using the hardware indicated. Do not overtighten.
• Les trous dans le support sont plus petits que les vis (BCK); ensuite, employer une perceuse électrique, pas une
clé, pour attacher le support au couvercle à l’aide de la quincaillerie indiquée. Ne pas trop serrer.
• Los agujeros en el soporte son más pequenos que los tornillos (BCK); entonces, usar un taladro eléctrico, no una
llave, para sujetar el soporte a la tapa usando el herraje indicado. No apretar demasiado.
• Notches at the rear of the Lid.
• Encoches à l’arrière du couvercle.
• Muescas al trasero de la tapa.
Front / Avant / Delantero
• The Hinge (EZB) goes together this way for the left side of the Lid.
• La charnière (EZB) se monte dans cette manière pour le côté gauche du couvercle.
• La bisagra (EZB) se monta en esta manera para el lado izquierdo de la tapa.
EZB
BET
BET
AAO
AAO
2.4
2.5
BCK
BCK
BCK
BCK
BCK
BCK
BCK (x6)
BET (x2)
AAO (x2)
1/2"
(13 mm)
1/2"
(13 mm)