8
TOOLS AND HARDWARE REQUIRED / HERRAMIENTAS Y ACCESORIOS REQUERIDOS / OUTILS ET ACCESSOIRES REQUIS
SECTION 1 (CONTINUED) / SECCIÓN 1 (CONTINUACIÓN) / SECTION 1 (SUITE)
1.5
1.7
1.6
1.8
(x5)
BAH (x4)
(x5)
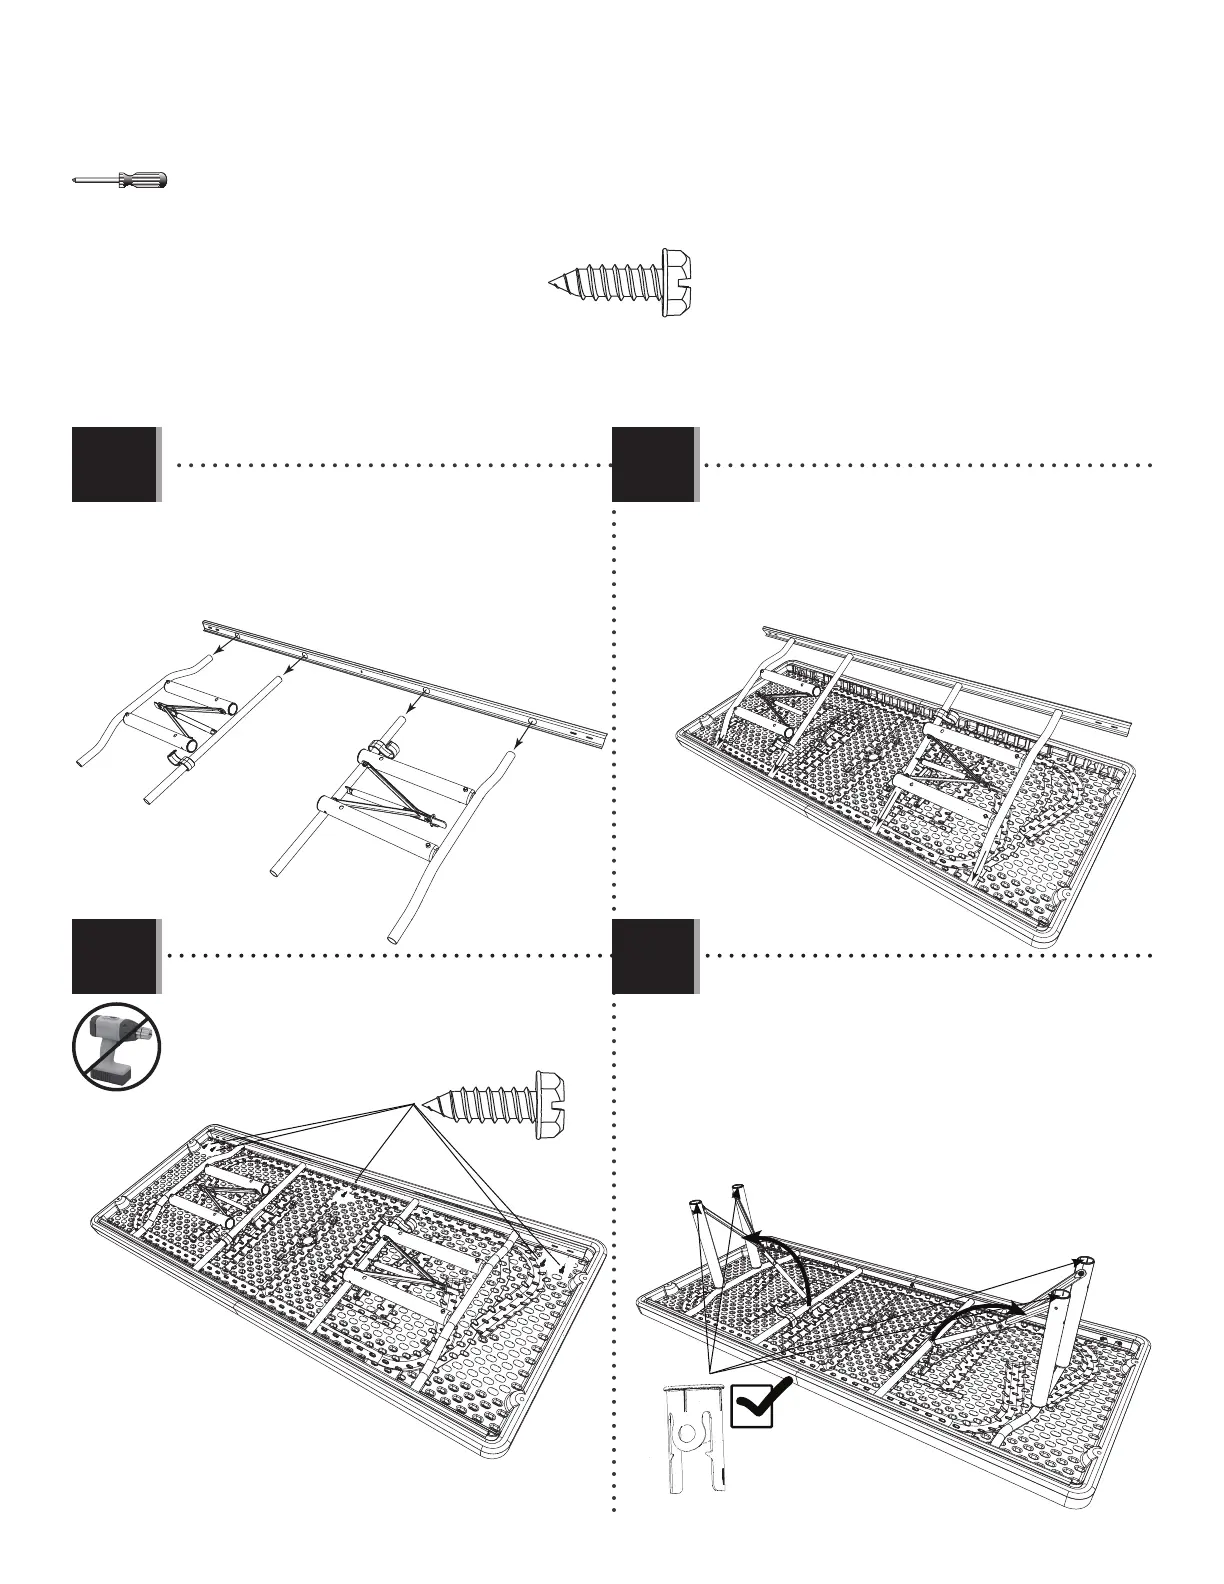
• Replace the fi ve Screws removed in Step 1.2.
• Vuelva a poner los cinco Tornillos retirados en
Paso 1.2.
• Réinsérez les cinq Vis enlevées dans l’Étape 1.2.
• Insert the Braces into the J-Channel still
connected to the Table Top.
• Inserte los Soportes dentro del Canal en forma de
«J» todavía conectado al Tablero.
• Insérez les Supports dans le Canal en forme de «
J » qui est encore conecté au Tableau.
• Slide the J-Channel over the two Braces.
• Deslice el Canal en forma de «J» sobre los dos
Soportes.
• Glissez le Canal en forme de « J » sur les deux
Supports.
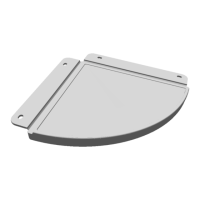
• The Bushings (BAH) should already be inside the
Brace (BAF). If not, insert them into the ends of the
Brace Assemblies.
• Los Casquillos (BAH) ya deben estar ubicados en
los Soportes (BAF). Si no, introdúzcalos dentro de los
Soportes.
• Les Bagues (BAH) doivent étre déjà ubiquées
dedans les Supports (BAF). Si non, insérez-les dedans
les extrémites des Supports.
 Loading...