EasyManua.ls Logo

Lifetime 60284 User Manual

Lifetime 60284
16 pages
To Next Page IconTo Next Page
Page #1 background imageLoading...
Page #1 background image
Scan the code, or visit go.lifetime.com/adironchair
Icon Legend...............................4
Warnings & Notices.....................5
Chair Assembly...........................6
Cleaning & Care........................11
Registration............................12
Warranty.............................13
TOOLS REQUIRED TABLE OF CONTENTS
CONTACT LIFETIME CUSTOMER SERVICE:
Call: 1-800-225-3865
Live Chat: www.lifetime.com
(click on “LIVE CHAT” tab)
QUESTIONS?
Model Number: 60284
Product ID:
Pour le français, voir la page 2. Para el español, ver la página 3.
ASSEMBLY INSTRUCTIONS
MODEL #60091
MODEL 60284
CWT (x1)
(Included)
FYE (x1)
(Included)
(x2)
(x1)
BEFORE ASSEMBLY:
Assemble on a level surface
At least 2 people recommended for assembly
ADIRONDACK
CHAIR
For Customer Service in Mainland Europe and the United Kingdom,
E-mail: csinternational@lifetime.com
WATCH THE HOW-TO ON YOUTUBE
YouTube
®
and the YouTube logo are trademarks of Google, LLC.
Question and Answer IconNeed help?

Do you have a question about the Lifetime 60284 and is the answer not in the manual?

Lifetime 60284 Specifications

General IconGeneral
BrandLifetime
Model60284
CategoryIndoor Furnishing
LanguageEnglish

Summary

Assembly Preparation and Guidance

Before Assembly

Key recommendations and preparation steps before beginning chair assembly.

Watch Assembly Video Guide

Instructions to access and view the assembly tutorial video on YouTube.

Tools and Hardware Required

List of all tools and hardware components needed for chair assembly.

Understanding Symbols and Safety

Icon Legend

Explanation of symbols and icons used throughout the assembly manual.

Safety Warnings and Notices

Crucial safety precautions and advisories for safe assembly and product usage.

Adirondack Chair Assembly

Plastic Parts Identification

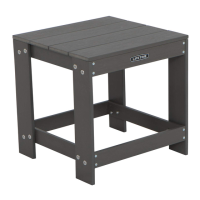
Visual identification guide for all plastic components required for assembly.

Step 1.1: Attach Outer Back Rest Panels

Connecting outer back rest panels to the main back rest using screws.

Step 1.2: Attach Back Rest to Seat

Securing the back rest assembly to the chair seat with screws.

Step 1.3: Attach Panel to Backrest Supports

Fastening the panel to the designated backrest support components.

Step 1.4: Attach Backrest Supports

Connecting backrest supports to the backrest and seat assembly.

Step 1.5: Attach Right Front Leg

Attaching the right front leg to the chair seat with specified hardware.

Step 1.6: Attach Right Arm Rest

Securing the right arm rest to the right front leg component.

Step 1.7: Repeat Left Side Assembly

Executing assembly steps 1.5 and 1.6 for the left side of the chair.

Step 1.8: Attach Armrests to Backrest Supports

Finalizing armrest attachment and tightening all assembly screws.

Product Care and Registration

Cleaning and Care Instructions

Guidelines for proper cleaning and maintenance to ensure product longevity.

Product Registration

Instructions for registering the product online to receive warranty and service updates.

Warranty Information

2-Year Limited Factory Warranty

Details of the manufacturer's limited warranty, including coverage terms and exclusions.

Related product manuals