54
TOOLS AND HARDWARE REQUIRED / OUTILS ET QUINCAILLERIE REQUIS / INSTRUMENTAL Y HERRAJE REQUERIDOS
X SECTION 4 (CONTINUED) / SECTION 4 (SUITE) / SECCIÓN 4 (CONTINUACIÓN)
3/16 in/po (≈5 mm)
AAN
ARN
CVZ (x24)
4.3
4.4
(1)
ARN
CVZ
CVZ
CVZ
CVZ
AAN
ARN (x8)
AAN (x12)
• Continue this step until all four panels are attached.
• Continuer cette étape pour attacher tous les quatre panneaux.
• Continuar este paso para sujetar todos los cuatro paneles de tejado.
!
!
1/2 in/po (≈13 mm)
(1)
AAN
AAN
CVZ
CVZ
CVZ
CVZ
ARN
ARN
ARN
ARN
ARN
ARN
CVZ
CVZ
CVZ
CVZ
CVZ CVZ
CVZ CVZ
AAN AAN
AAN AAN
CVZ
CVZ
AAN
ARX
CVZCVZ
CVZ
CVZ
CVZ
CVZ
ARXARX
ARX
AAN
AANAAN
ARX (x4)
DXP
DXP
EWX
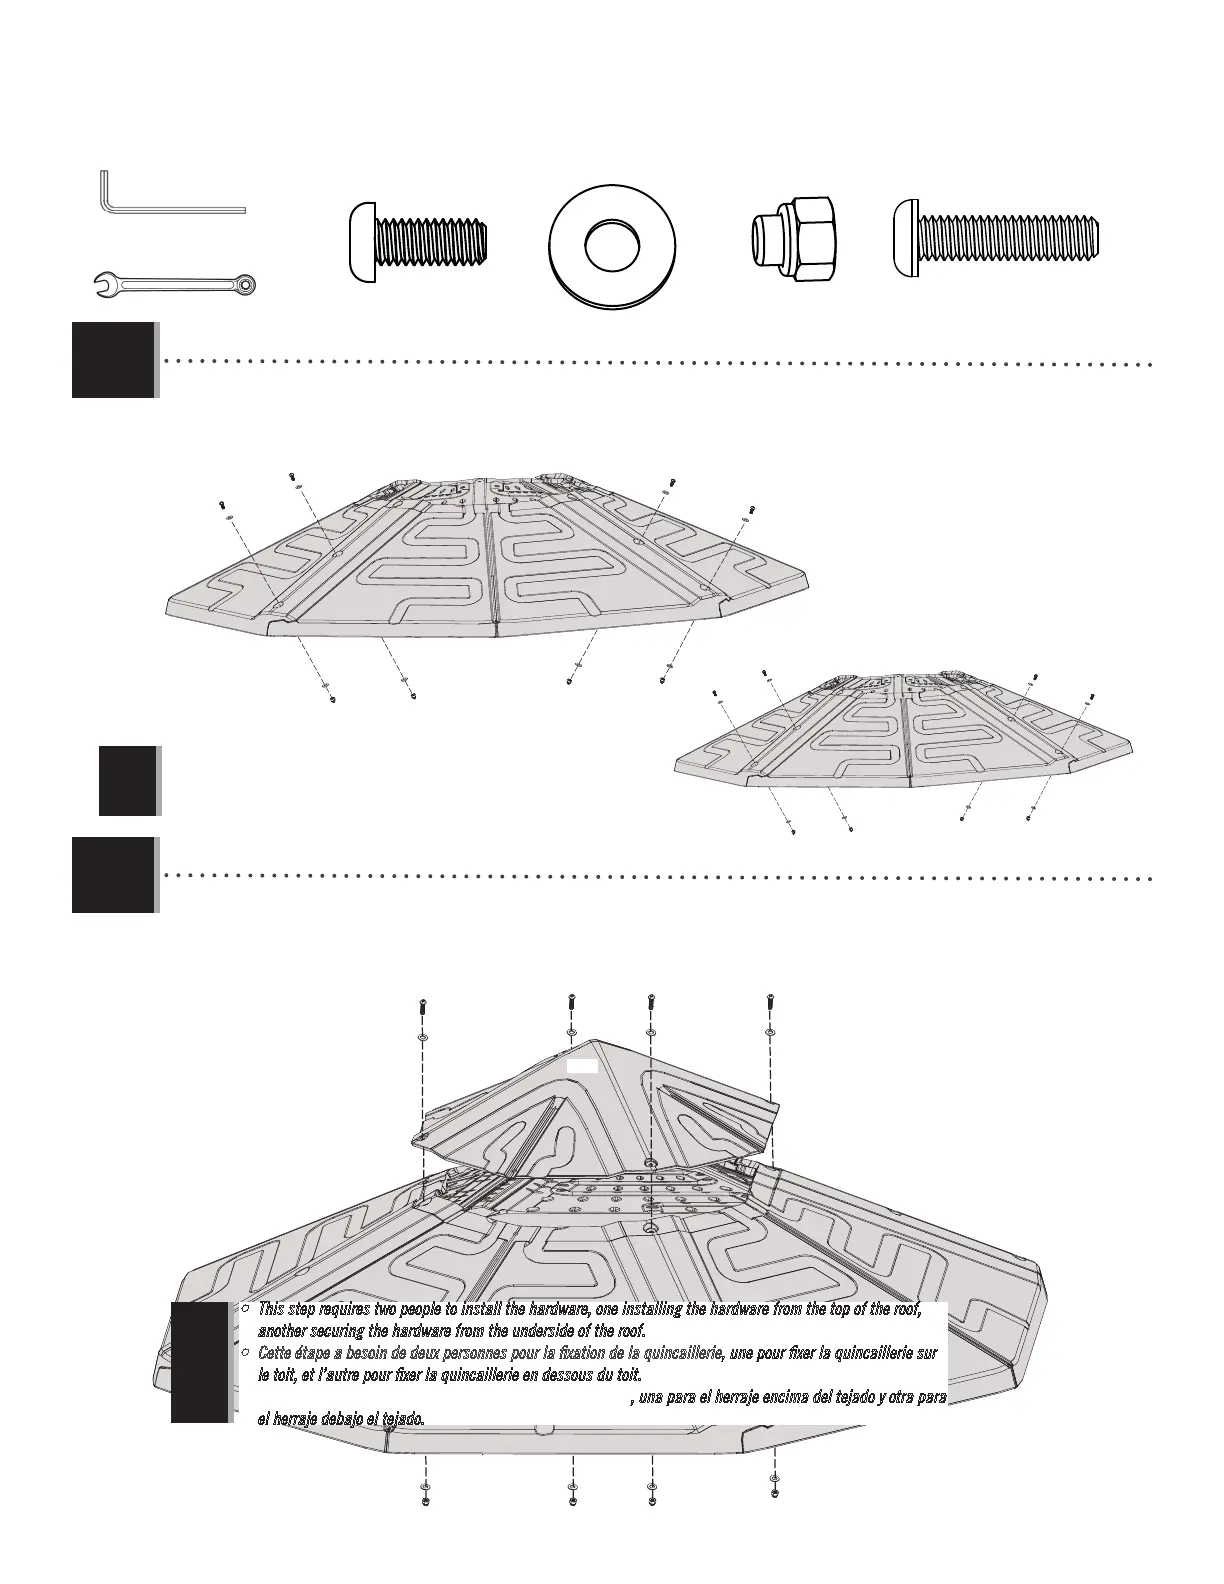
• Attach the Roof Panels (DXP) with the hardware shown.
• Attacher les panneaux de toit (DXP) les uns les autres à l’aide de la quincaillerie indiquée.
• Sujetar los paneles de tejado (DXP) los unos a los otros usando el herraje indicado.
• Line up the holes in the Roof Cap (EWX) with the holes of the roof panels and secure with the hardware indicated.
• Aligner les trous dans le chapeau de toit (EWX) avec less trous dans les panneaux de toit. Attacher-le bien à l’aide
de la quincaillerie indiquée.
• Alinear los agujeros en la cumbrera de tejado (EWX) con los agujeros en los paneles de tejado. Sujetarlo usando el
herraje indicado.
• This step requires two people to install the hardware, one installing the hardware from the top of the roof,
another securing the hardware from the underside of the roof.
• Cette étape a besoin de deux personnes pour la fi xation de la quincaillerie, une pour fi xer la quincaillerie sur
le toit, et l’autre pour fi xer la quincaillerie en dessous du toit.
• Este paso requiere dos personas para la fi jación del herraje, una para el herraje encima del tejado y otra para
el herraje debajo el tejado.