33
TOOLS AND HARDWARE REQUIRED / OUTILS ET QUINCAILLERIE REQUIS / INSTRUMENTAL Y HERRAJE REQUERIDOS
BRK (x6)
BRK (x6)
Carriage Bolts
Boulons a carosserie
Pernos de carrocería
Cap Nuts
Écrous borgnes
Tuercas ciegas
Left Door
Porte gauche
Puerta izquierda
7/16 in/po
(≈11 mm)
BQR
BQL
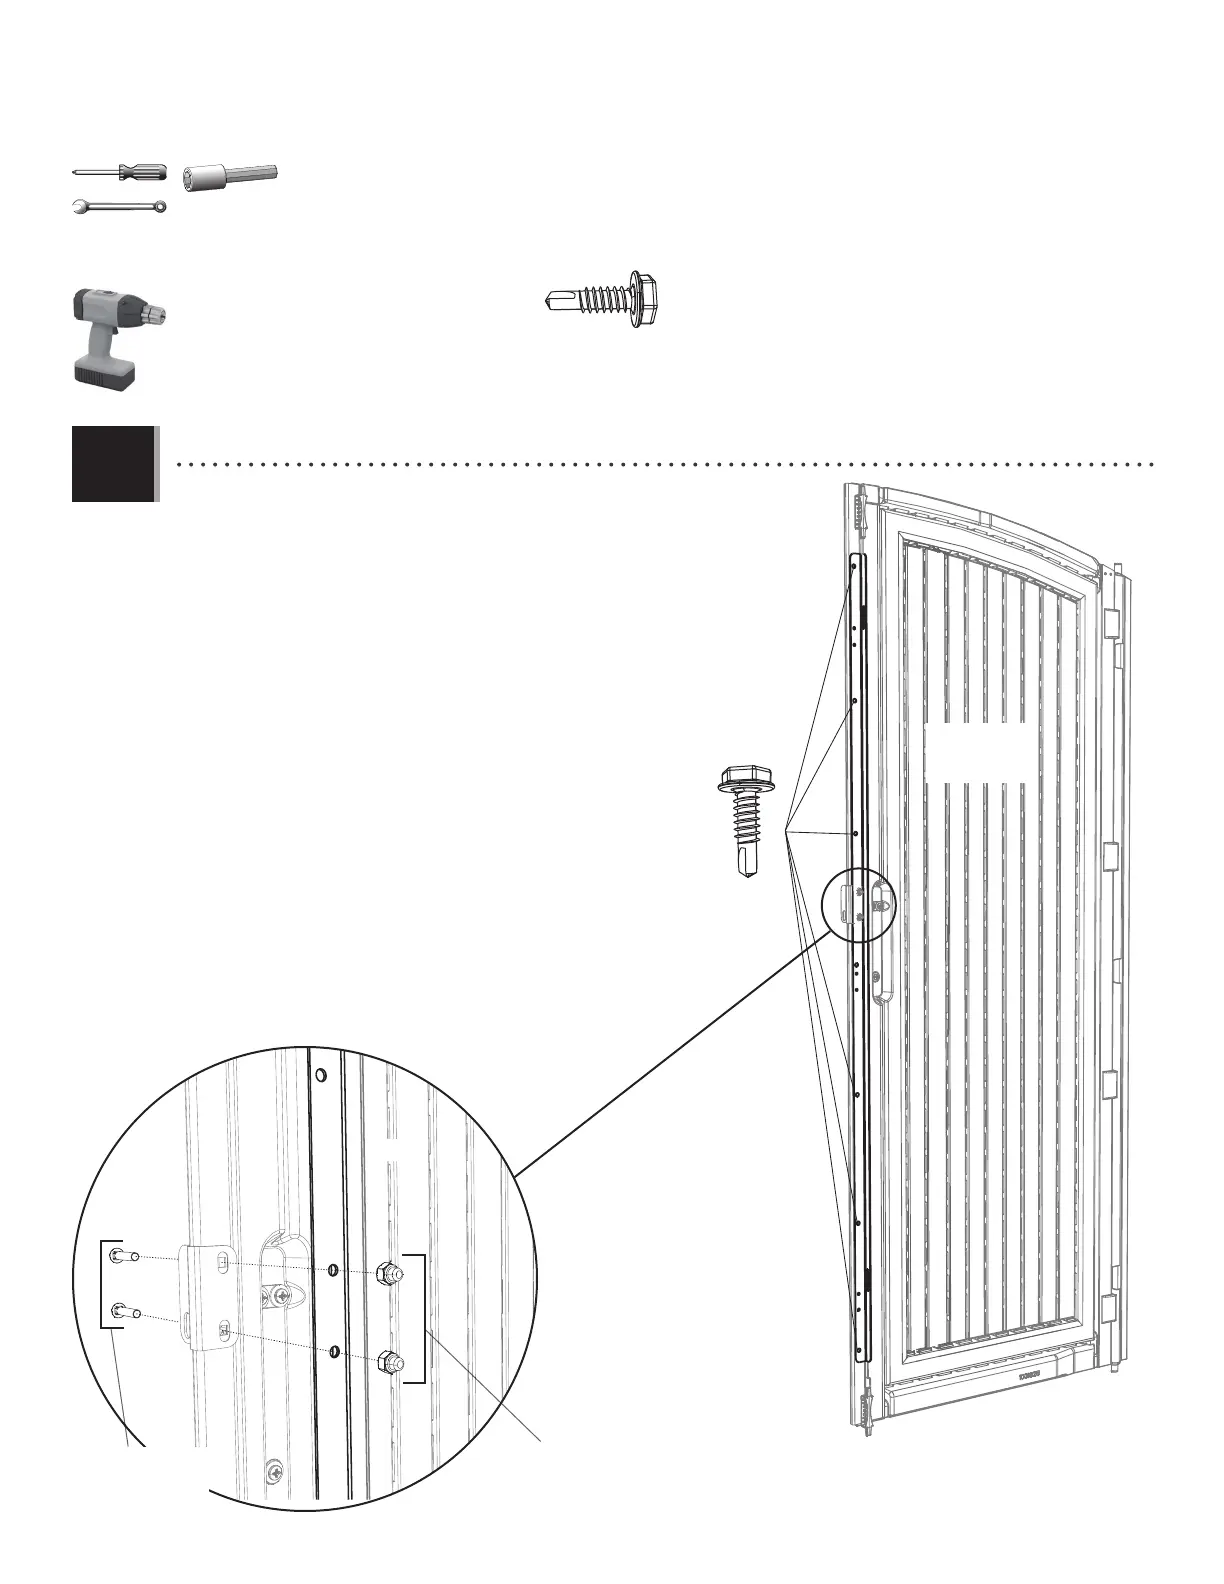
3.1
• Remove the two cap nuts from the carriage bolts and align
the two center holes in a vertical door support (BQR) with those
in the left door as shown. Secure the support to the door
using the carriage bolts and cap nuts. Finally, ensure the
support is parallel to the edge of the door and secure it using
six (6) self-tapping screws (BRK) at the locations shown.
• Enlever les écrous borgnes des boulons de carrosserie,
et aligner les deux trous centraux dans le support vertical de
la porte (BQR) avec ceux de la porte gauche comme indiqué.
Bien attacher le support à la porte à l’aide des boulons à
carrosserie et les écrous borgnes. Enfin, veiller à ce que le
support est parralel au bord du la porte, et l’attacher à l’aide
de six (6) vis autotaraudeuses (BRK) aux indroits indqués.
• Retirar las tuercas ciegas de los pernos de carrocería,
y alinear los dos agujeros centrales en el soporte vertical
para la puerta (BQR) con ellos en la puerta izquierda como
se muestra. Sujetar el soporte angular a la puerta usando
los pernos de carrocería y las tuercas ciegas. Por último,
asegurarse que el canal angular es paralelo con el borde de
la puerta, y sujetarlo usando seis (6) tornillos autoroscantes
(BRK) à las ubicaciones indicadas.
X SECTION 3 (CONTINUED) / SECTION 3 (SUITE) / SECCIÓN 3 (CONTINUACIÓN)