28
SECTION 2 (CONTINUED) / SECTION 2 (SUITE) / SECCIÓN 2 (CONTINUACIÓN)
TOOLS & HARDWARE REQUIRED / OUTILS ET QUINCAILLERIE REQUIS / INSTRUMENTAL Y HERRAJE REQUERIDOS
HARDWARE IS SHOWN TO SCALE, UNLESS NOTED OTHERWISE (*) / LA QUINCAILLERIE EST ILLUSTRÉE À L’ÉCHELLE, SAUF INDICATION CONTRAIRE (*) / SE MUESTRA EL HERRAJE A ESCALA, A
MENOS QUE SE INDIQUE LO CONTRARIO (*)
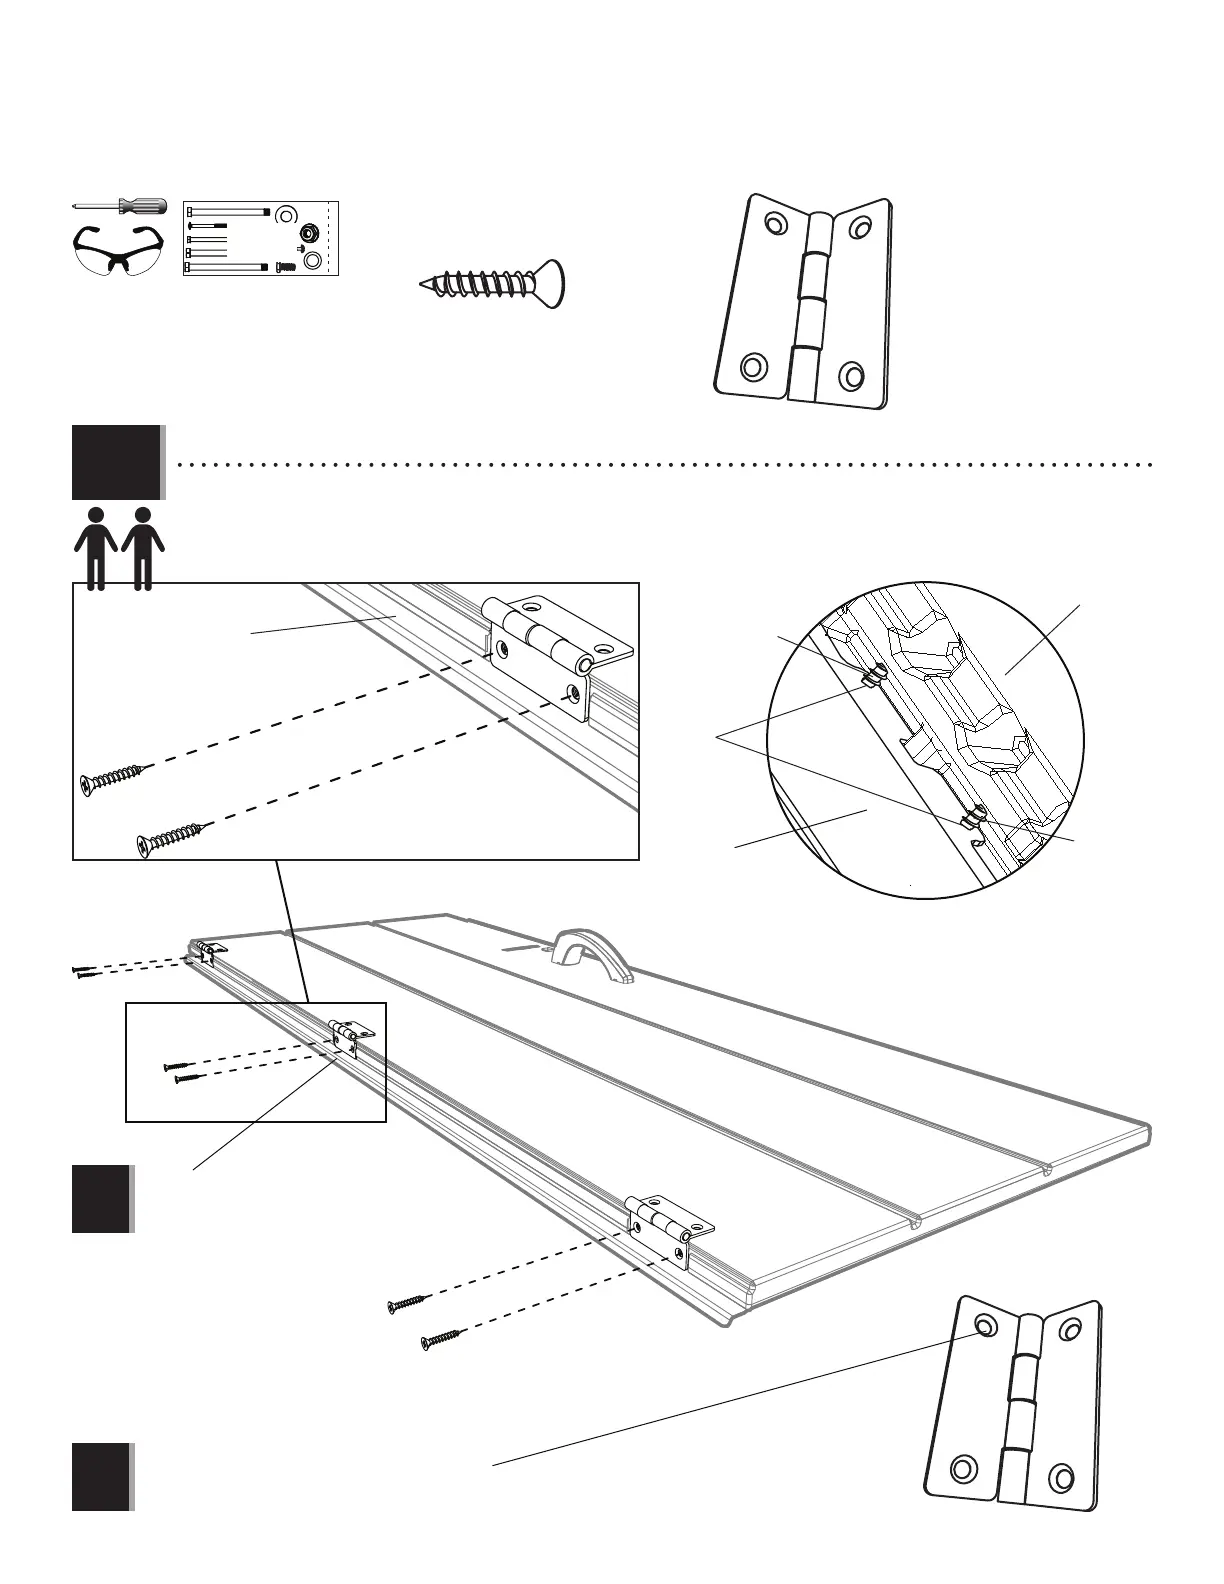
2.6
DXW
DXW
DXW
DXW
DXW
DXW
DXW
DXW
DXW
DXW
DXW (x6)
DWJ (x3)*
DWJ
• These Screws (DXW) go through the Hinge, Door, and through the holes in the Channel. Start with the center Hinge.
• Ces vis (DXW) vont à travers la charnière, la porte, et les trous dans le canal. Commencer avec la charnière centrale en premier.
• Estos tornillos (DXW) atravesan la bisagra, la puerta, y los agujeros en el canal. Comenzar con la bisagra central primero.
Rear of Door / La partie arrière de la porte
La parte trasera de la puerta
Channel / Canal / Canal
Channel / Canal
Holes
Trous
Agujeros
Door
Porte
Puerta
Note: Chamfered side faces away from Door.
Remarque : Le côté chanfreiné doit être opposé à la porte.
Nota: El lado biselado debe dar la espalda a la puerta.
Note: Start with the center Hinge.
Remarque : Commencer avec la charnière centrale.
Nota: Comenzar con la bisagra central.
!
!
GEE