40
TOOLS AND HARDWARE REQUIRED / OUTILS ET QUINCAILLERIE REQUIS / INSTRUMENTAL Y HERRAJE REQUERIDOS
X SECTION 7 (CONTINUED) / SECTION 7 (SUITE) / SECCIÓN 7 (CONTINUACIÓN)
ADZ (x15)
AHD
AHD
AGL
x5
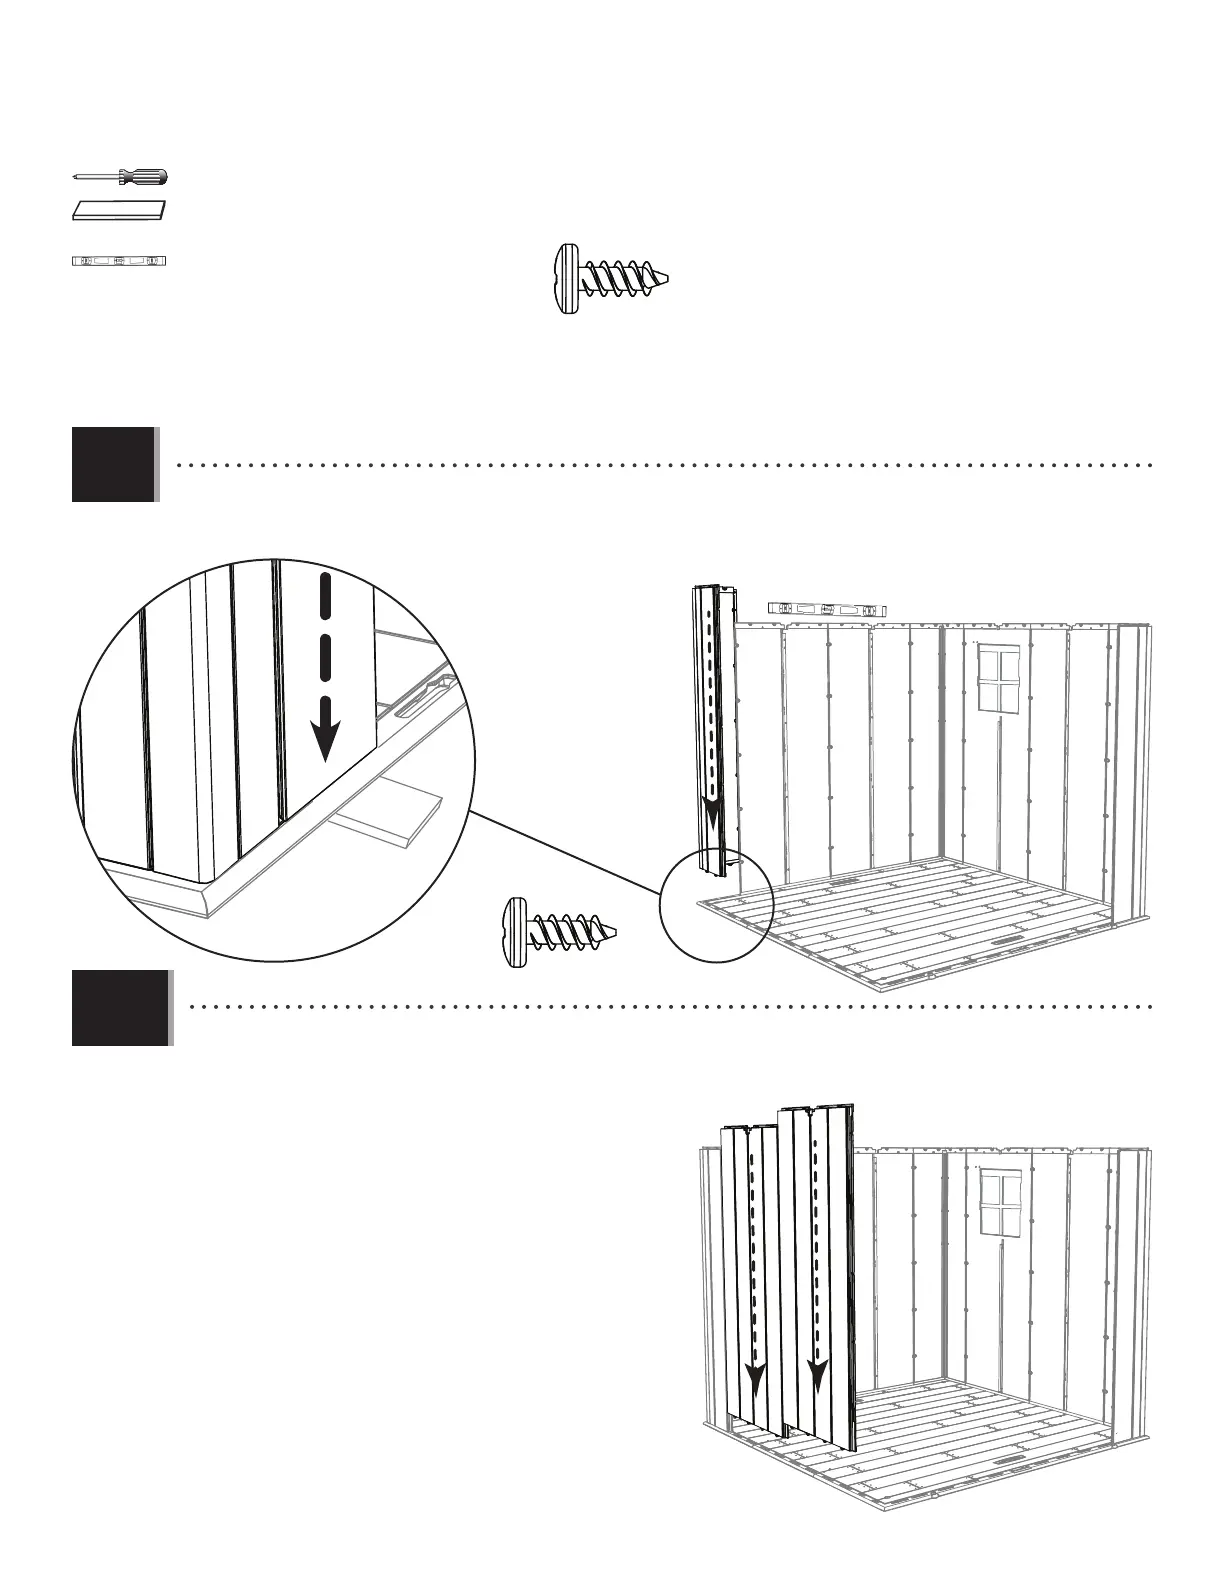
• Attach this Corner Panel in the same manner you did the previous Corner Panel.
• Attacher ce panneau angulaire de la même façon que le panneau angulaire précédent.
• Sujetar este panel angular de la misma manera que el panel angular anterior.
• Insert the tabs of two (2) Wall Panels (AHH and/or AHD)
into the slots along the left edge of the Floor. Slide the
Panels toward the Corner Panel. Secure the Panels to one
another using fi ve (5) Screws (ADZ) for each Panel.
• Insérer les languettes des deux (2) panneaux muraux
(AHH et/ou AHD) dans les fentes le long du bord gauche
du plancher. Faire glisser les panneaux vers le panneau
angulaire. Attacher les panneaux les un aux autres à l’aide
de cinq (5) vis (ADZ) pour chaque panneau.
• Insertar las lengüetas de dos (2) paneles murales (AHH y/o
AHD) dentro de las ranuras a lo largo del borde izquierdo
del piso. Deslizar los paneles hacia el panel angular.
Sujetar los paneles los unos a los otros usando cinco (5)
tornillos (ADZ) para cada panel.
7.9
7.10
(EUF)
EUF