48
TOOLS AND HARDWARE REQUIRED / OUTILS ET QUINCAILLERIE REQUIS / INSTRUMENTAL Y HERRAJE REQUERIDOS
X SECTION 9 (CONTINUED) / SECTION 9 (SUITE) / SECCIÓN 9 (CONTINUACIÓN)
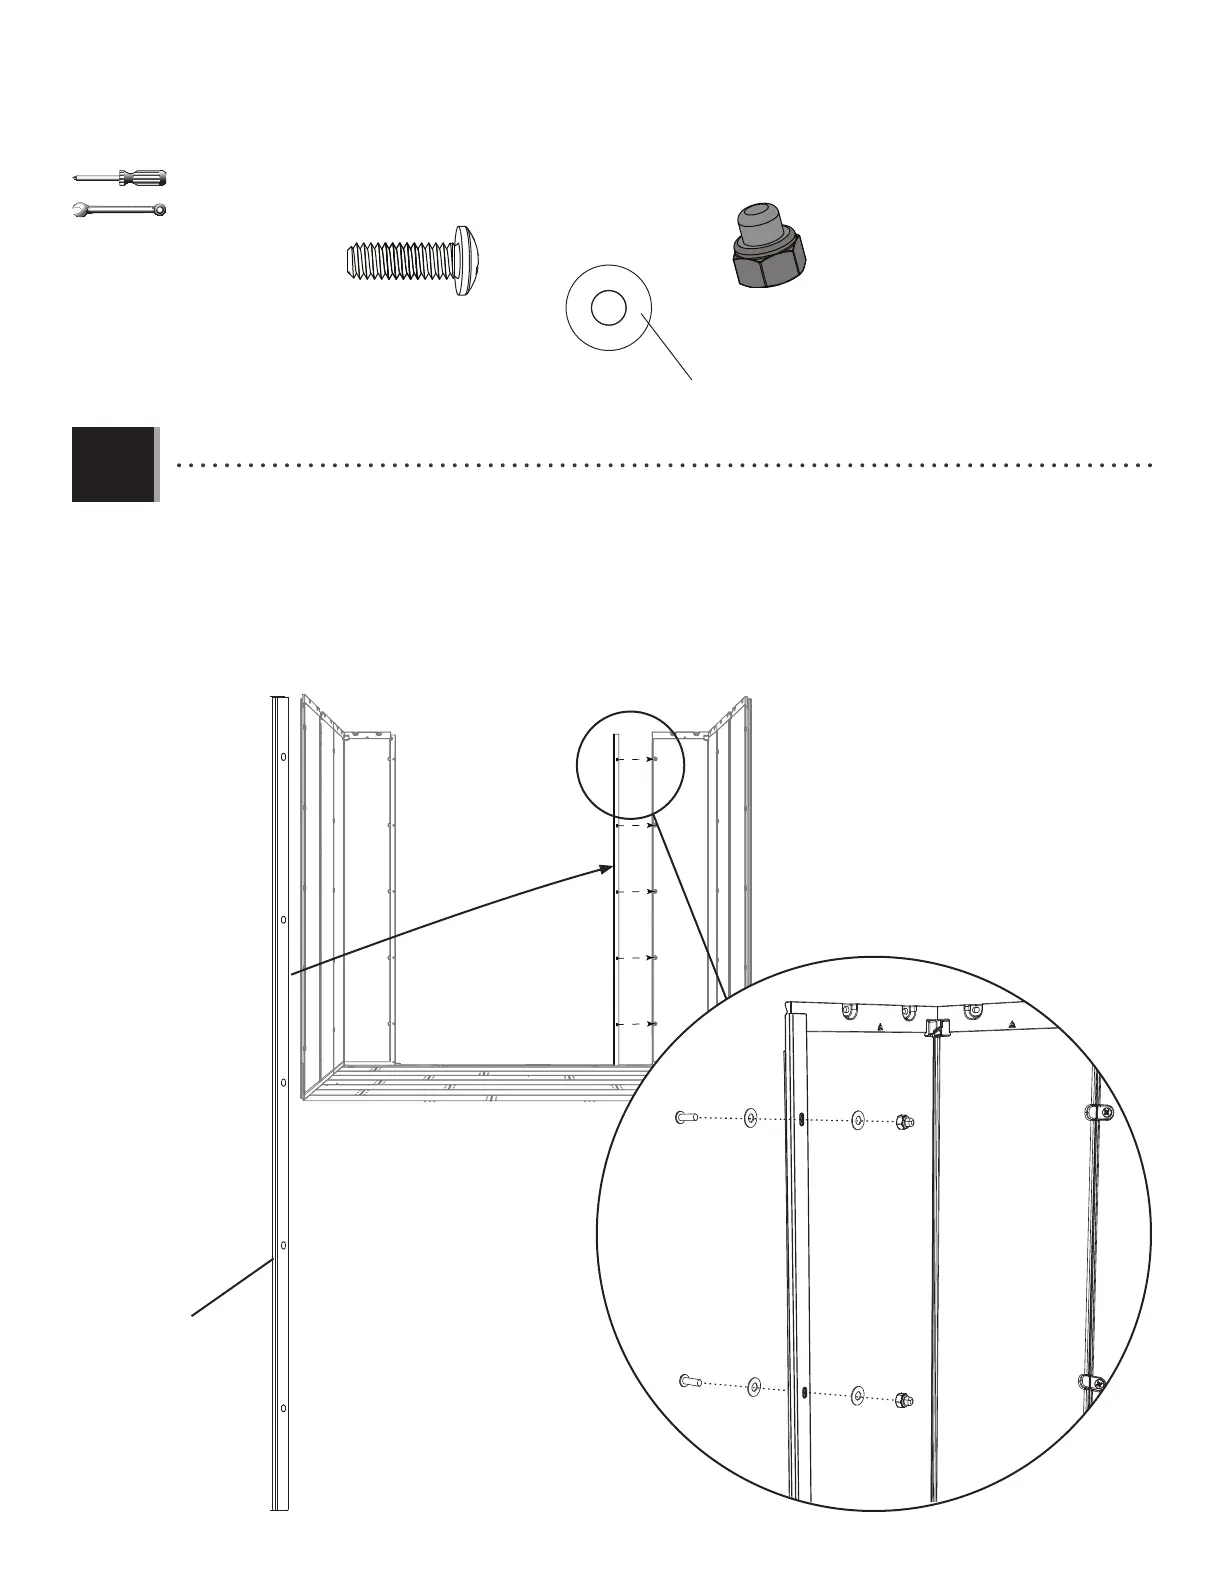
BFY (x5)
ADJ (x5)
BXZ (x10)
BYA
BYA
7/16 in/po
(11 mm)
• Place the Left Door Jamb (BYA) onto the edge of the left, front Corner Wall Panel. The Curved edge curves toward the
outside of the shed. Align the holes in the Jamb with those in the Corner Wall Panel. Secure the Jamb to the Panel
using the hardware included.
• Mettre le montant gauche (BYA) sur le bord du panneau angulaire gauche avant. Le bord recourbé du montant
courbe vers l’extérieur de l’abri. Aligner les trous dans le montant avec ceux du panneau angulaire. Attacher bien le
montant au panneau à l’aide de la quincaillerie incluse.
• Colocar la jamba izquierda (BYA) en el borde del panel angular izquierdo delantero. El borde curvado va hacia el
exterior de la caseta. Alinear los agujeros en la jamba con ellos en panel angular. Sujetar la jamba al panel usando
el herraje incluido.
• Curved edge
• Borde curvo
• Bord courbé
BXZ
BXZ
BXZ
BXZ
ADJ
ADJ
BFY
BFY
9.2
Plastic / Plastique / Plástico