10
X SECTION 1 (CONTINUED) / SECTION 1 (SUITE) / SECCIÓN 1 (CONTINUACIÓN)
4" x 93 1/2" x 3/4"
(10,2 cm x 2,38 m x 19,1 mm)
48" x 93 1/2" x 3/4"
(1,22 cm x 2,38 m x 19,1 mm)
8d 2" (8d 5,08 cm) (x84)
x84
48" x 93 1/2" x 3/4"
(1,22 m x 2,38 m x 19,1 mm) (x3)
1
!
4" x 93 1/2" x 3/4"
(10,2 cm x 2,38 m x 19,1 mm) (x1)
A
B
x30!
Drainage Holes
Trous de drainage
Agujeros para el drenaje
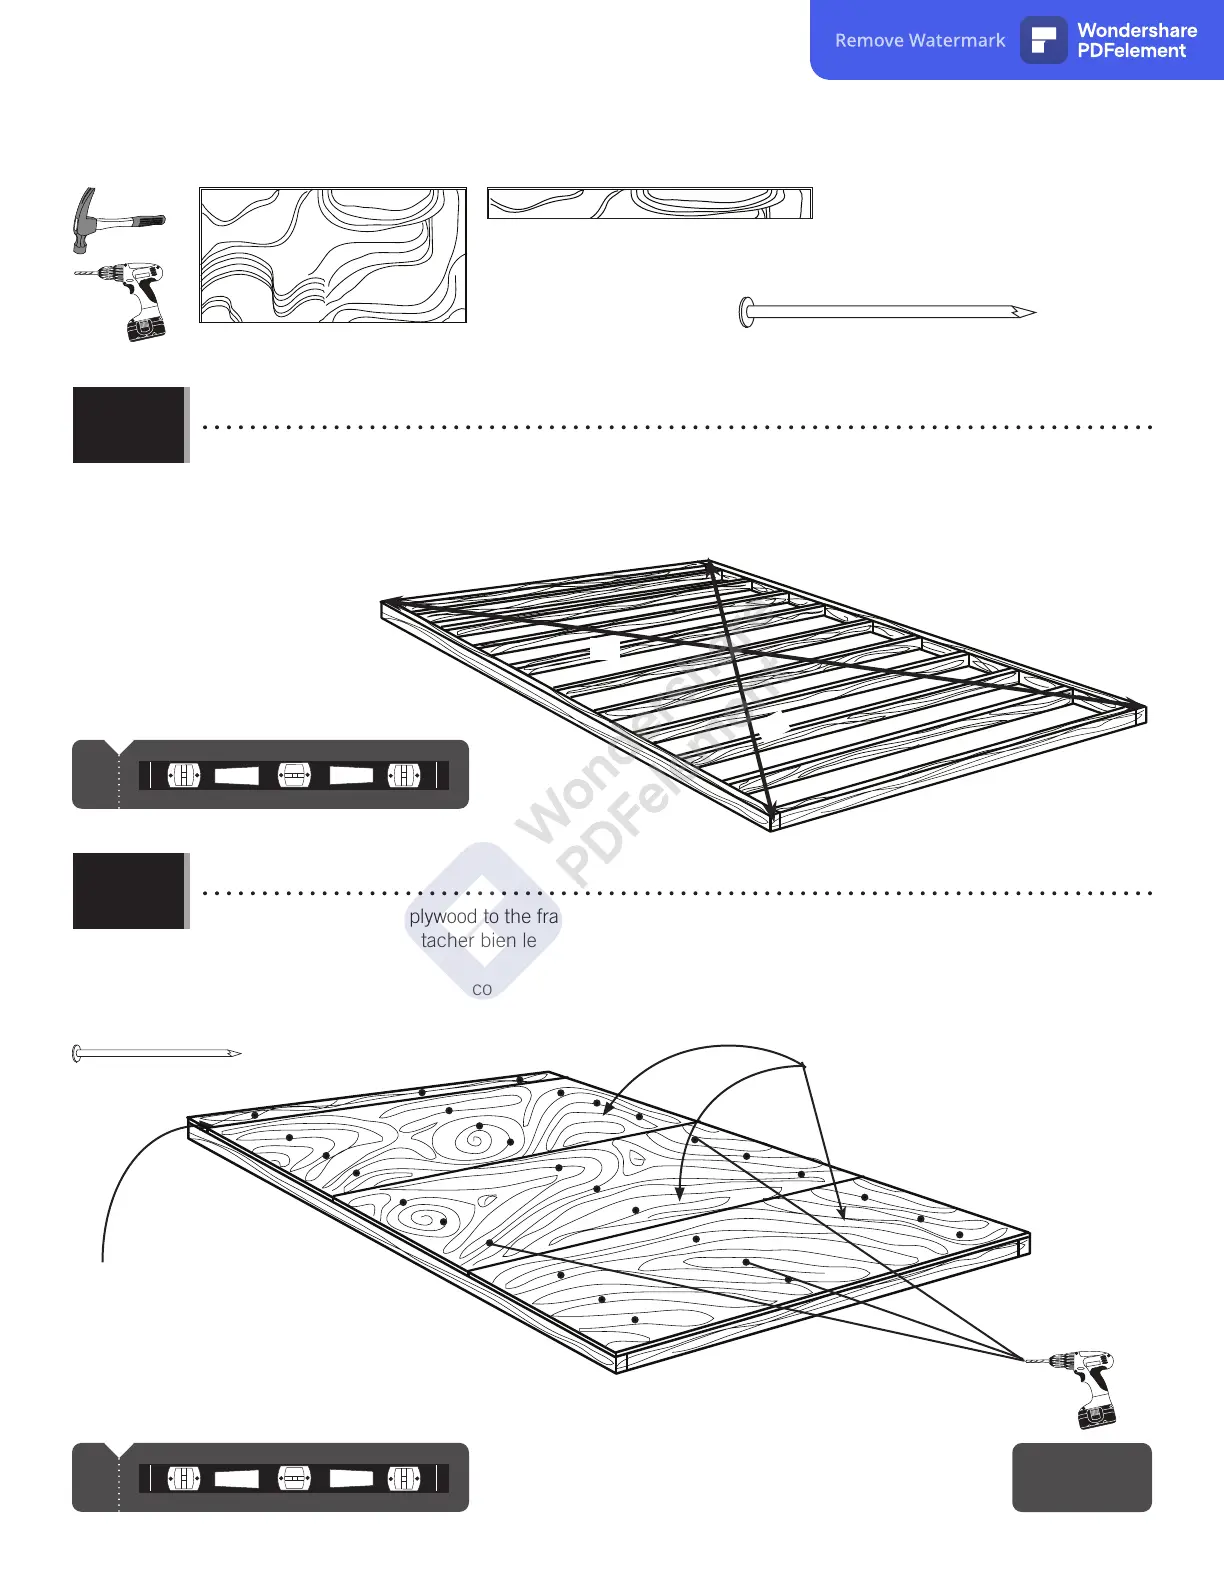
TOOLS, PARTS, AND HARDWARE REQUIRED / INSTRUMENTAL, PIEZAS, Y HERRAJE REQUERIDOS / OUTILS, PIÈCES, ET QUINCAILLERIE REQUIS
!
• Square the frame, measuring from corner to corner. Measurement A & B should be about the same length.
• Carrer le cadre en mesurant d’angle à angle. La mesure " A " et " B " doivent être à peu près la même longeur.
• Cuadrar el armazón mediendo de esquina a esquina. La medida "A" y "B" deben ser approximadamente el mismo largo.
• Using nails, fasten the plywood to the frame. Then, drill 5/16" holes for drainage.
• En utilisant des clous, attacher bien le contreplaqué au cadre. Ensuite, percer des trous de 8 mm pour le
drainage.
• Usando unos clavos, sujete el contrachapado al armazón. Entonces, taladrar agujeros de 8 mm para el
drenaje.
1.2.3
1.2.4
Remove Watermark
Wondershare
PDFelement