5050
X SECTION 10 (CONTINUED) / SECTION 10 (SUITE) / SECCIÓN 10 (CONTINUACIÓN)
TOOLS AND HARDWARE REQUIRED / OUTILS ET QUINCAILLERIE REQUIS / INSTRUMENTAL Y HERRAJE REQUERIDOS
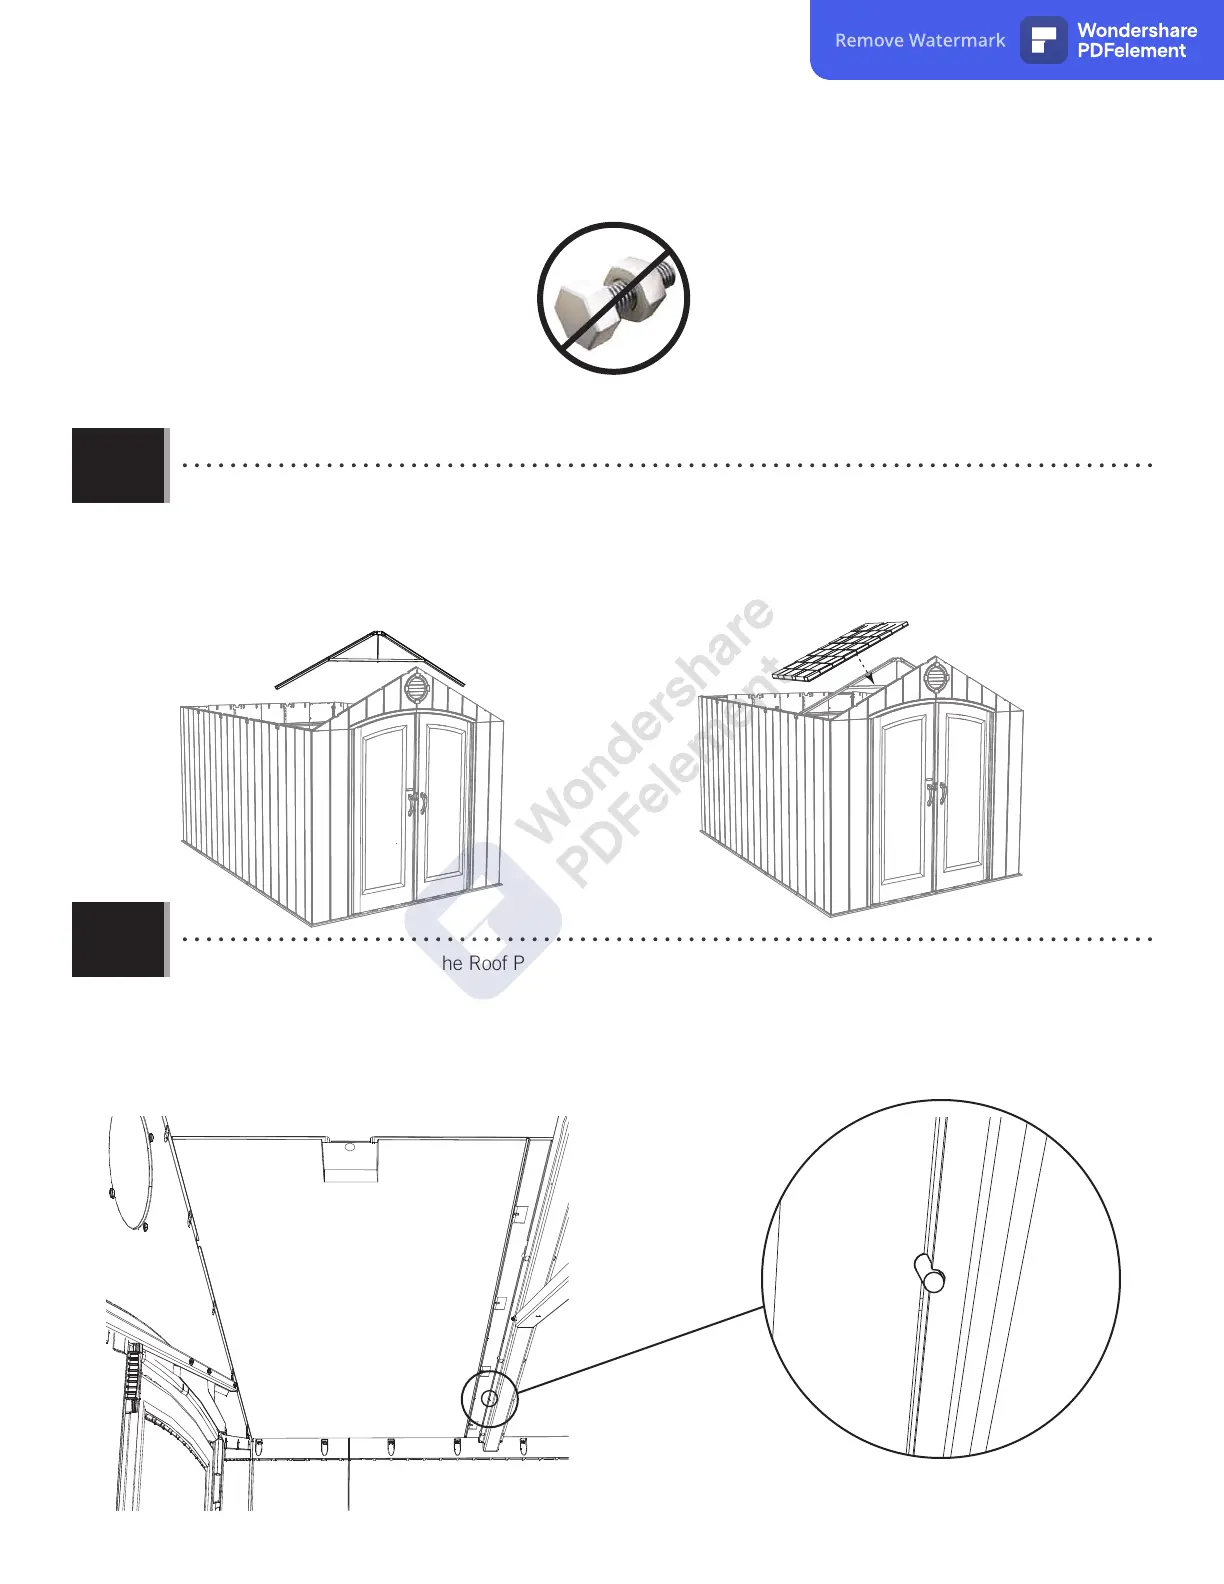
• Set a Truss Assembly into the notches on the fi rst two opposite Wall Panels. Set a Roof Panel (AGQ) onto the Gable,
Wall Panel, and Truss Assembly.
• Mettre une ferme dans les encoches des premiers deux panneaux muraux opposés. Mettre un panneaux de toit
(AGQ) sur le pignon, panneau mural, et la ferme.
• Colocar una cercha dentro de las muescas de los primeros dos paneles de pared opuestos. Colocar un panel de
tejado (AGQ) sobre la fachada de entrada, panel mural, y la cercha.
AGQ
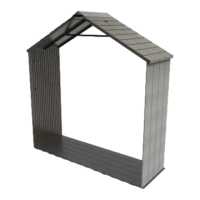
• The groove at the bottom of the Roof Panel sets over the top of the Wall Panel. Ensure the alignment nub fi ts into
the notch in the Truss.
• Mettre la rainure au bord inférieur du panneau de toit sur la partie supérieure du panneau mural. Mettre la petite
bosse d’alignement dans l’encoche de la ferme.
• Colocar la ranura a lo largo del borde inferior del panel de tejado sobre la parte superior del panel de pared.
Encajar el bulto de alineamiento en la muesca en la cercha.
10.1
10.2
Remove Watermark
Wondershare
PDFelement