28
TOOLS AND HARDWARE REQUIRED / OUTILS ET QUINCAILLERIE REQUIS / INSTRUMENTAL Y HERRAJE REQUERIDOS
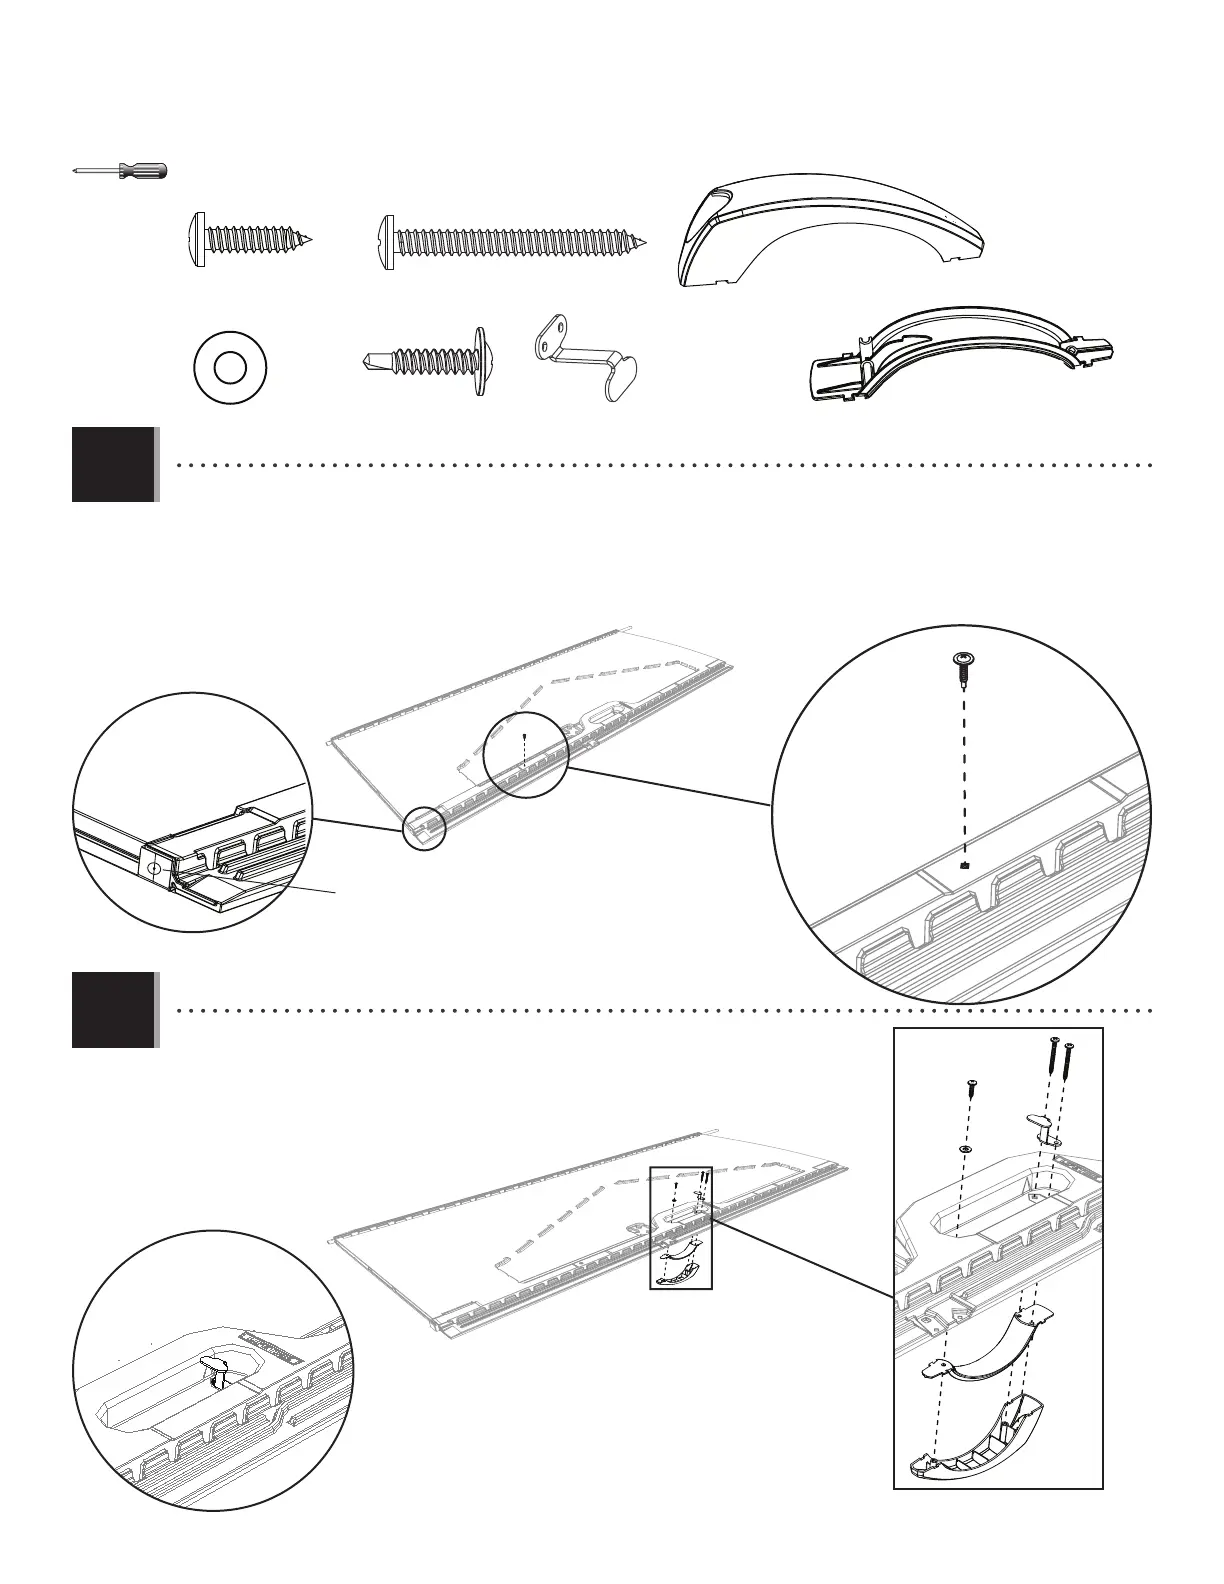
X SECTION 5 (CONTINUED) / SECTION 5 (SUITE) / SECCIÓN 5 (CONTINUACIÓN)
• Attach the Handle pieces (BYR & BYS) using the hardware provided.
• Attacher les pièces de la poignée (BYR et BYS) à l’aide de la quincaillerie incluse.
• Sujetar las piezas del picaporte (BYR y BYS) usando el herraje inlcuido.
AEE (x1)
ADW (x1)
BYZ (x2)
BBI (x1)
BBI
BBI
ADW
AEE
5.5
5.6
BYZ
BYZ
BYS
BYR
CHK
• Flush with the Right Door
• À ras de la porte droite
• A ras de la puerta derecha
• Once the End Cap is fl ush with the bottom of the Door, insert Self-Drilling/Self-Tapping Screw (CHK) into the Door Panel
at the location shown to hold the Square Tube in place.
• Une fois que le capuchon soit a ras du bord inférieur de la porte, insérer une vis autoperceuse/autotaraudeuse (CHK)
dans la porte à l’emplacement indiqué afi n de maintenir le tube carré en place.
• Una vez que el tapón esté a ras del borde inferior de la puerta, insertar un tornillo auto-perforante/auto-roscante (CHK)
en la puerta a la ubicación ilustrada para mantener el tubo cuadrado en su lugar.
CHK (x1)
BYR (x1)
BYS (x1)