64
TOOLS AND HARDWARE REQUIRED / OUTILS ET QUINCAILLERIE REQUIS / INSTRUMENTAL Y HERRAJE REQUERIDOS
X SECTION 10 (CONTINUED) / SECTION 10 (SUITE) / SECCIÓN 10 (CONTINUACIÓN)
ADZ
ADZ (x4)
10.11
10.10
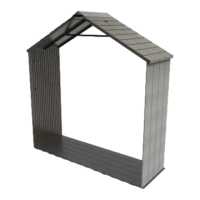
• Align the Clips with the holes in the Entry
Gable, and insert four (4) Screws (ADZ) to
secure the Gable to the Roof Panel.
• Aligner les clips de pignon avec les trous
dans le pignon d’entrée, et insérer quatre (4)
vis (ADZ) pour fi xer le pignon au panneau de
toit.
• Alinear los clips de fachada con los
agujeros en la fachada de entrada, e insertar
cuatro (4) tornillos (ADZ) para fi jar la fachada
al panel de techo.
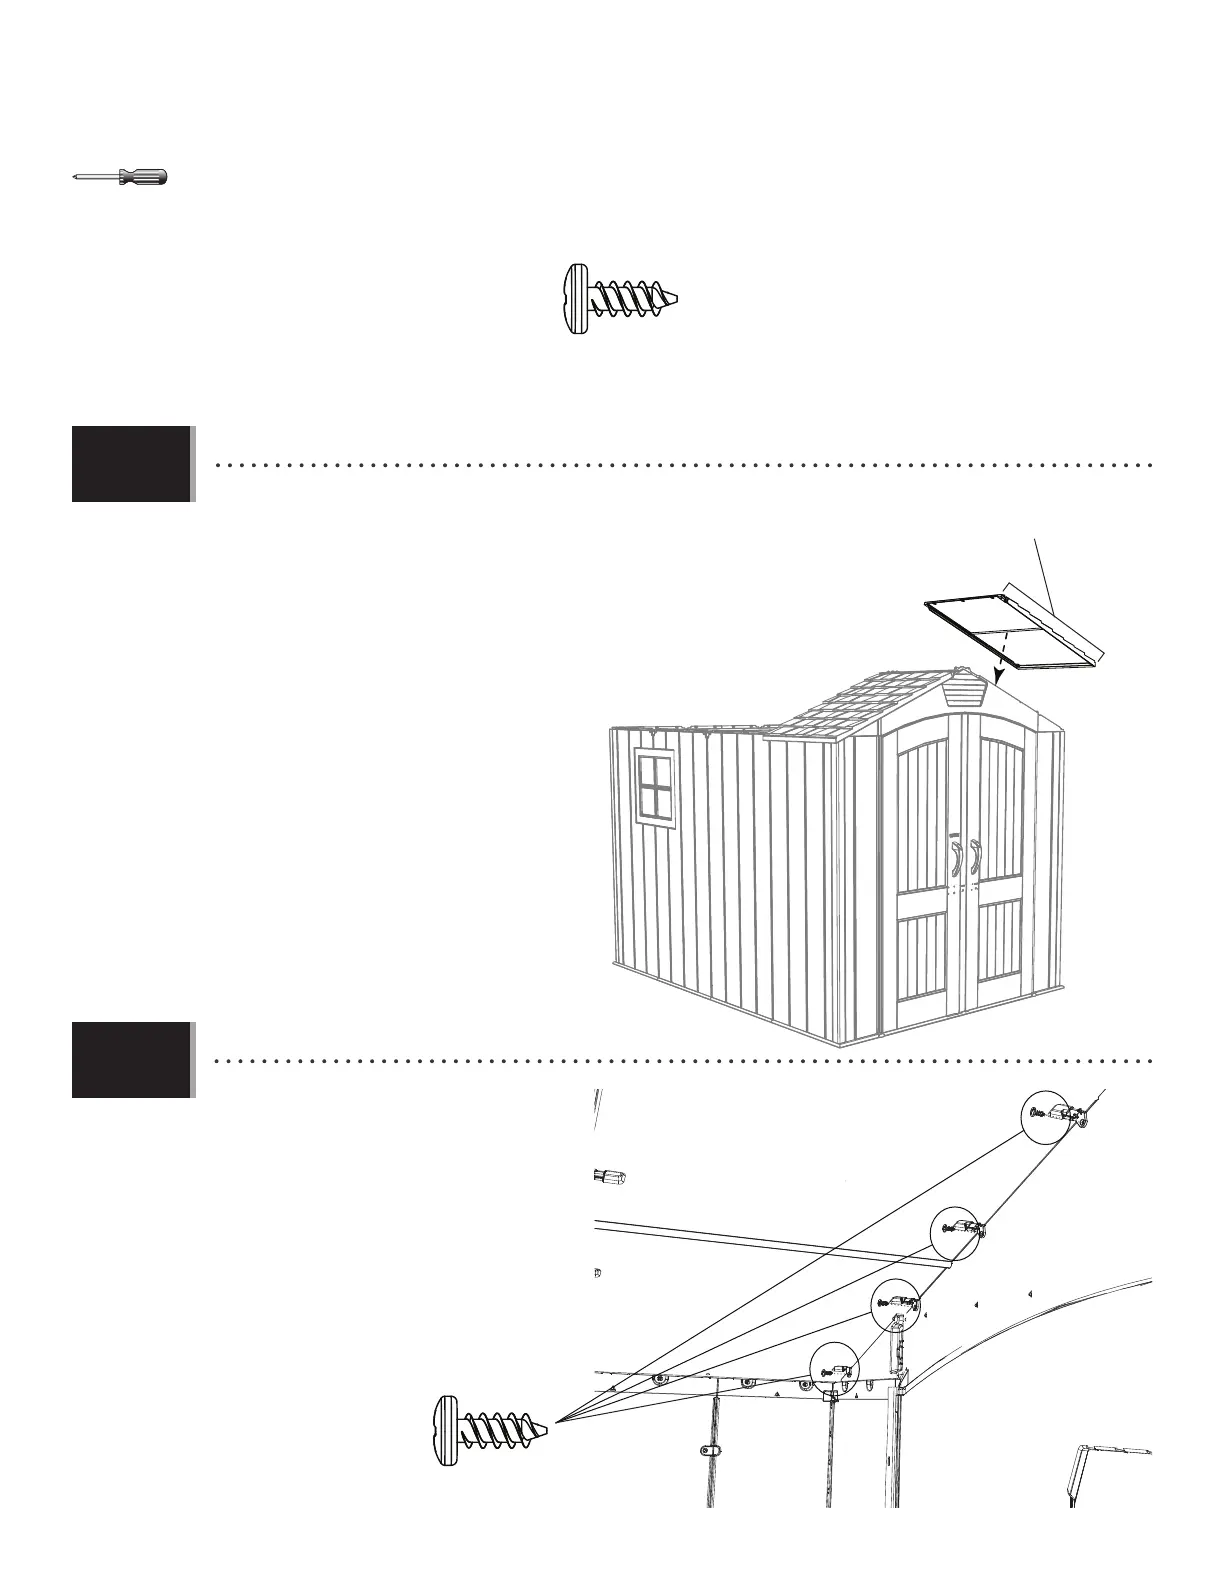
• Set the Roof Panel from steps 10.8–10.9 onto the Entry Gable,
Wall Panel, and Truss Assembly. The Gable Clips should be against the
Entry Gable.
• Mettre le panneau de toit des étapes 10.8 – 10.9 sur le pignon
d’entree, panneau mural, et la ferme. Les clips de pignon doivent être
contre le pignon d’entree.
• Colocar le panel de techo de los pasos 10.8–10.9 sobre la fachada
de entrada, panel mural, y la cercha. Los clips de fachada deben estra
contra la fachada de entrada.
• The Gable Clips are on this edge.
• Les clips de pignon sont sur ce bord.
• Los clips de fachada están en este borde.