45
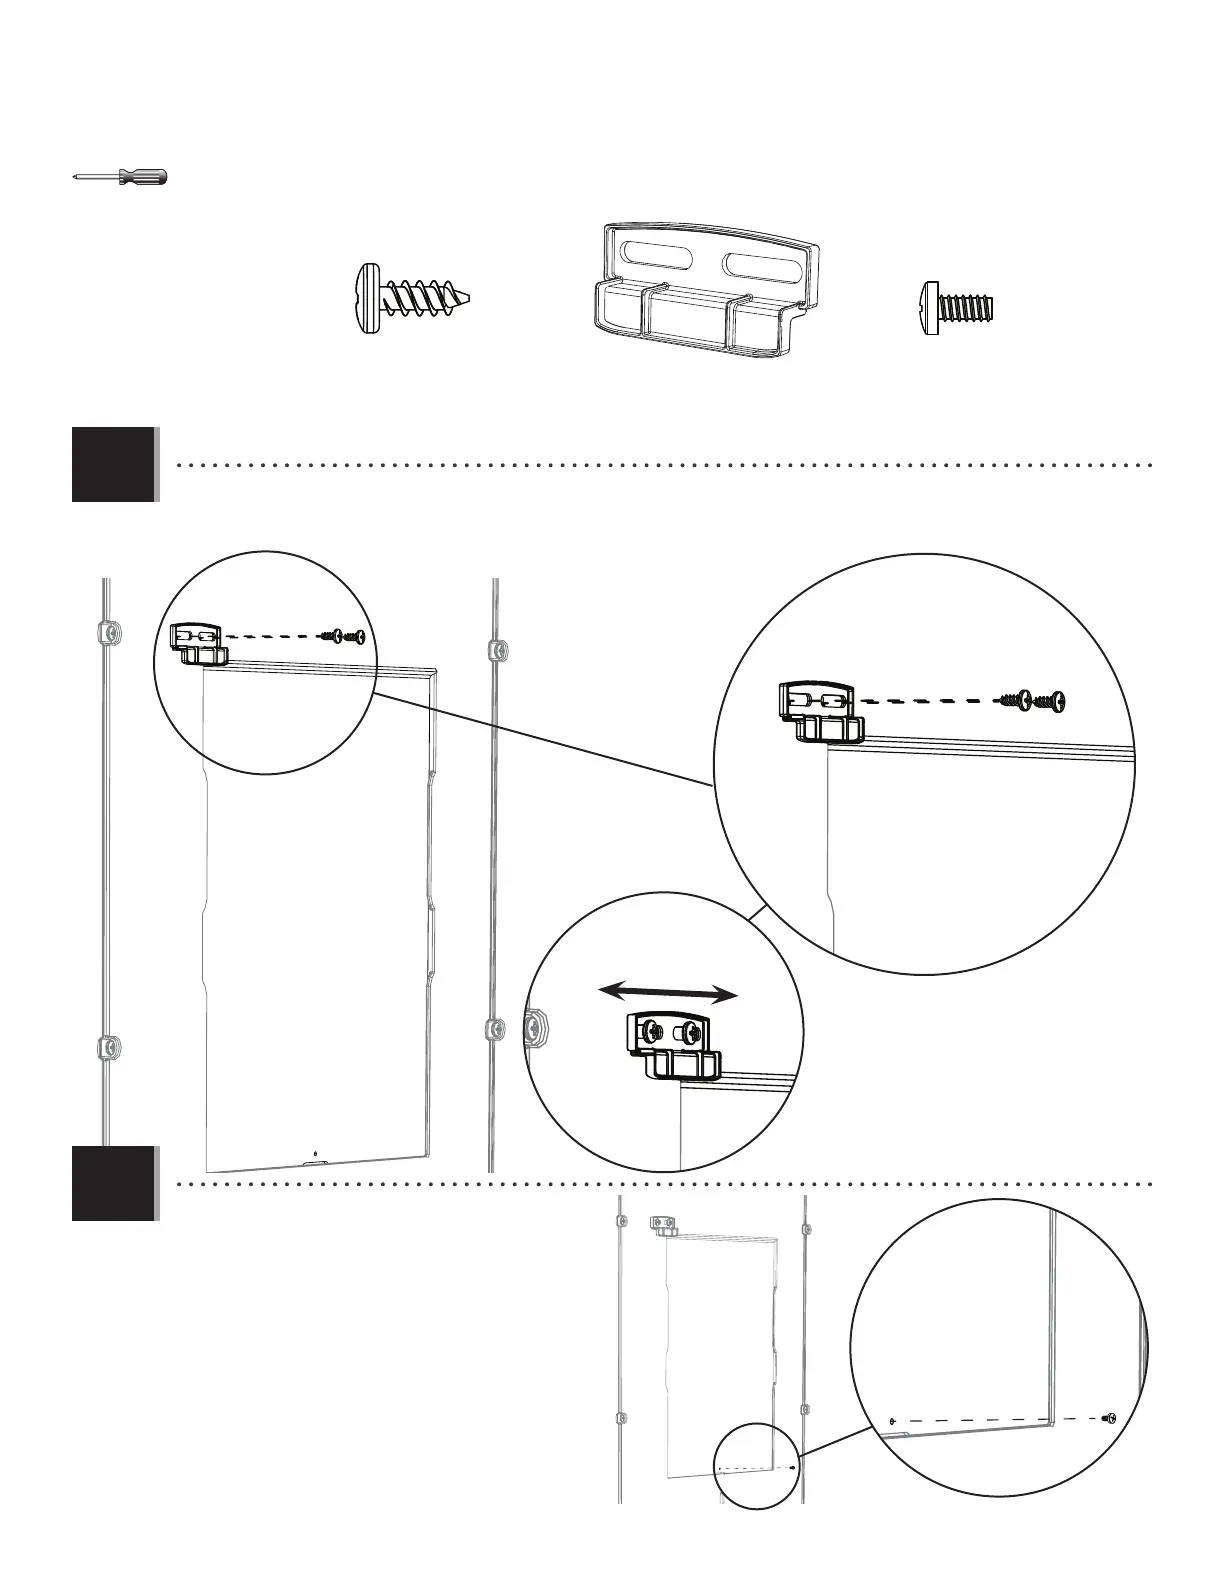
TOOLS AND HARDWARE REQUIRED / OUTILS ET QUINCAILLERIE REQUIS / INSTRUMENTAL Y HERRAJE REQUERIDOS
SECTION 8 (CONTINUED) / SECTION 8 (SUITE) / SECCIÓN 8 (CONTINUACIÓN)
ADZ (x4)
AIS (x2)
5
ADZ
ADZ
ADY
AIS
8.3
8.4
• Insert the Screw (ADY) into the hole at the
bottom of the Window Pane. This helps keep
the Window Pane up when open. Repeat this
section for the second Window Pane.
• Insérer la vis (ADY) dans le trou au bord
inférieur du carreau. Cela aide à maintenir le
carreau en haut lorsqu’il est ouvert. Répéter
cette section pour le deuxième carreau.
• Insertar el tornillo (ADY) en el agujero al
borde inferior de la hoja. Esto ayuda a
prevenir la cierre de la hoja. Repetir esta
sección para la segunda hoja.
• Attach the Latch (AIS) at the top left corner of the Window. The Latch should move freely.
• Attachez le loquet (AIS) à l’angle supérieur gauche de la fenêtre. Le loquet doit se déplacer librement.
• Sujete el cerrojo (AIS) a la esquina izquierda superior de la ventana. El cerrojo debe mover libremente.
ADY (x2)