9
X SECTION 1 (CONTINUED) / SECTION 1 (SUITE) / SECCIÓN 1 (CONTINUACIÓN)
TOOLS & HARDWARE REQUIRED / OUTILS ET QUINCAILLERIE REQUIS / INSTRUMENTAL Y HERRAJE REQUERIDOS
1.2
1.3
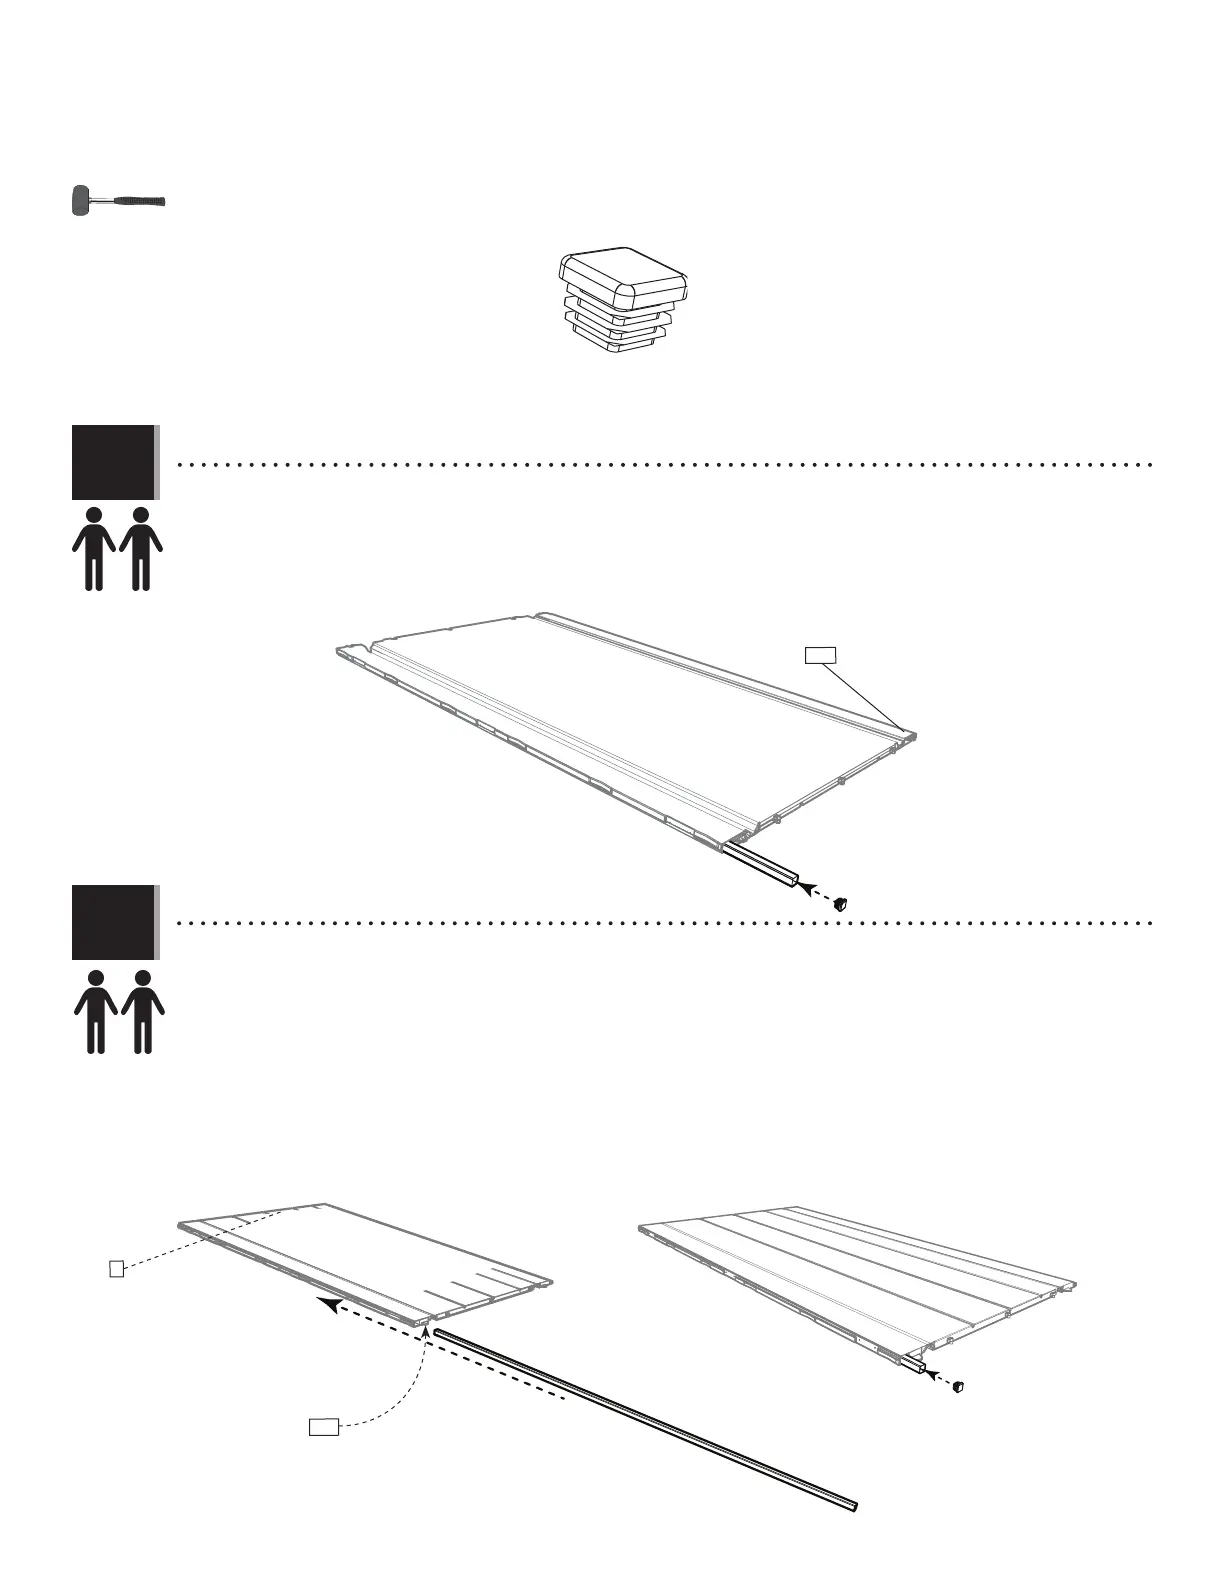
• Insert an End Cap (AHS) into the end of the Tube, and continue inserting the Tube until the Cap is fl ush with the
bottom of the Panel.
• Insérer un capuchon (AHS) dans l’extrémité du tube, et continuer à insérer le tube jusqu’à ce que le capuchon soit
au ras du bord inférieur du panneau.
• Insertar un tapón (AHS) en el extremo del tubo, y continuar insertando el tubo hasta que el tapón esté a ras del
borde inferior del panel.
AHS
AHS
AHS (x2)
AGY
FEJ
• Front of panel
• La partie avant du panneau
• La parte delantera del panel
• Rear of panel
• La partie arrière du panneau
• La parte trasera del panel
Bottom edge / Bord inférieur
Borde inferior
• While another adult holds the Panel (AGY) in place, insert a Wall Square Tube (FEJ) into the square hole at the bottom
of the Panel until a few inches hang out the bottom. (The ID, AGY, is located on the bottom of the back side of the Panel.)
There is also an “R” along the top, inside border.
• Pendant qu’un autre adulte maintent le panneau (AGY) en place, insérer un tube carré pour le mur (FEJ) dans le trou
carré à la partie inférieure du panneau jusqu’à ce que quelques centimètres dépasse le bord inférieur. (L’identifi ant,
AGY, est localisé au fond de la face arrière du panneau.) Il y a, aussi, la lettre « R » le long du bord intérieur supérieur.
• Mientras que otro adulto mantiene el panel (AGY) en su lugar, insertar un tubo cuadrado para el muro (FEJ) en el agujero
cuadrado en la parte inferior del panel hasta que unos centímetros cuelguen del agujero. (El identifi cador, AGY, está
ubicado cerca del borde inferior de la cara trasera del panel.) Hay, también, la letra «R» a lo largo del boder interior superior.
AGN
AGN
R
L