39
SECTION 2 (CONTINUED) / SECTION 2 (SUITE) / SECCIÓN 2 (CONTINUACIÓN)
TOOLS & HARDWARE REQUIRED / OUTILS ET QUINCAILLERIE REQUIS / INSTRUMENTAL Y HERRAJE REQUERIDOS
Hardware is shown to scale, unless noted otherwise (*) / La quincaillerie est illustrée à l’échelle, sauf indication contraire (*) / Se muestra el herraje a escala, a menos que se indique lo contrario (*)
2.19
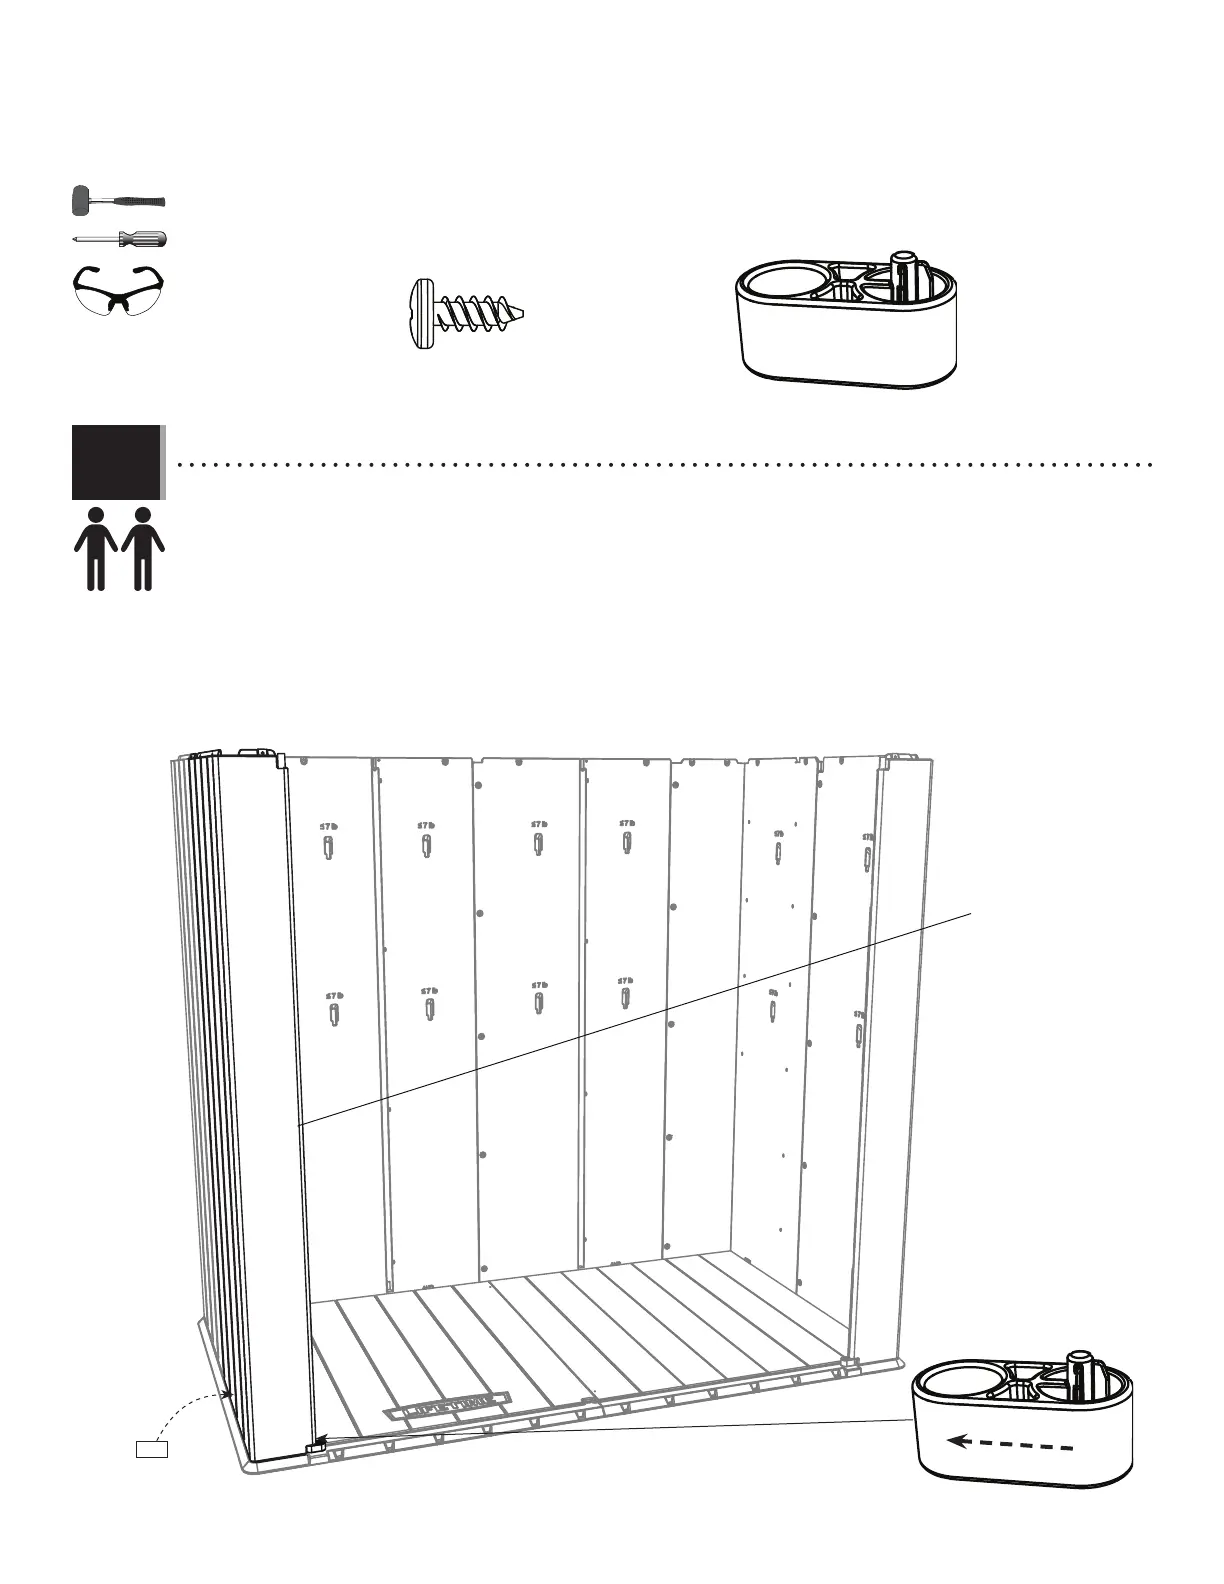
GLE (x1)
GLE
• Attach the front-left corner wall panel (AGN) similarly to the front-right corner wall panel. Secure with fi ve (5) screws (ADZ).
Do not overtighten. Slide a hinge cap (GLE) under the edge of the panel in the direction indicated, and pull the wall tube down
through it and into the hole in the fl oor as far as it will go. If necessary, use a rubber mallet to tap it into place.
• Attacher le panneau mural angulaire avant gauche (AGN) de la même manière que le panneau mural angulaire avant droit.
Bien les attacher à l’aide de cinq (5) vis (ADZ). Ne pas trop serrer. Faire glisser le capuchon de charnière (GLE) sous le bord du
panneau, et insérer le tube du mur à travers le capuchon et dans le trou dans le plancher autant que possible. Si besoin,
utilizar un maillet en caoutchouc pour le taper en place.
• Fijar el panel mural angular delantero izquierdo (AGN) igual que el panel mural angular delantero derecho. Fijar bien
usando cinco (5) tornillos (ADZ). No apretar demasiado. Deslizar el tapón de bisagra (GLE) debajo el borde del panel, e insertar
el tubo del muro por el tapón y el agujero en el piso lo más lejos posible. Si es necesario, usar un mazo de goma para golpearlo
en su lugar.
• The tube is here.
• Le tube est ici.
• El tubo está aquí.
ADZ (x5)
AGN