40
SECTION 2 (CONTINUED) / SECTION 2 (SUITE) / SECCIÓN 2 (CONTINUACIÓN)
TOOLS & HARDWARE REQUIRED / OUTILS ET QUINCAILLERIE REQUIS / INSTRUMENTAL Y HERRAJE REQUERIDOS
Hardware is shown to scale, unless noted otherwise (*) / La quincaillerie est illustrée à l’échelle, sauf indication contraire (*) / Se muestra el herraje a escala, a menos que se indique lo contrario (*)
2.20
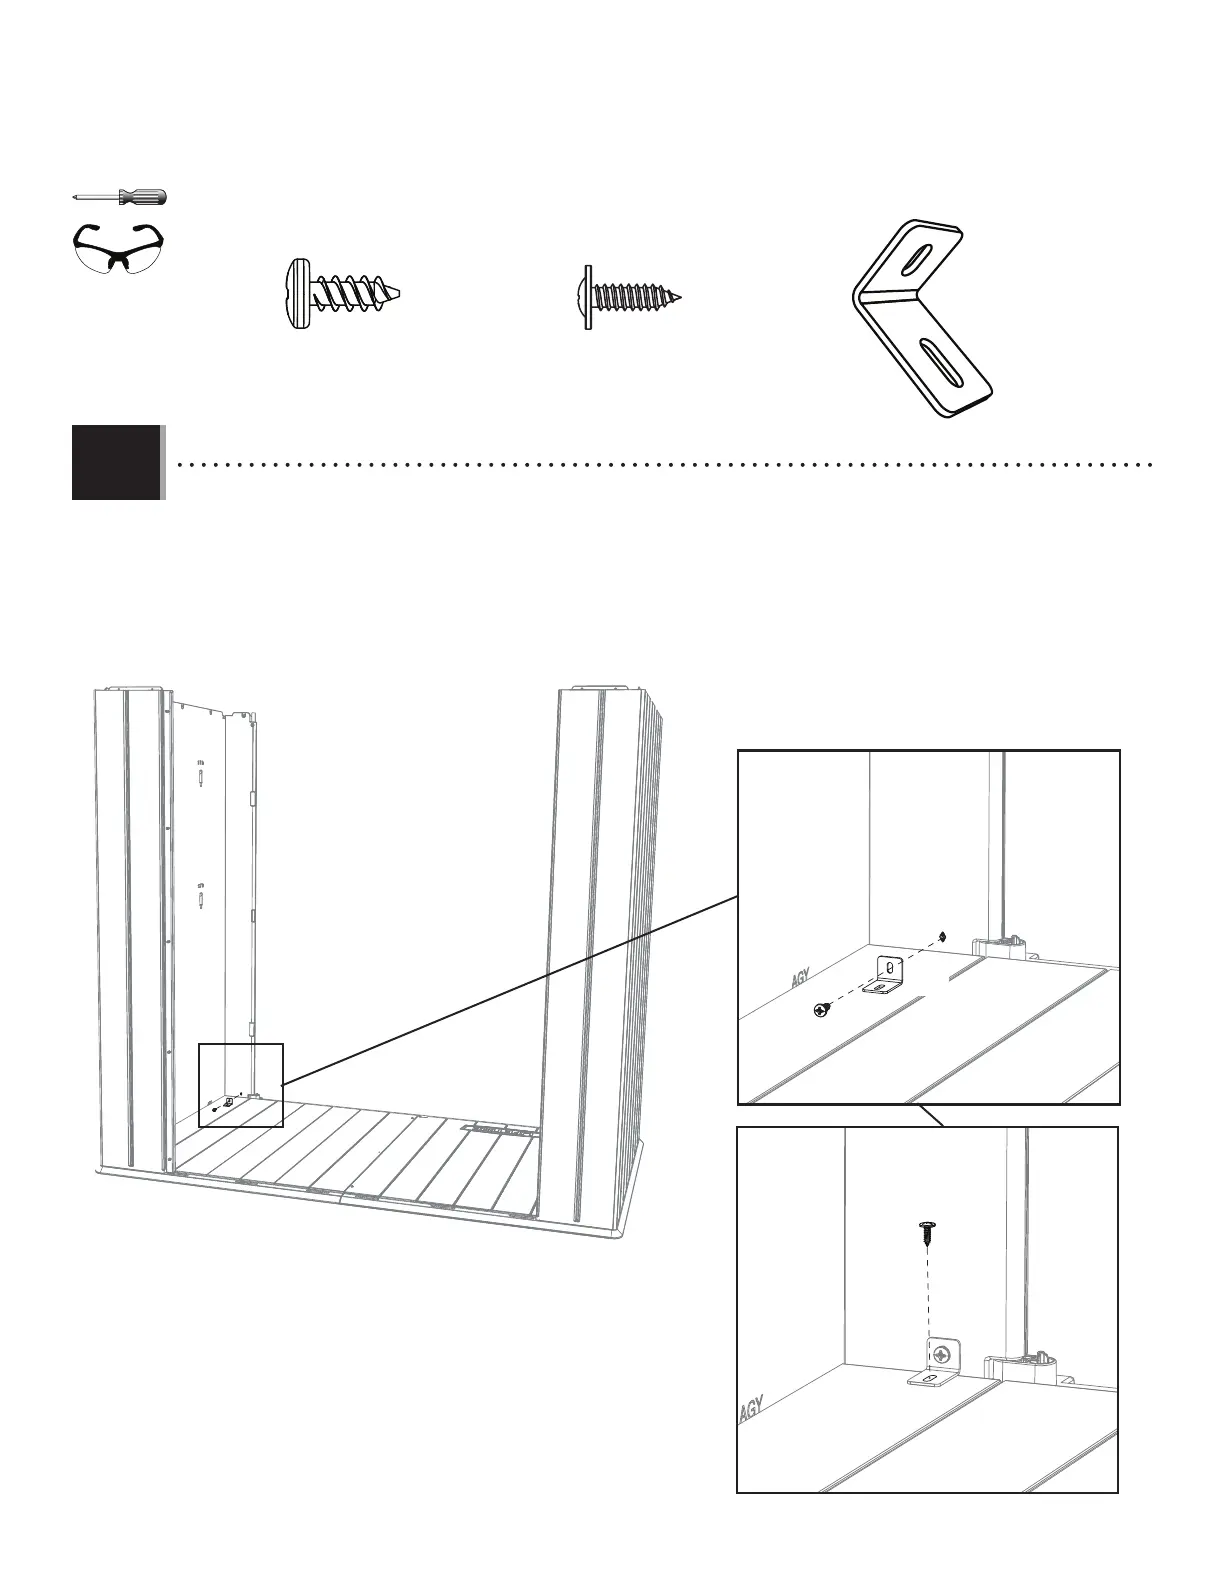
• Attach an L-bracket (GMB) to the bottom of the front-right corner wall panel using one (1) screw (ADZ). Attach the
bracket to the fl oor using one (1) screw (GJZ). Do not overtighten. Repeat this step for the front-left corner wall panel.
• Attacher un support en « L » (GMB) au fond du panneau mural angulaire avant droit à l’aide d’une (1) vis (ADZ). Attacher
le support au plancher à l’aide d’une (1) vis (GJZ). Ne pas trop serrer. Répéter cette étape pour le panneau mural angulaire avant
gauche.
• Fijar un soporte en «L» (GMB) al fondo del panel mural angular delantero izquierdo usando un (1) tornillo (ADZ). Fijar
el soporte al piso usando un (1) tornillo (GJZ). No apretar demasiado. Repetir este paso para el panel mural angular delantero
izquierdo.
The rear wall panels have been removed for clarity / Les murs arrières ont été retirés par souci de clarté
Los muros traseros han sido quitados para mayor claridad
ADZ (x2)
ADZ
GJZ
GMB (x2)
GMB
GJZ (x2)
Front / Devant / Delantera