48
SECTION 3 (CONTINUED) / SECTION 3 (SUITE) / SECCIÓN 3 (CONTINUACIÓN)
TOOLS & HARDWARE REQUIRED / OUTILS ET QUINCAILLERIE REQUIS / INSTRUMENTAL Y HERRAJE REQUERIDOS
HARDWARE IS SHOWN TO SCALE, UNLESS NOTED OTHERWISE (*) / LA QUINCAILLERIE EST ILLUSTRÉE À L’ÉCHELLE, SAUF INDICATION CONTRAIRE (*) / SE MUESTRA EL HERRAJE A ESCALA, A
MENOS QUE SE INDIQUE LO CONTRARIO (*)
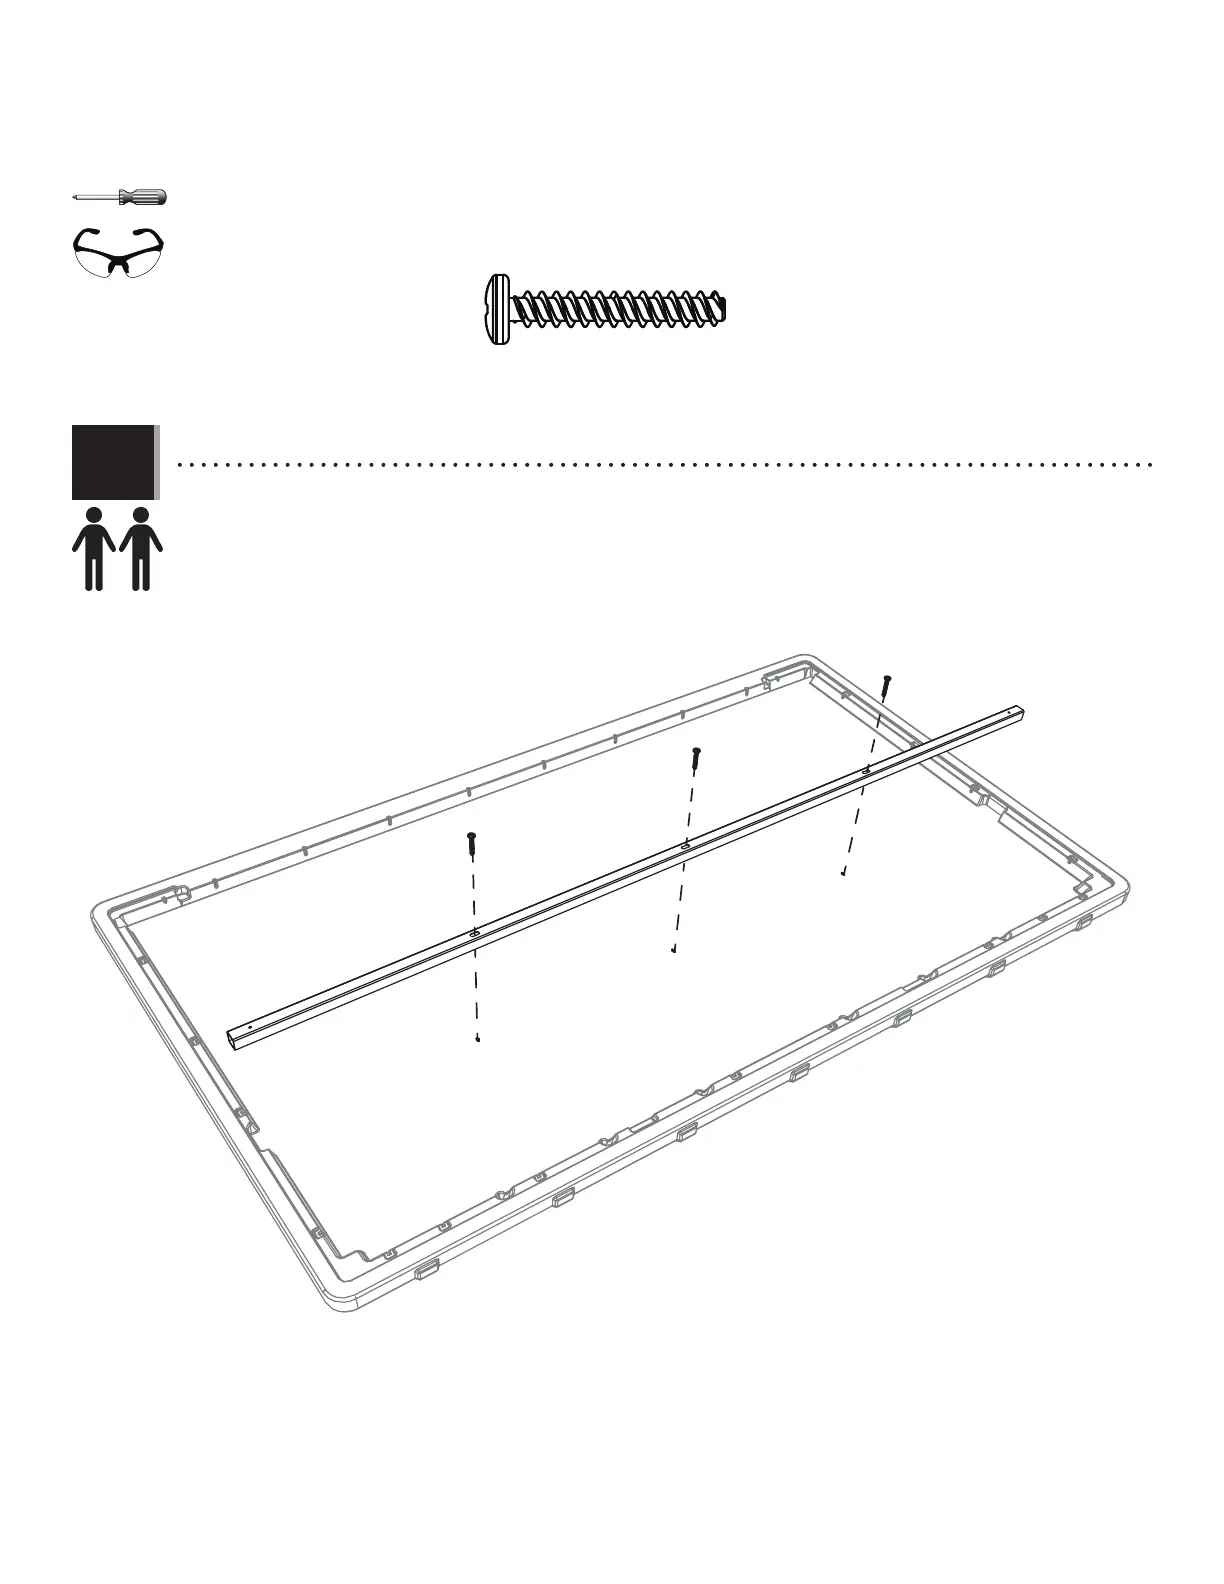
3.1
• Place the roof beam (GKT) down onto the underside of the roof panel (AND). Position the three center-most holes in
the tube over the holes in the panel. Secure with three screws (GLW). Do not overtighten.
• Mettre la poutre de toit (GKT) sur le dessous du panneau de toit (AND). Positionner le trois trous centraux dans le tube
sur les trous dans le panneau. Bien l’attacher à l’aide de trois vis (GLW). Ne pas trop serrer.
• Colocar la viga de tejado (GKT) sobre la parte inferior del panel de tejado (AND). Situar los tres agujeros centrales en el
tubo sobre los agujeros en el panel. Fijarlo bien usando tres tornillos (GLW). No apretar demasiado.
Front edge of roof / Bord avant du toit / Borde delantero del tejado
GLW (x3)
GLW
GLW
GLW
AND
GKT