14
X SECTION 1 (CONTINUED) / SECTION 1 (SUITE) / SECCIÓN 1 (CONTINUACIÓN)
TOOLS & HARDWARE REQUIRED / OUTILS ET QUINCAILLERIE REQUIS / INSTRUMENTAL Y HERRAJE REQUERIDOS
1.5
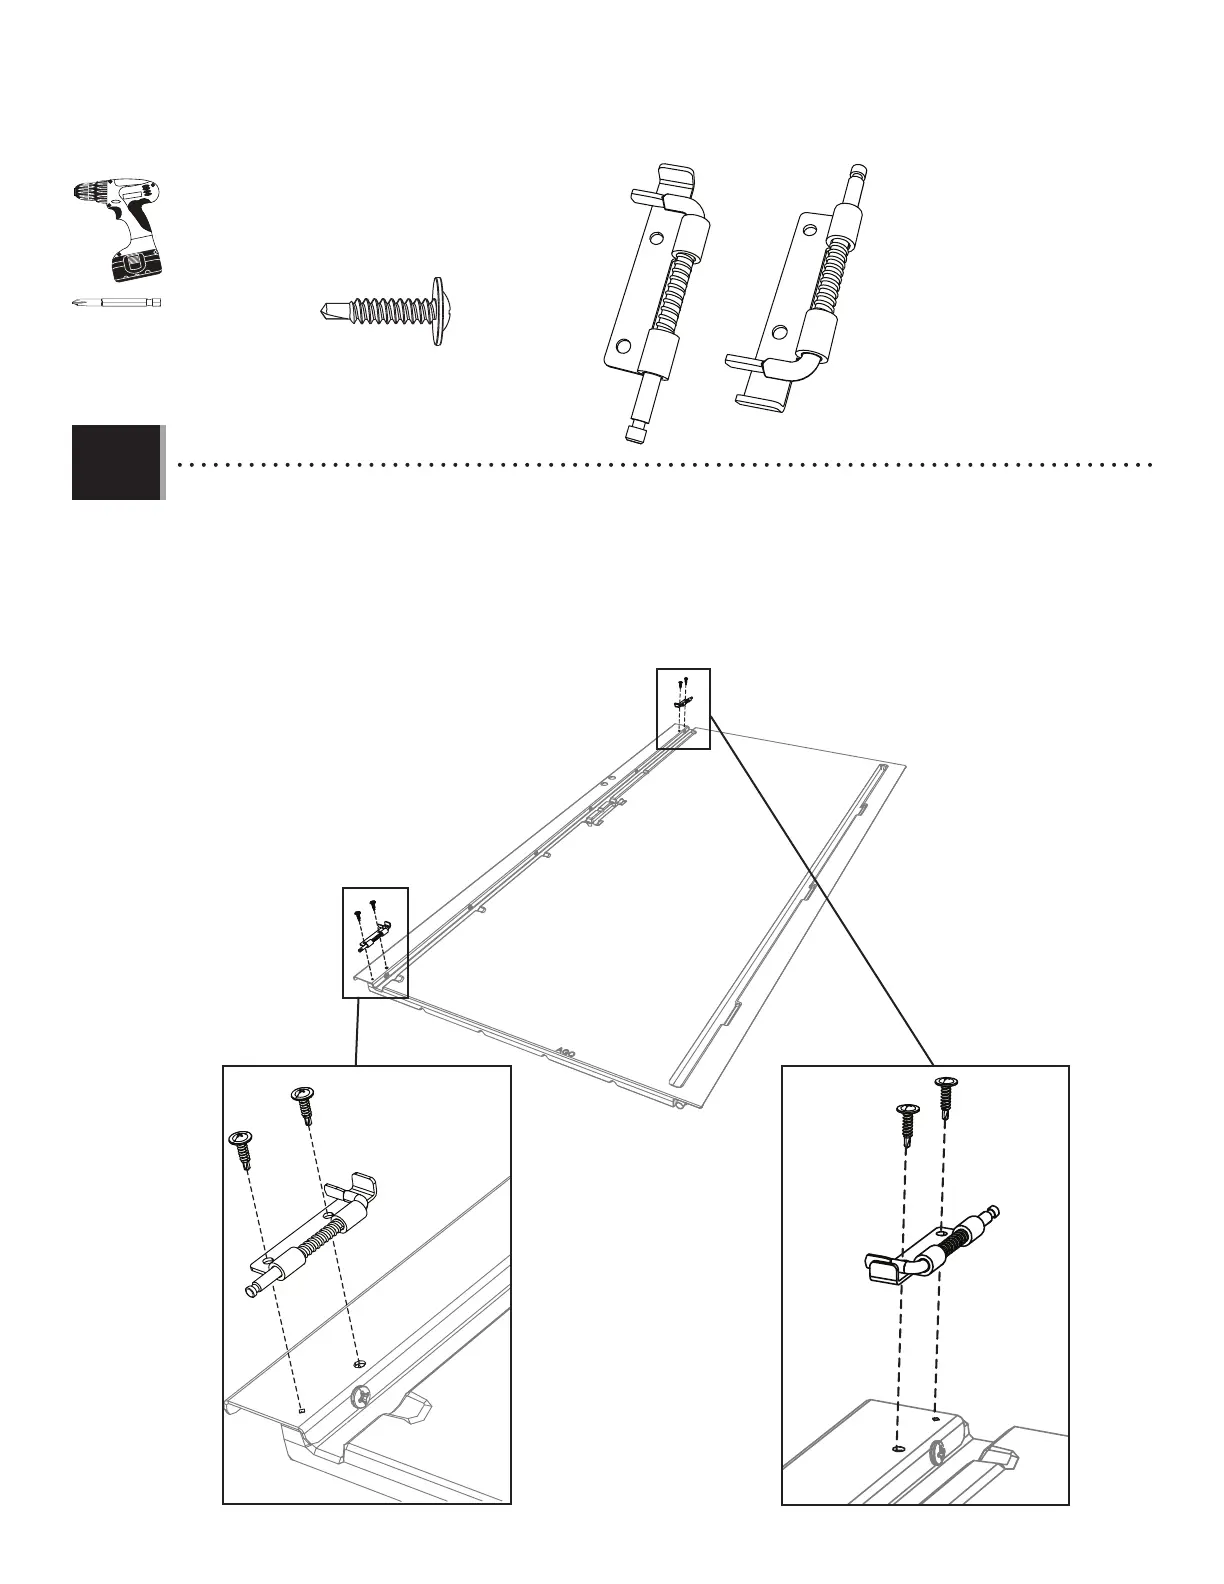
• Orient the top and bottom deadbolts (DGR & DGS) as indicated, and align the holes in the deadbolt with those at the bottom of the
channel. Secure the channel to the door using two (2) screws (CHK). If the deadbolts don’t move freely, loosen the screws just a tad.
• Orienter les verrous supérieur et inférieur (DGR & DGS) comme indiqué, et aligner les trous dans le verrour avec ceux dans le canal.
Bien attacher le canal à la porte à l’aide de deux (2) vis (CHK). Si les verrous ne se déplacent pas librement, désérrer un peu les vis.
• Orientar los cerrojos superior e inferior (DGR & DGS) como se muestra, y alinear los agujeros en el cerrojo con los agujeros en el
extremo inferior del canal. Fijar bien el canal a la puerta usando dos (2) tornillos (CHK). Si los cerrojos no se mueven libremente, afl ojar
los tornillos sólo un poco.
DGS (x1)
DGR (x1)
CHK (x4)
CHK
CHK
CHK
CHK
DGR
DGS
ADC (x1)