38
X SECTION 2 (CONTINUED) / SECTION 2 (SUITE) / SECCIÓN 2 (CONTINUACIÓN)
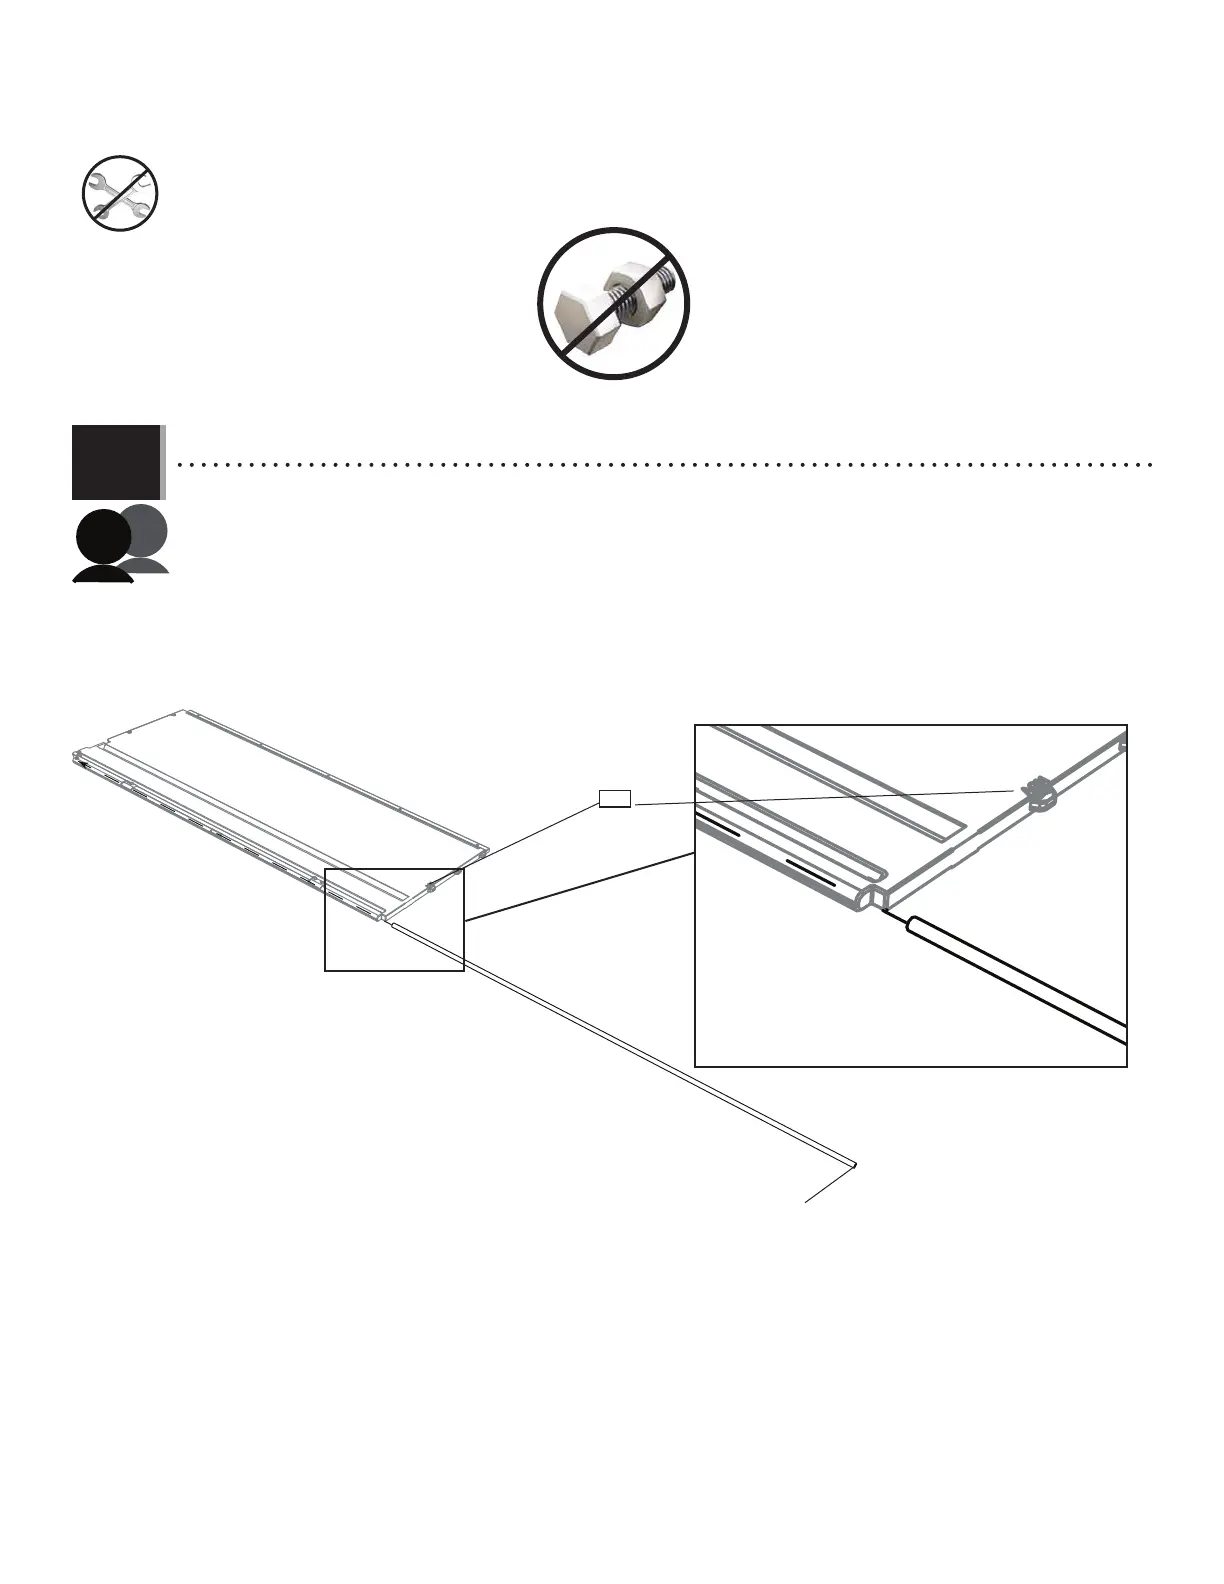
TOOLS & HARDWARE REQUIRED / OUTILS ET QUINCAILLERIE REQUIS / INSTRUMENTAL Y HERRAJE REQUERIDOS
Bottom edge / Bord inférieur / Borde inferior
• Lay the left, front corner wall panel (AGN) face down on level ground. While another adult holds the panel in place, insert a wall
hinge tube (GCU) into the hole at the bottom of the panel. Remember, this tube has no notch at the ends. (The ID, AGN, is located on the
bottom of the back side of the panel.)
• Mettre le panneau mural angulaire avant gauche (AGN) face contre terre. Pendant qu’un autre adulte maintent le panneau en
place, insérer un tube de charnière mural (GCU) dans le trou à la partie inférieure du panneau. Se souvenir que ce tube n’a pas
d’encoche aux extrémités. (L’identifi ant, AGN, est localisé au fond de la face arrière du panneau.)
• Colocar el panel mural angular delantero izquierdo (AGN) boca abajo. Mientras que otro adulto mantiene el panel en su lugar,
insertar un tubo de bisagra mural (GCU) en el agujero en la parte inferior del panel. Recordar que este tubo no tiene una muesca a los
extremos. (El identifi cador, AGN, está ubicado cerca del borde inferior de la cara trasera del panel.)
• End cap
• Capuchon
• Tapón
AGN
AGN
GCU
2.18
• Rear of panel
• La partie arrière du panneau
• La parte trasera del panel