74
TOOLS AND HARDWARE REQUIRED / OUTILS ET QUINCAILLERIE REQUIS / INSTRUMENTAL Y HERRAJE REQUERIDOS
X SECTION 9 (CONTINUED) / SECTION 9 (SUITE) / SECCIÓN 9 (CONTINUACIÓN)
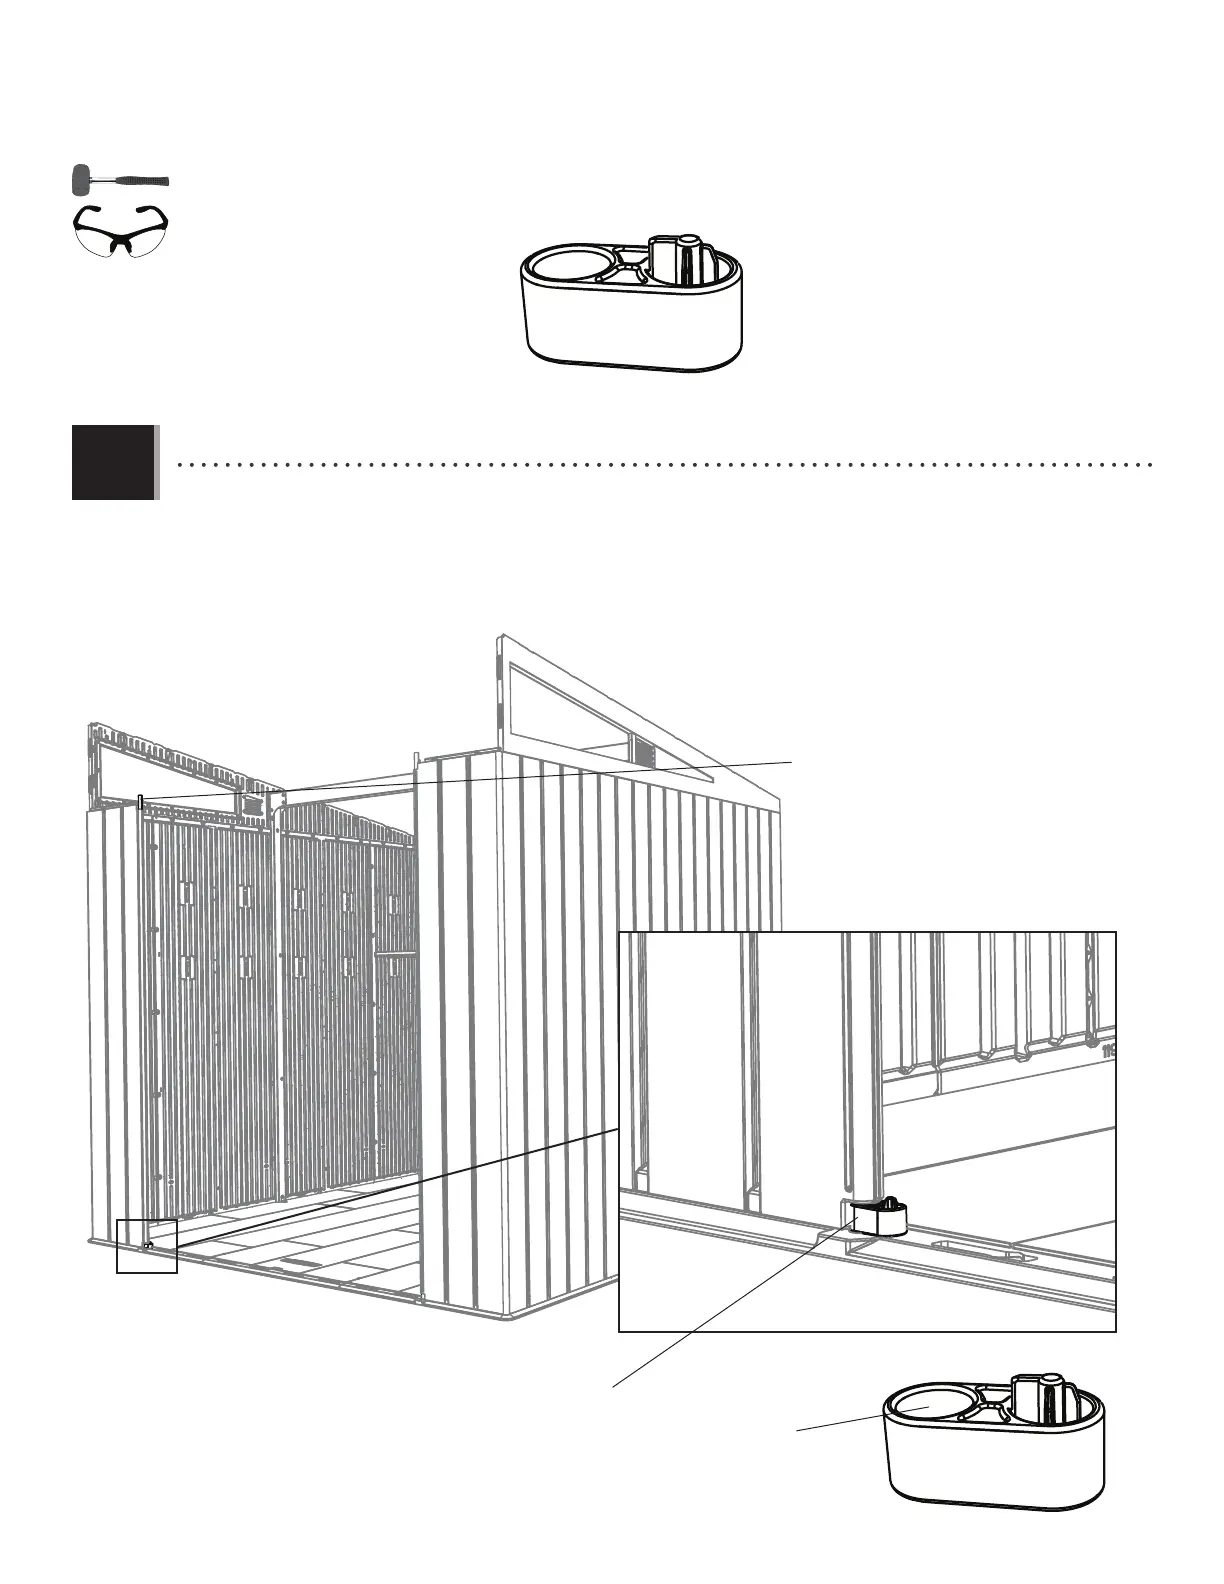
• Pull the hinge tube in the wall up about 2" (≈5 cm) and slide a hinge cap (GLE) underneath it. Pull the hinge tube back down
and insert it through the hinge cap and into the bushing from step 6.3. If necessary, use a rubber mallet to gently tap the tube in place.
• Tirer le tube d’articulation en haut à peu près 5 centimètres (2") et faire glisser le capuchon de charnière (GLE) underneath it.
Tirer le tube d’articulation en bas et l’insérer à travers le capuchon et dans la bague de l’étape 6.3. Si besoin, employer un maillet en
caoutchouc pour taper le tube en place soigueusement.
• Levantar el tubo de articulación unos 5 centimetros (2") y deslizar un tapón de bisagra (GLE) debajo el tubo. Bajar el tubo e
insertarlo por el tapón y en el casquillo del paso 6.3. Si es necesario, usar un mazo de goma para golpear cuidadosamente el tubo en su
lugar.
• The hinge tube in the wall goes in left hole
• Le tube de charnière dans le mur va dans le trou gauche
• El tubo de bisagra en el muro va en el agujero izquierdo
• The hinge tube
• Tube de charnière
• Tubo de bisagra
9.8
GLE (x1)
GLE
GLE
 Loading...


