23
TOOLS AND HARDWARE REQUIRED / OUTILS ET QUINCAILLERIE REQUIS / INSTRUMENTAL Y HERRAJE REQUERIDOS
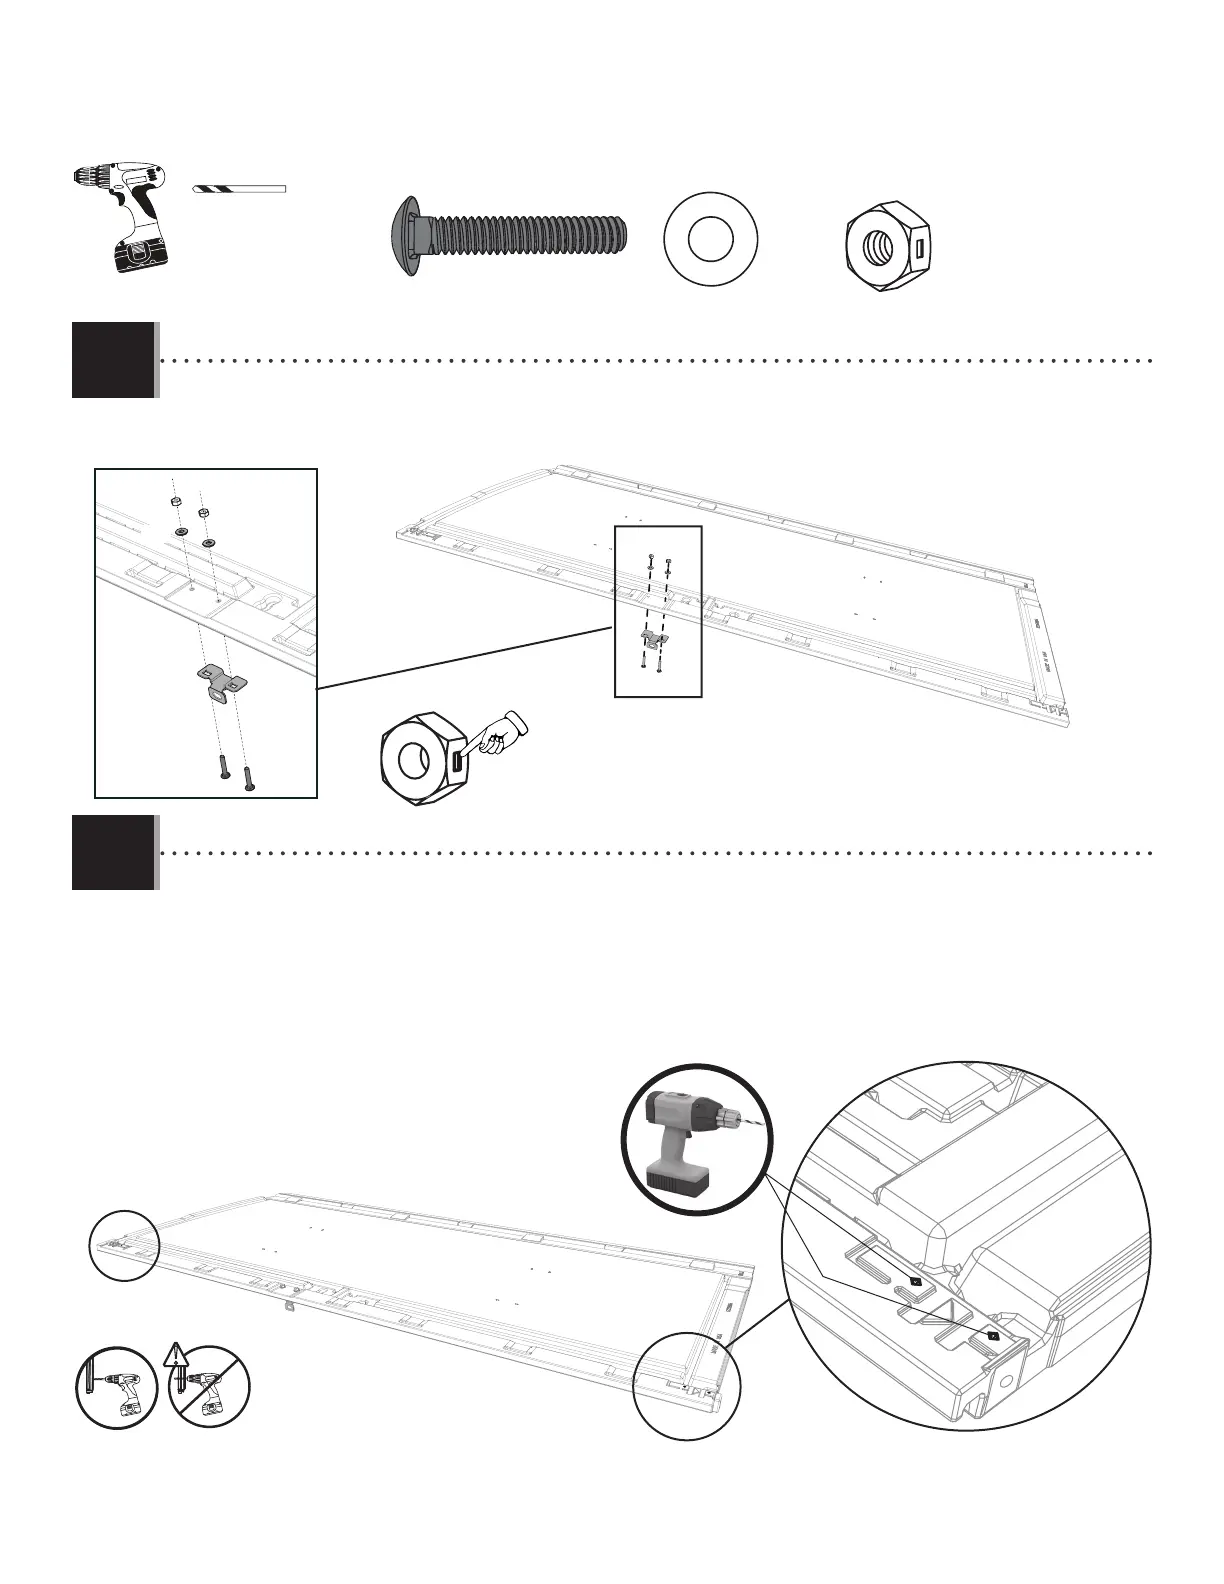
X SECTION 4 (CONTINUED) / SECTION 4 (SUITE) / SECCIÓN 4 (CONTINUACIÓN)
4.3
4.4
• Attach the left latch bracket (EOY) to the door using the hardware included. Do not overtighten.
• Attachez le support gauche à loquet (EOY) à la porte à l’aide de la quincaillerie incluse. Ne pas trop serrer.
• Sujete el soporte izquierdo para el pestaño (EOY) a la puerta usando el herraje incluido. No apretar demasiado.
AAB (x2)
AAB
AAB
ACH (x2)
ACH
ACH
AEB (x2)
AEB
AEB
EOY
• Drill into the divots at the top and bottom of the door and into the tube inside but not all the way through the door.
Use the 1/8" (3 mm) drill bit (ARA) included.
• Percez les marques à la partie supérieure et inférieure de la porte et dedans le tube à l’intérieur mais pas à
travers la porte entière. Utilisez le foret de 3 mm (1/8 po) (ARA) inclus.
• Taladre las marcas al tope y al fondo de la puerta y dentro del tubo adentro mas no por la puerta entera. Use la
broca de 3 mm (1/8 in.) (ARA) incluida.
!
1/8 in/po
(≈3 mm)
ARA (x1)