37
4
TOOLS AND HARDWARE REQUIRED / OUTILS ET QUINCAILLERIE REQUIS / INSTRUMENTAL Y HERRAJE REQUERIDOS
X SECTION 7 (CONTINUED) / SECTION 7 (SUITE) / SECCIÓN 7 (CONTINUACIÓN)
AIW (x1)
7.5
AIW
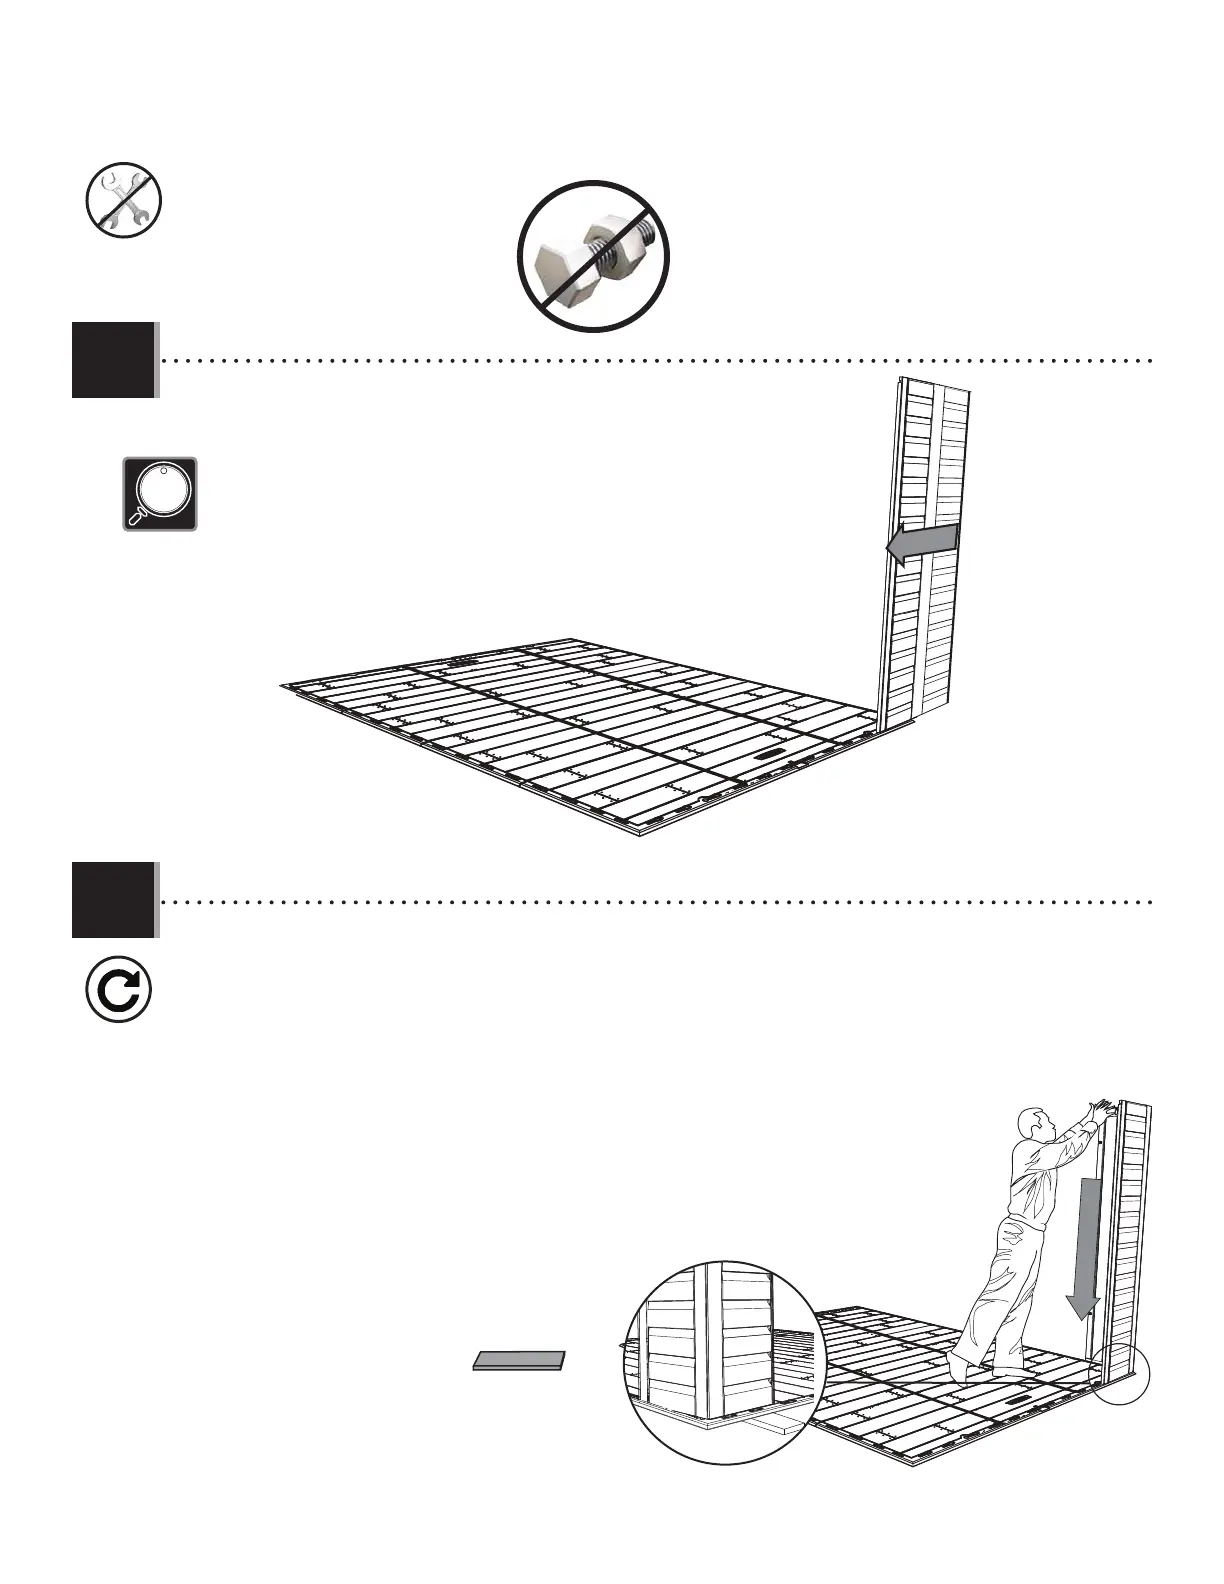
• Bend the corner panel, and pull down on the panel to snap the remaining tabs in place. To
help with insertion, place the plastic block (AIW) under the fl oor panel directly under the tab being
inserted. You should hear a “click” when the tab pops into place. Repeat this step for the second tab.
• Plier le panneau angulaire, et insérer les autres languettes. Pour aider avec le montage, mettre
le bloque en plastique (AIW) sous le panneau de plancher directement sous la languette à insérer.
Répéter ce processus pour la deuxième languette.
• Doblar el panel angular e introduzca las lengüetas restantes. Para ayudar con el armado,
deslizar el bloque de plastico (AIW) debajo el panel de piso directamente debajo la lengüeta a
insertar. Se escucha un«clic» cuando la lengüeta se sienta en su lugar. Repetir este proceso para la
segunda lengüeta.
• Slide the panel to the left.
• Faire glisser le panneau à gauche.
• Deslizar el panel a la izquierda.
7.4
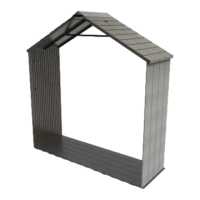
• If the bushings are in the way, temporarily remove
them to insert the wall panel.
• Si les bagues interférent avec l’installation, les
retirer temporairement pour pouvoir insérer le
panneau mural.
• Si los casquillos interfi eren con la instalación,
retirarlos temporalmente para poder insertar el
panel mural.