8
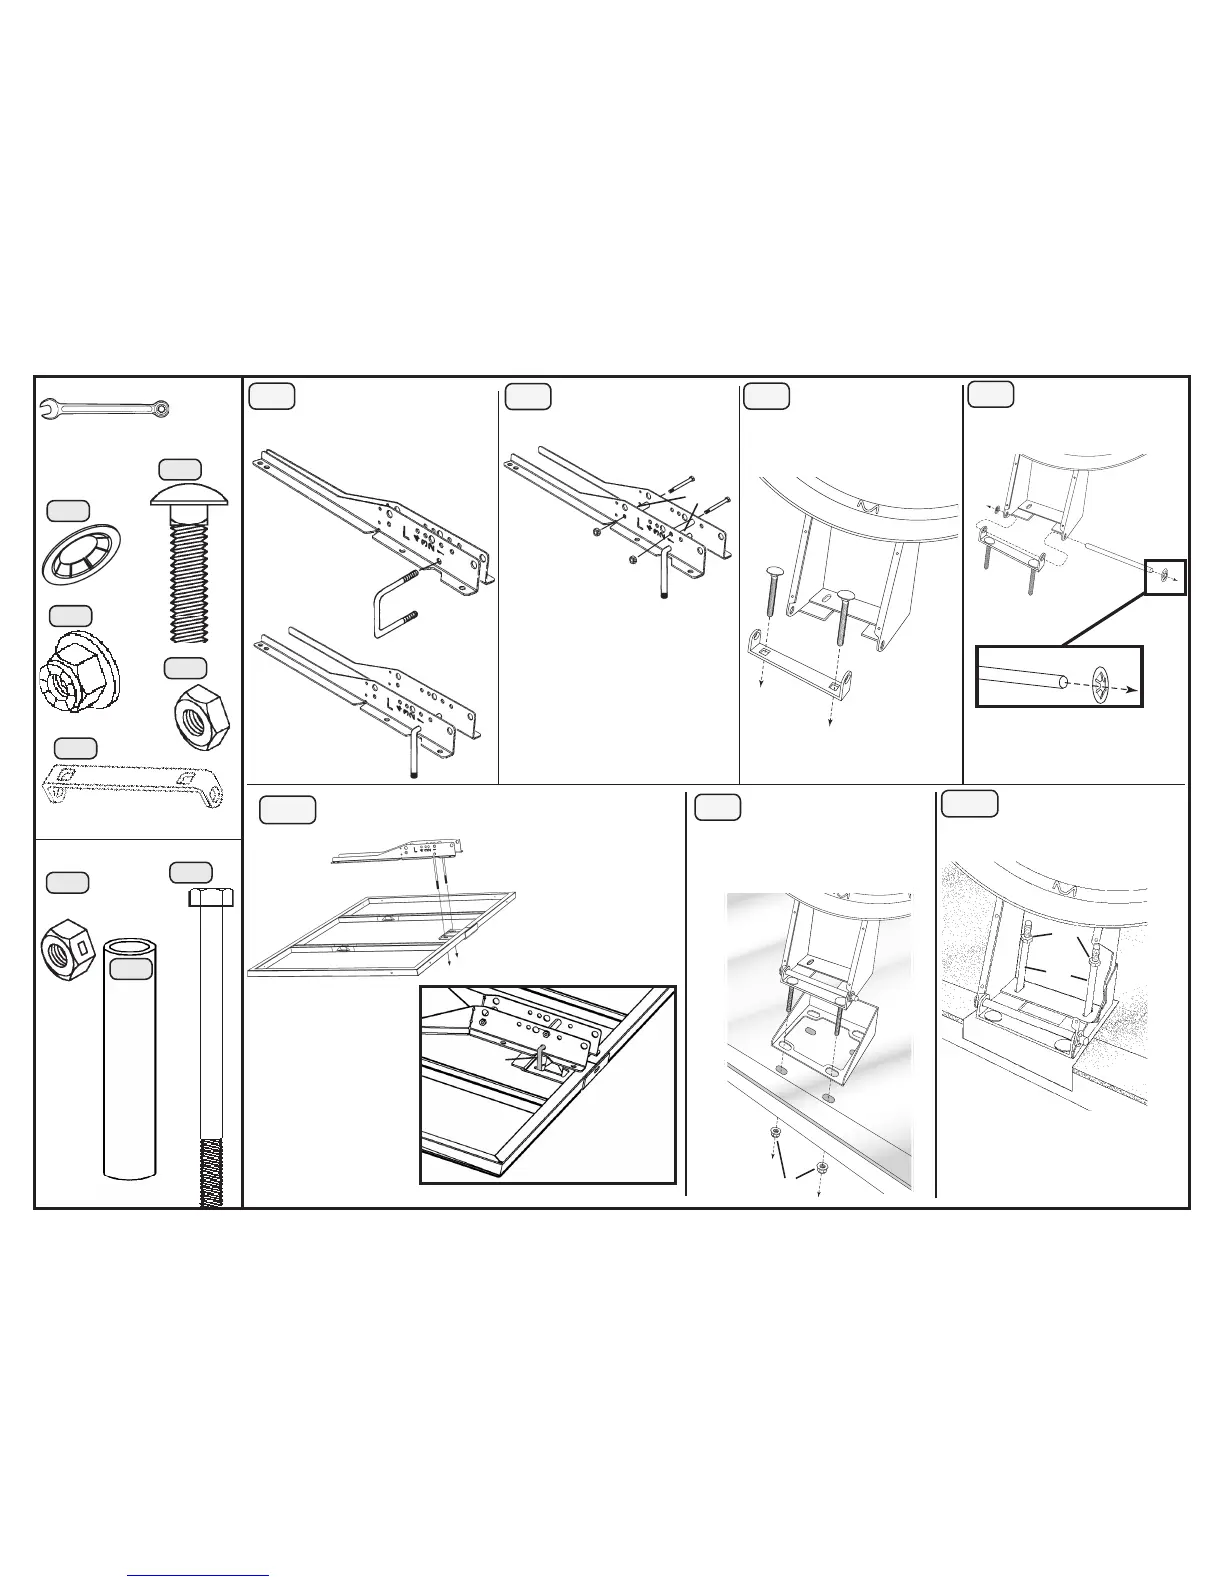
Required For This Page:
Pliers
RE
AP
AQ
RE
17.1 Hold the Backboard
Brackets (AP & AQ) together
and slide the U-Bolt (RE) through the
holes as shown.
17
18.1 Ensure the U-Bolt (RE)
is in the notches.
18.2 Completely tighten the Nuts
(MA).
18
19
19.1 Insert a 5/16” x 1
1/4” Carriage Bolt (RC)
through each hole in the Rim Pivot
Bracket (RI).
MB
ML
MB
AP
AQ
MI
RE
MI
RC
RI
RC
AO
20.1 The Push Nuts (RB)
should be convex side
out.
20
RH
RB
RI
RB
RH
AO
23
RD
RE
23.1 Tighten the Jam Nuts
(RD) onto the U-Bolt (RE) as
far as they will go.
RC
RD
RF
RB
RI
(Not actual size)
MB
MI
ML
9/16” Wrenches
HD9185
1003678
(2)
(2)
(2)
(1)
(2)
(2)
(2)
(2)
RB
22.1 Lay the Backboard
(AU) face up with the Rim
(AO) holes exposed over the edge
of the table. Bolts will go through
the Backboard and the Backboard
Brackets on the back.
22
21
21.1 Lay the Backboard (AU) on a table or bench.
Note: The U-Bolt (RE) goes
through the upper openings
as shown.
RE
AU
AF
RF
RC
RC
RE