49
TOOLS AND HARDWARE REQUIRED / OUTILS ET QUINCAILLERIE REQUIS / HERRAMIENTAS Y HERRAJE REQUERIDOS
X SECTION 2 (CONTINUED) / SECTION 2 (SUITE) / SECCIÓN 2 (CONTINUACIÓN)
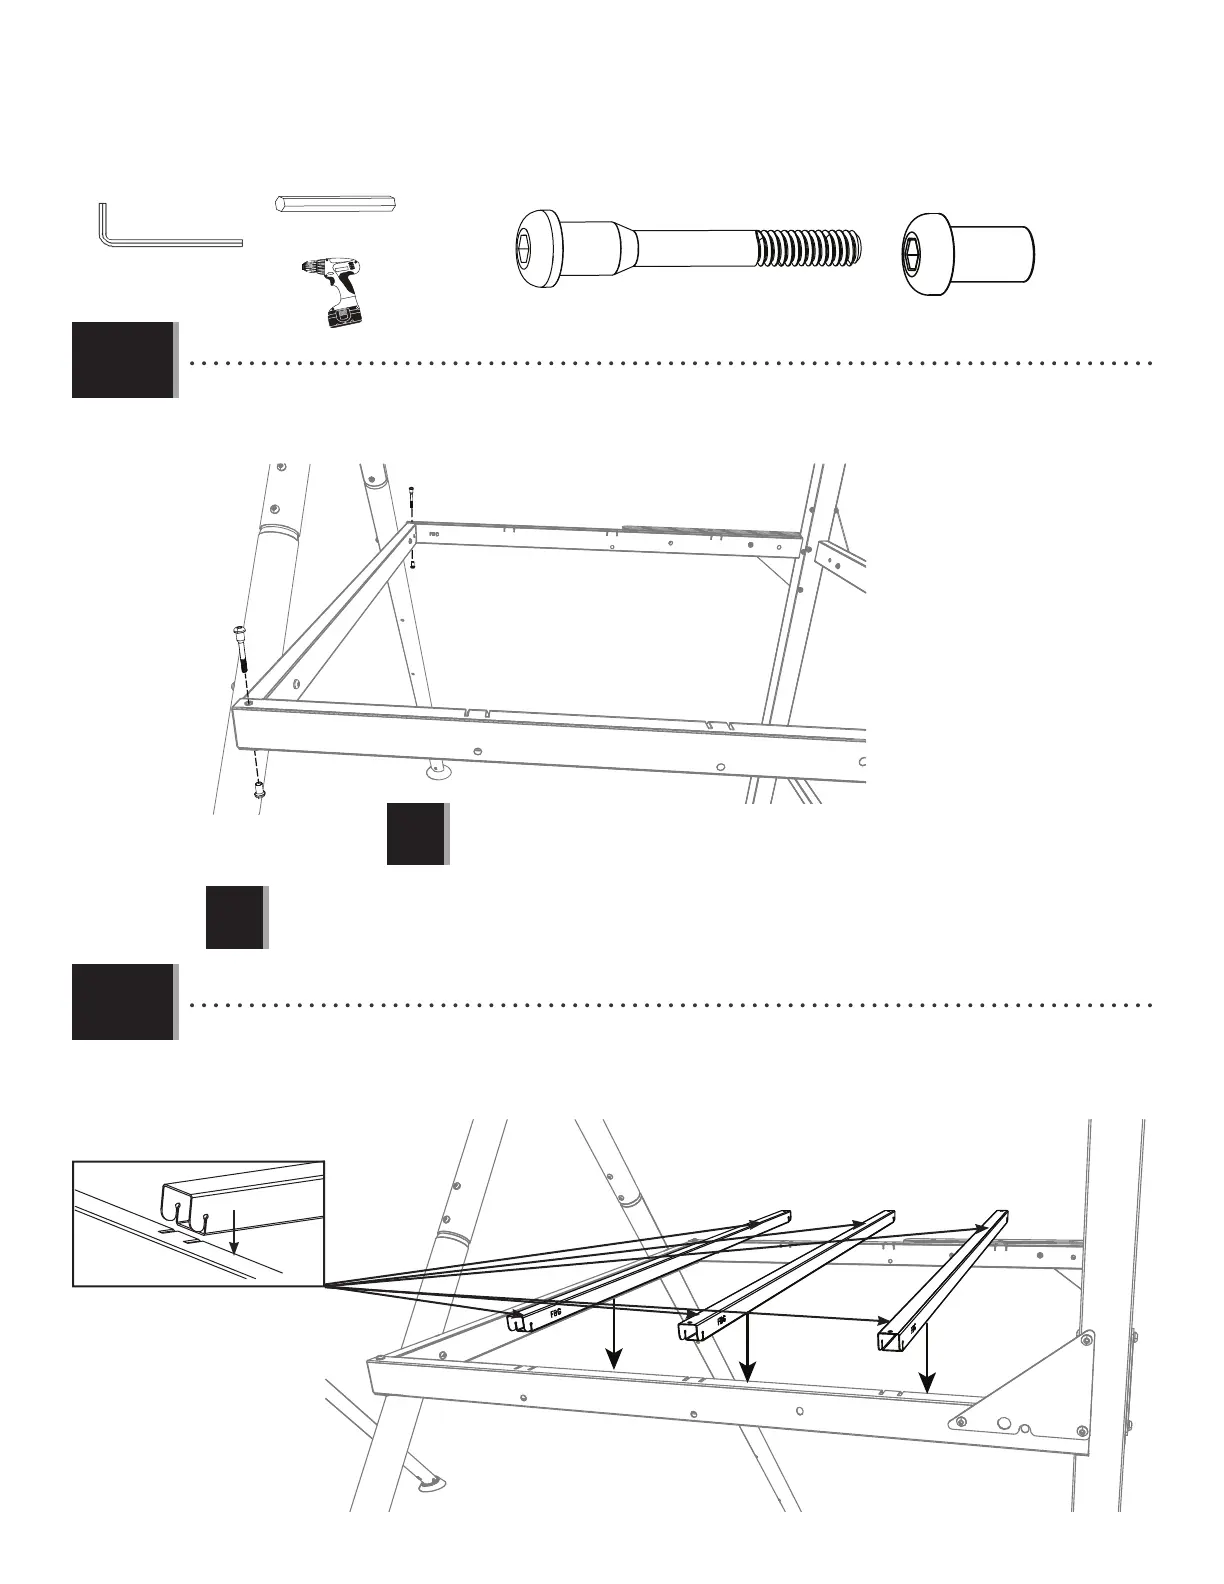
• Attach the Large Deck Frame to the A-Frame with the hardware indicated.
• Fixez la charpente du grand pont à la charpente en « A » avec la quincaillerie indiquée.
• Fije el marco de la plataforma grande al marco «A» con el herraje indicado.
2.18
2.19
DXD
DXD
BTS
BTS
BTS (x2)
3/16 in/po (≈5 mm)
(2)
DXD (x2)
• Place the Deck Support Floor Braces (FBG) into the slots located on the Support Poles.
• Placez les entretoises de support de plancher du pont (FBG) dans les fentes situées sur les poteaux de support.
• Coloque los soportes de piso de la plataforma (FBG) en las ranuras situadas en los postes de soporte.
FBD
FBE
FBG
FBG FBG
!
• DO NOT OVERTIGHTEN THE HARDWARE! Overtightening the hardware will cause the metal frame to bend.
• NE PAS TROP SERRER LA QUINCAILLERIE! Le cadre en métal pliera si la quincaillerie est trop serrée.
• ¡NO APRETAR DEMASIADO EL HERRAJE! Si el herraje se aprieta demasiado, el marco metálico se doblará.
(1)
(1)
FBD
FBE
!
• If there is diffi culty completing this step, loosen the local hardware. Tighten all hardware once the poles are installed.
• S’il est diffi cile de terminer cette étape, desserrer la quincaillerie avoisinante. Serrer toute la quincaillerie une fois les poteaux installés.
• Si tiene difi cultad para completar este paso, afl oje los elementos locales. Apriete todos los elementos una vez que los postes queden
instalados.