18
TOOLS AND HARDWARE REQUIRED / OUTILS ET QUINCAILLERIE REQUIS / INSTRUMENTAL Y HERRAJE REQUERIDOS
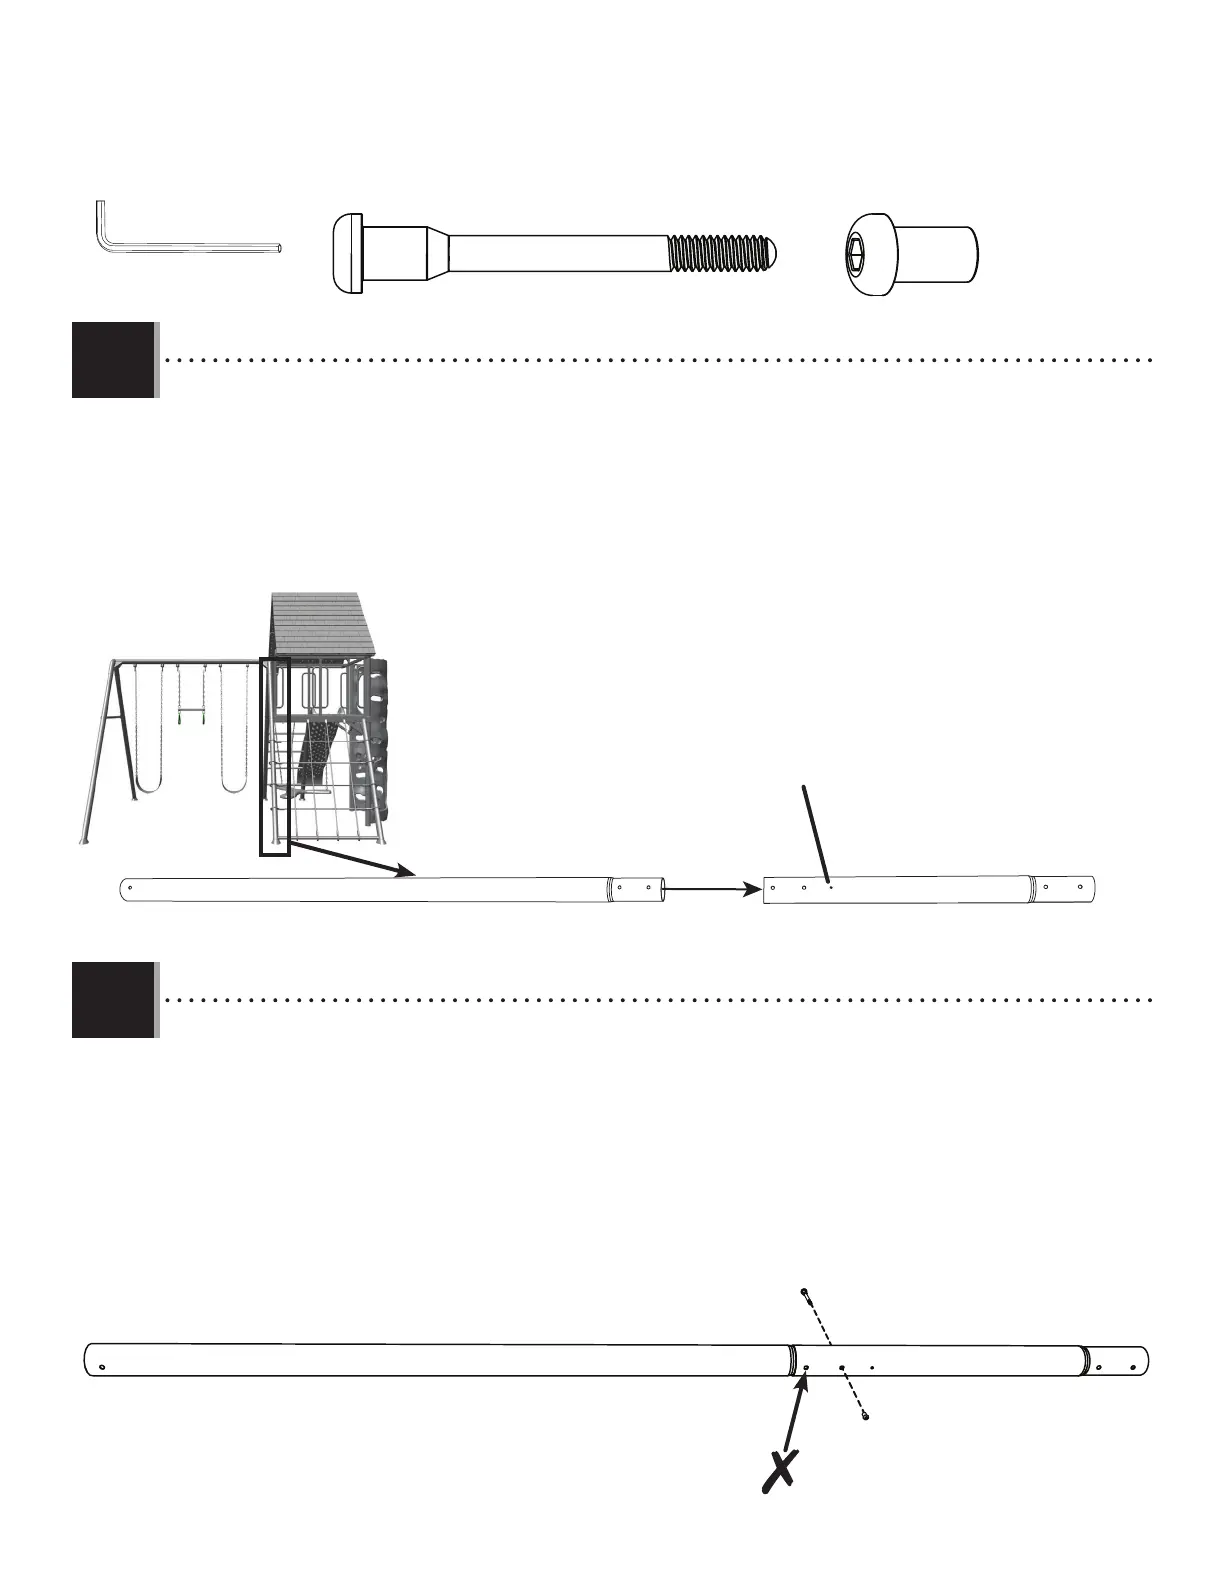
X SECTION 1 (CONTINUED) / SECTION 1 (SUITE) / SECCIÓN 1 (CONTINUACIÓN)
1.5
• Insert the top A-frame pole (GPK) into the bottom A-frame pole (GPJ). The bottom A-frame cargo net pole has no small
holes and the top A-frame pole has one (1) small hole. Line up the holes.
• Insérez lemât supérieur du support en A (GPK)dans lepoteau inférieur du support en A (GPJ). Le poteau inférieur de fi let
de cargaison du support en A n’a pas de petits trous et le poteau supérieur du support en A a un (1) petit trou.
Alignez les trous.
• Inserte el poste superior del marco-A (GPK) en el poste inferior del marco-A (GPJ). El poste inferior de la red de carga del
marco-A no tiene pequeños orifi cios y el poste superior del marco-A tiene un (1) pequeño orifi cio. Alinee los
orifi cios.
3/16 in/po (≈5 mm)
(2)
Small hole
Petit trou
Agujero pequeño
GPKGPJ
1.6
• Attach the bottom A-frame pole and the top A-frame pole together with the hardware indicated. Only attach the poles
at the location illustrated. The other hole will be attached later in the assembly.
• Fixez le mât inférieur du support en A et le mât supérieur du support en A avec la quincaillerie indiquée. Fixez les
poteaux uniquement à l’emplacement illustré. L’autre trou sera fi xé plus tard dans l’assemblage.
• Fije el poste inferior del marco-A al poste superior del marco-A con los herrajes indicados. Fije los postes únicamente
en el sitio que aparece en la ilustración. El otro orifi cio se unirá posteriormente en el montaje.
GPL
BTS
GPK
BTS (x1)
GPL (x1)
GPJ